 When I was in grade school, we were always allowed to bring in a treat for the whole class on our birthdays. Since my birthday was in June, and it was usually hot out, my mom would always make jello jigglers for me to take! They were always a huge hit because they were delicious, refreshing and fun. Making your own jello jigglers is super simple and can be incredibly healthy, as long as it’s not with the artificially sweetened, food dyed, jello brand.
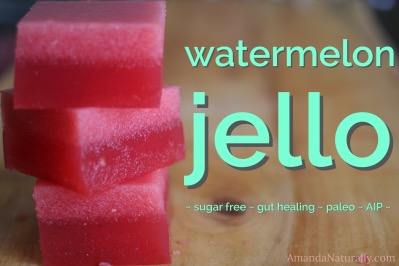
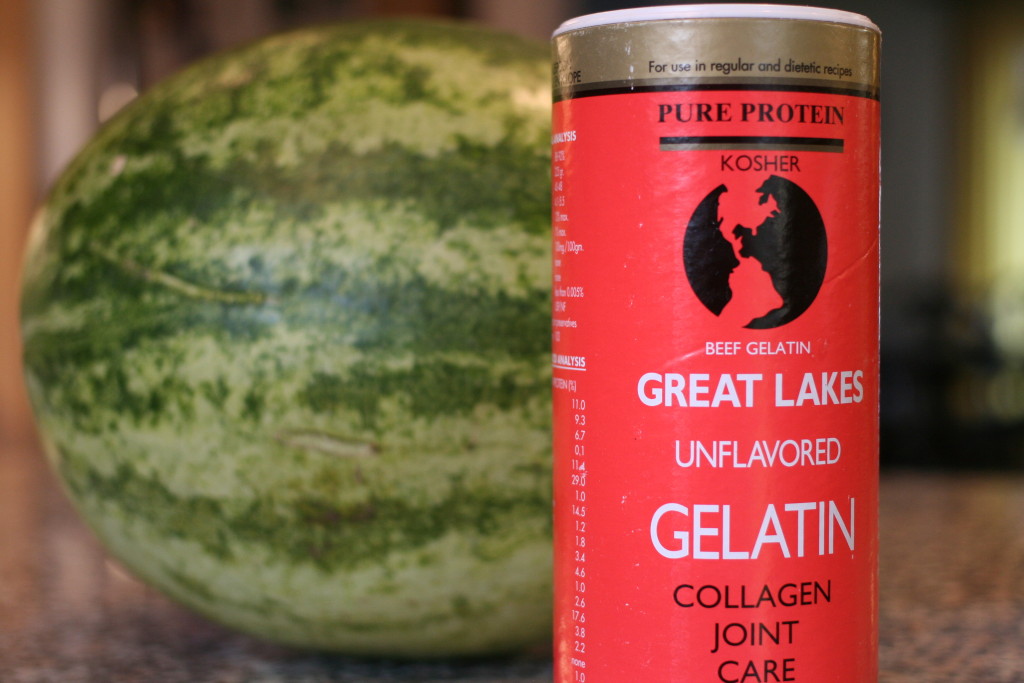
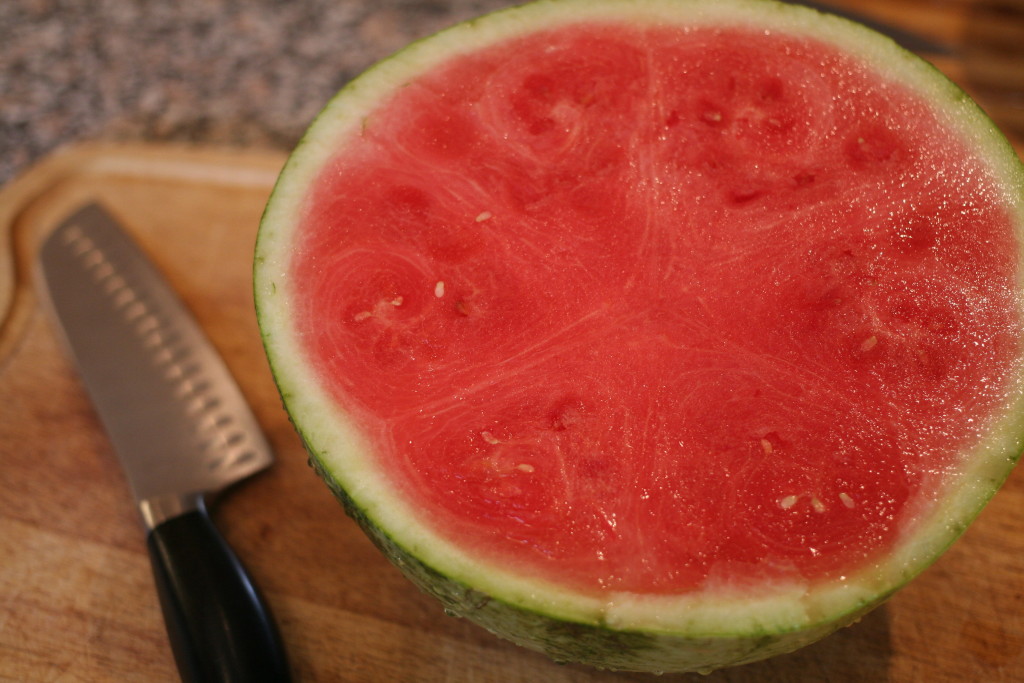
The flavour of homemade jello that I tend to make the most often is watermelon, simply because a large watermelon is a lot of fruit for 2 people to polish off before it goes bad. By turning it into jello, not only do you extend the life of the watermelon, but you have the opportunity to make an incredibly nourishing treat! Why is homemade jello so nourishing? Because gelatin, especially the grass-fed variety, is the breakdown product of connective tissue. And the best way to support our connective tissue, is to eat it! Why would we want to support connective tissue? Well it’s the scaffolding that our entire body is built upon. More specifically, it’s what keeps the gut strong (ie. not leaky!), our joints healhy and our skin firm and elastic. For more info on the benefits of consuming gelatin, check out this post. I love using homemade jello when working with parents on healing their kids guts, but adults can enjoy them just the same!
Watermelon Jello
1. Cut open watermelon and chop into pieces or scoop out using a spoon.
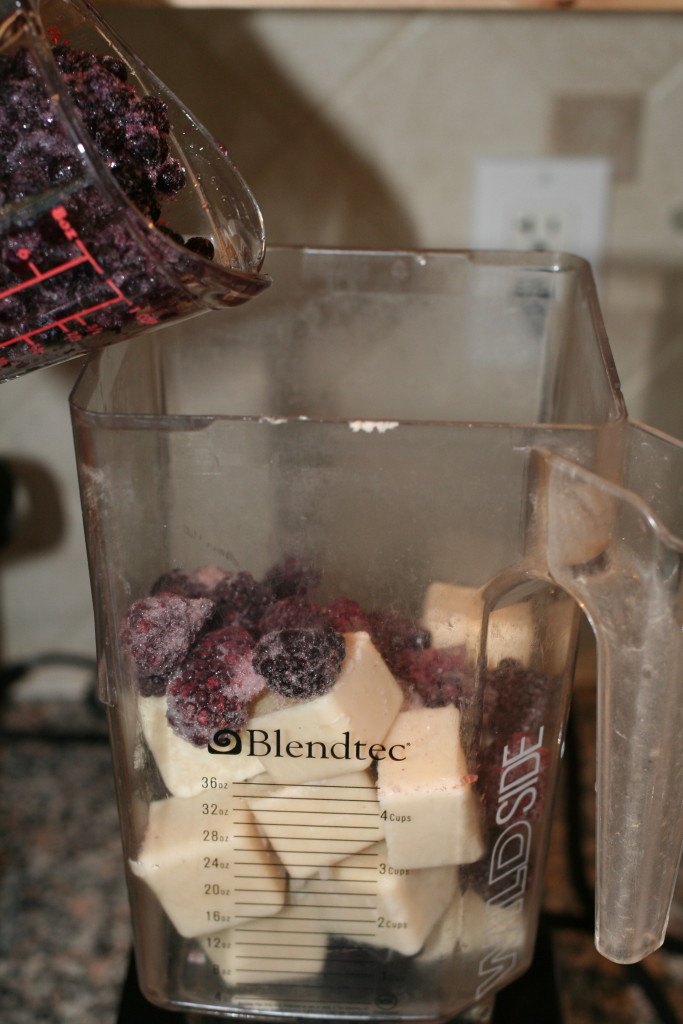
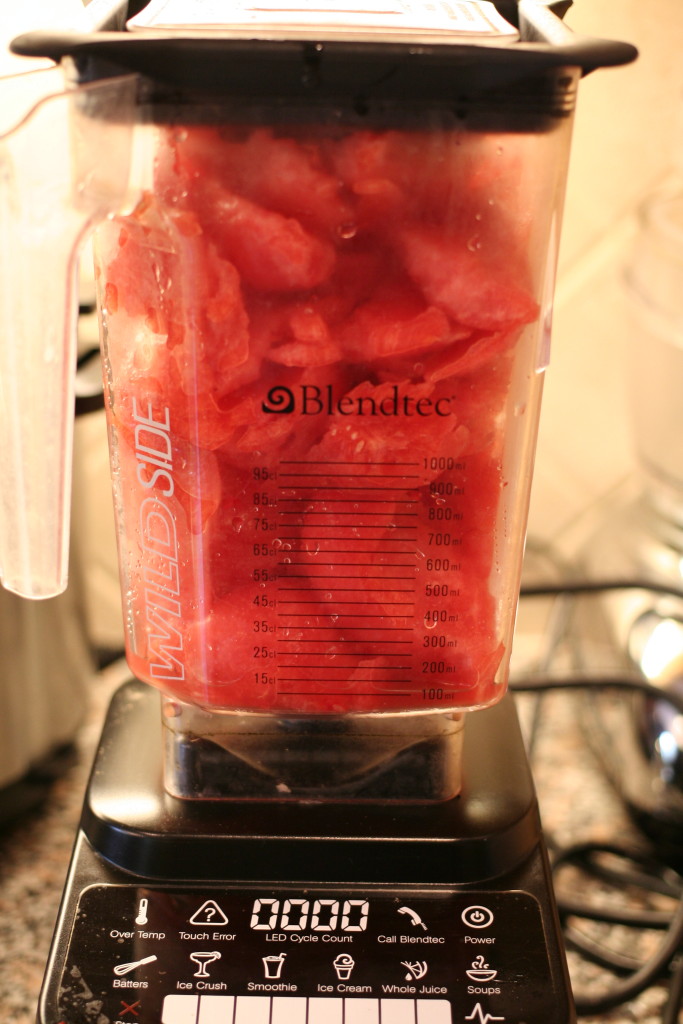 2. Puree in your blender. You will likely have to do this multiple steps since 1 watermelon can give you a lot of material to work with! This watermelon gave 13 cups of pureed juice. (Optional: strain watermelon juice to get rid of the pulp. I’ve done this before but I find it unnecessary and time consuming. The only benefit is you get clear jello, instead of the cloudy layer on top – which I actually kind of like the look of!)
3. Stir in some raw honey and a pinch of sea salt, to your taste. For 13 cups I used 1 cup of honey. A good ballpark number is 1-2 tbsp honey per cup of watermelon. (You can absolutely omit the honey altogether and just use the fruit juice!)
4. Measure your total liquid amount (watermelon + honey). Mine was 14 cups.
5. Place half the liquid in a pot over low heat. Stir frequently and heat until very warm. DO NOT BOIL.
6. Meanwhile, place the other half of the liquid in a bowl and add the gelatin. The amount you need is 1 tbsp gelatin per 1 cup of liquid. So I used 14 tbsp gelatin (or ¾ cup + 2 tbsp). Let the gelatin bloom for about 5 minutes, while you warm the other half of the liquid.
7. Once the gelatin has bloomed (either entirely or mostly), and the liquid in the pot is very warm, dump the gelatin/liquid mixture into the pot. Whisk thoroughly to combine.
NOTE: Small batches work well with allowing the gelatin to bloom and simply whisking it in. I find with large amounts of gelatin like this, the gelatin clumps together. So when you dump it into the pot, use an immersion blender to break up all the gelatin.
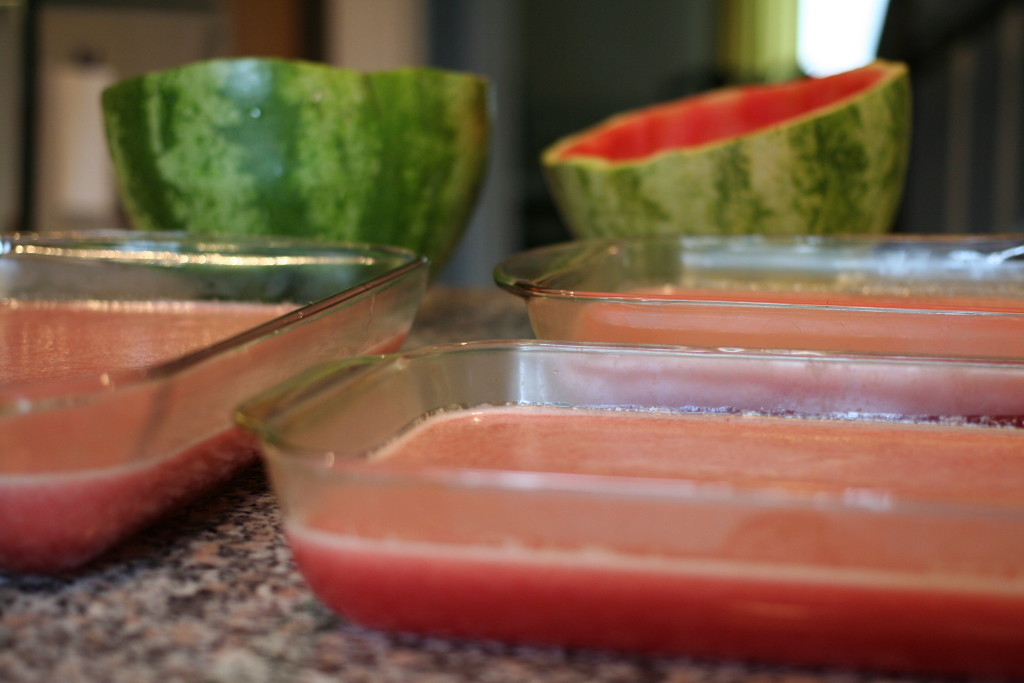
8. Pour mixture into silicon muffin liners/tins, cake pans or chocolate moulds.
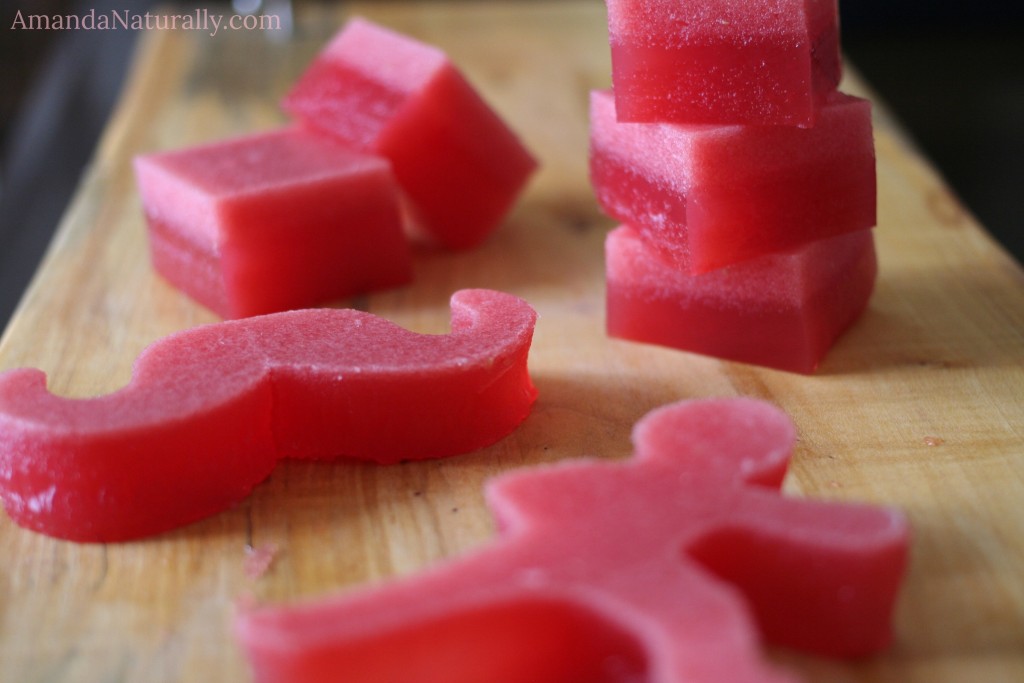
9. Refrigerate for 1-2 hours before popping out of moulds or cutting into jello jigglers. You can simply cut into squares, or have some fun by using cookie cutters!
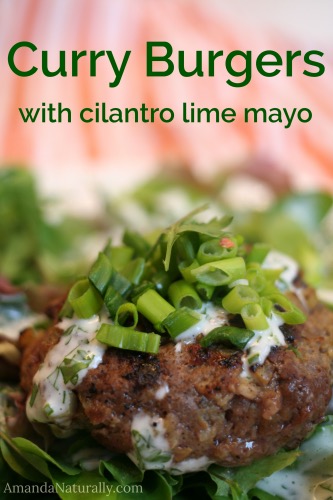 Burgers are a staple in our house! Why? Because they’re quick to make, delicious and inexpensive. The last part is key, because when buying
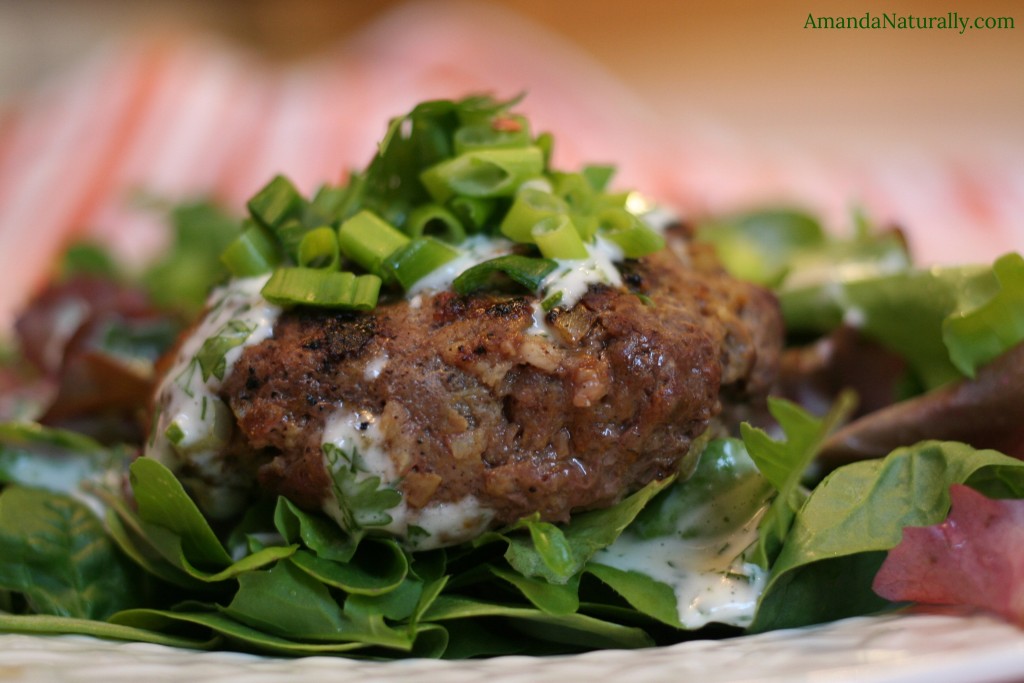
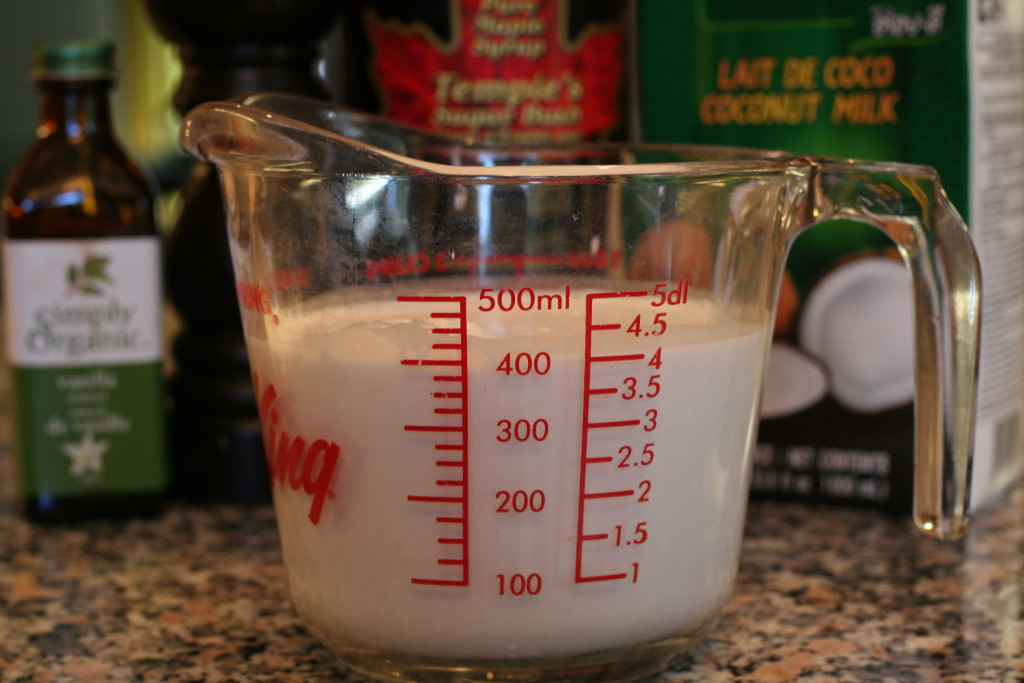
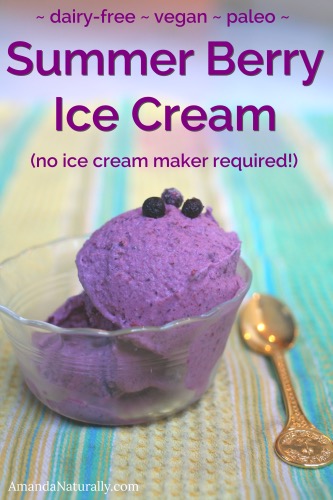 Have you had coconut milk ice cream yet? If your answer is anything other than “hell ya”, go out and get some right now! Specifically the brand