Sweet Potato Fries

Sweet Potato Fries | AmandaNaturally.comOne of my goals with this blog is to present simple, nourishing food. To show anyone who may stumble across this little piece of the blogosphere that it is easy to make food that tastes amazing, is budget-friendly, and is healing to your body, whether you are the picture of health, or dealing with a serious health crisis.

Today’s post, my friends, does not get any simpler than that. I present you with: 
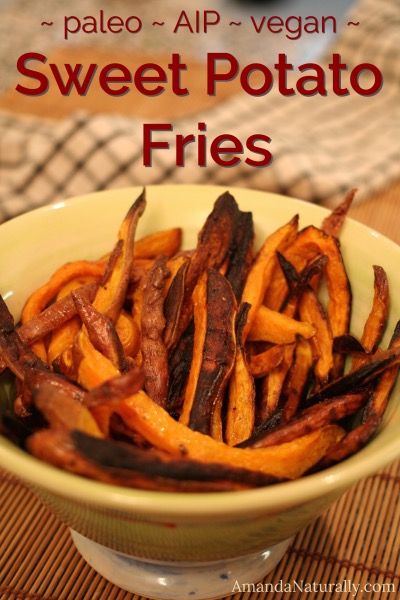
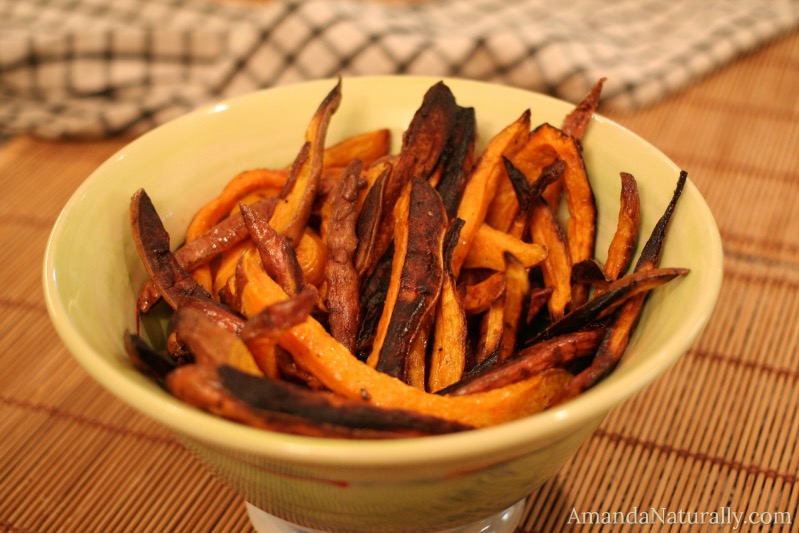
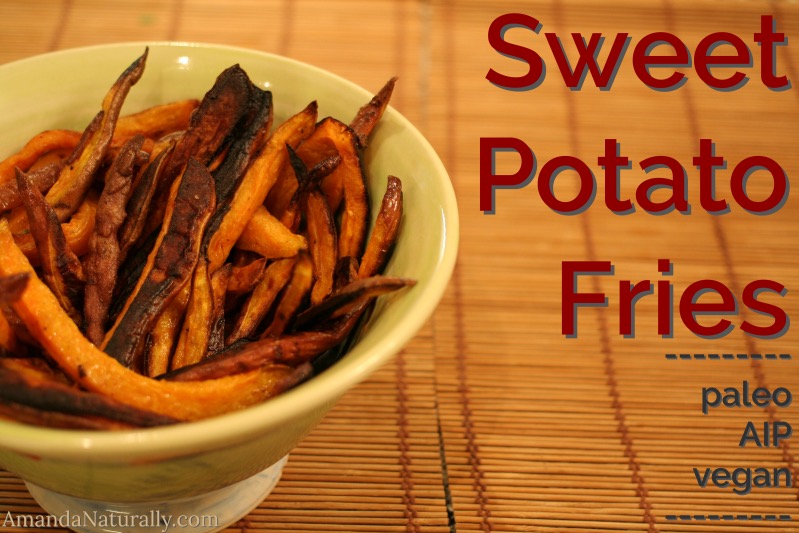
Sweet Potato Fries!

Making a good batch of sweet potato fries is an awesome skill to have. Sweet potatoes are very inexpensive and are on EWG’s Clean 15 list – so they are not a priority to be bought organic.

Here are the 2 most important things to remember when making sweet potato fries:

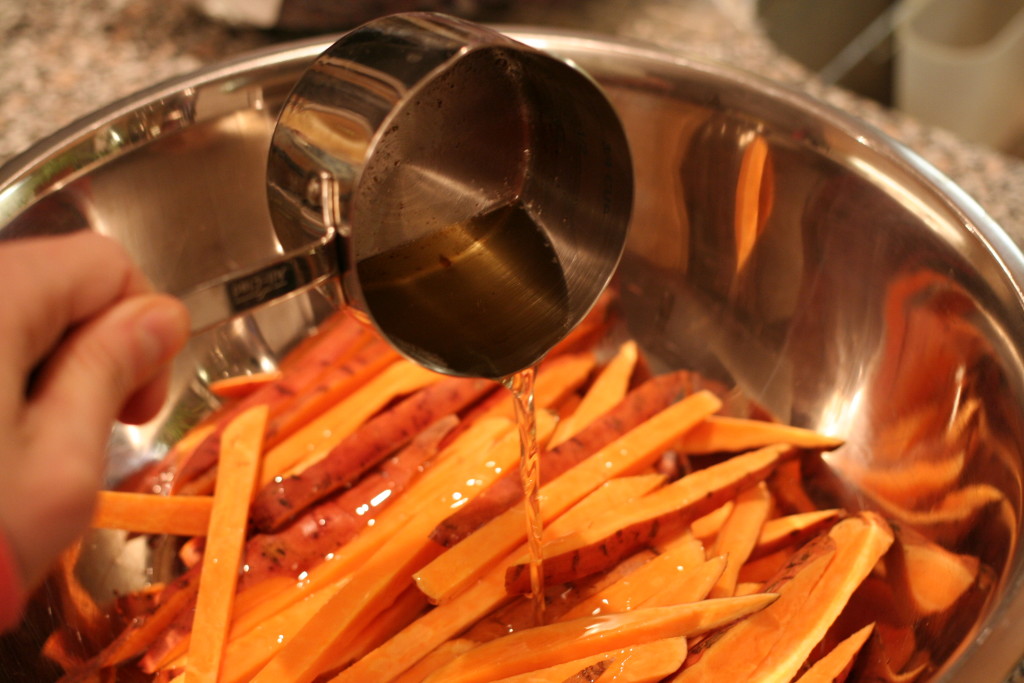
1. Use a liberal amount of fat. I beg of you – stop being afraid of fat! Fat is such an important part of the human diet – especially for women. The fat phobic nutrition era that we are slowly crawling out of, is based on cherry-picked and misinterpreted science and professional opinion. Just make sure you use a good quality fat! If you want to keep it vegan, use coconut or avocado oil. But trust me when I tell you that duck fat is hands down the best fat to use in this recipe, followed closely by lard. As long as the animal was raised properly, animal fat is not only not dangerous for you, but incredibly healthy!


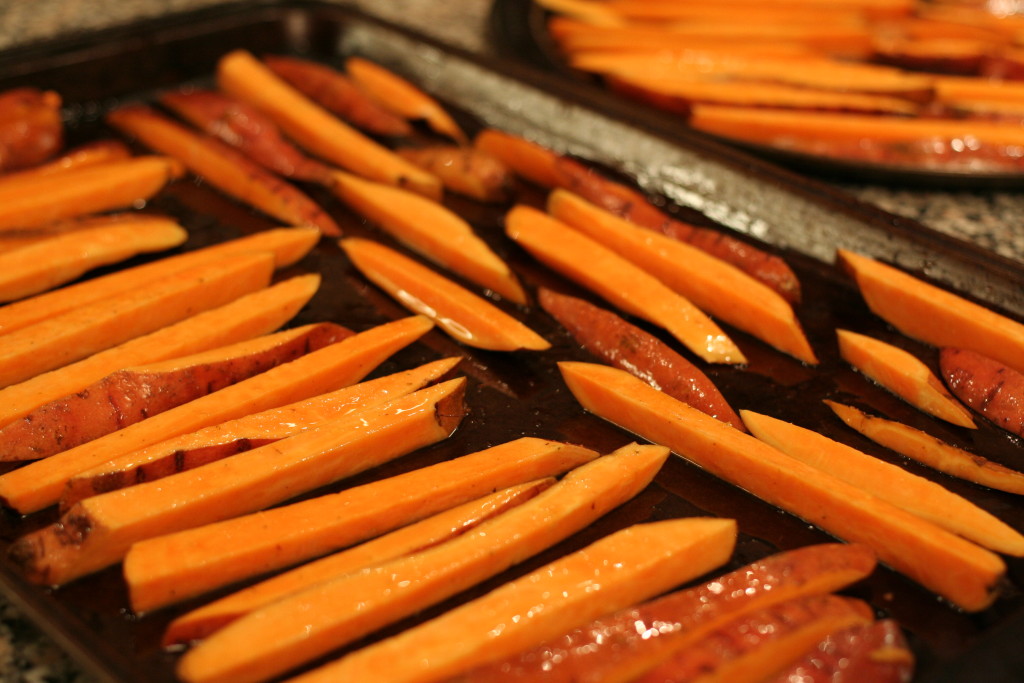
2. Leave space between the fries. If you bunch them too close together, the steam that comes off the fries during the baking process makes them soggy and you don’t get that crispy outside layer that you’re going for. You’re better off using an extra baking sheet, than squishing all of the fries close together!


If you do those 2 things, you’re good to go. From there, feel free to get creative with spices like chili and cumin. Or keep it classic with sea salt. Looking for a dip? I love mixing my homemade mayonnaise with a clean Sriracha sauce for a spicy dip.

Which ever way you go with these, you can rest easy knowing that they are truly healthy for you! On top of that, they are compliant with paleo, the autoimmune protocol, low fodmap (if you keep the portion very moderate) and plant-based diets. But most importantly, they’re awesome – especially when making burgers!


Sweet Potato Fries
Serves 4
Paleo, AIP, Vegan. Delicious and Nutritious. Perfect side dish for a grass-fed burger!
Write a review
Print
Prep Time
5 min
Cook Time
40 min
Total Time
45 min
Prep Time
5 min
Cook Time
40 min
Total Time
45 min
Ingredients
  1. 4 small sweet potatoes
  2. ¼ cup duck fat, melted (or lard, coconut oil, ghee)
  3. sea salt, liberally (or garlic sea salt, kelp sea salt)
Instructions
  1. Preheat oven to 375F.
  2. Slice sweet potatoes into fries.
  3. Toss in a bowl with melted fat and sea salt.
  4. Split evenly between 2 baking sheets. Leave space between every fry to prevent soggy fries.
  5. Bake for 40 minutes, flipping fries once.
Notes
  1. If your fries are particularly small, you might need less time. Or more time if they're wedges.
Add spices to take these up a notch! Try
  1. - cumin & chili powder
  2. - rosemary
  3. - cinnamon & coconut sugar
Amanda Naturally http://www.amandanaturally.com/

Asian Inspired Pasta Salad

Asian Inspired Pasta Salad | gluten free, vegetarian | AmandaNaturally.com
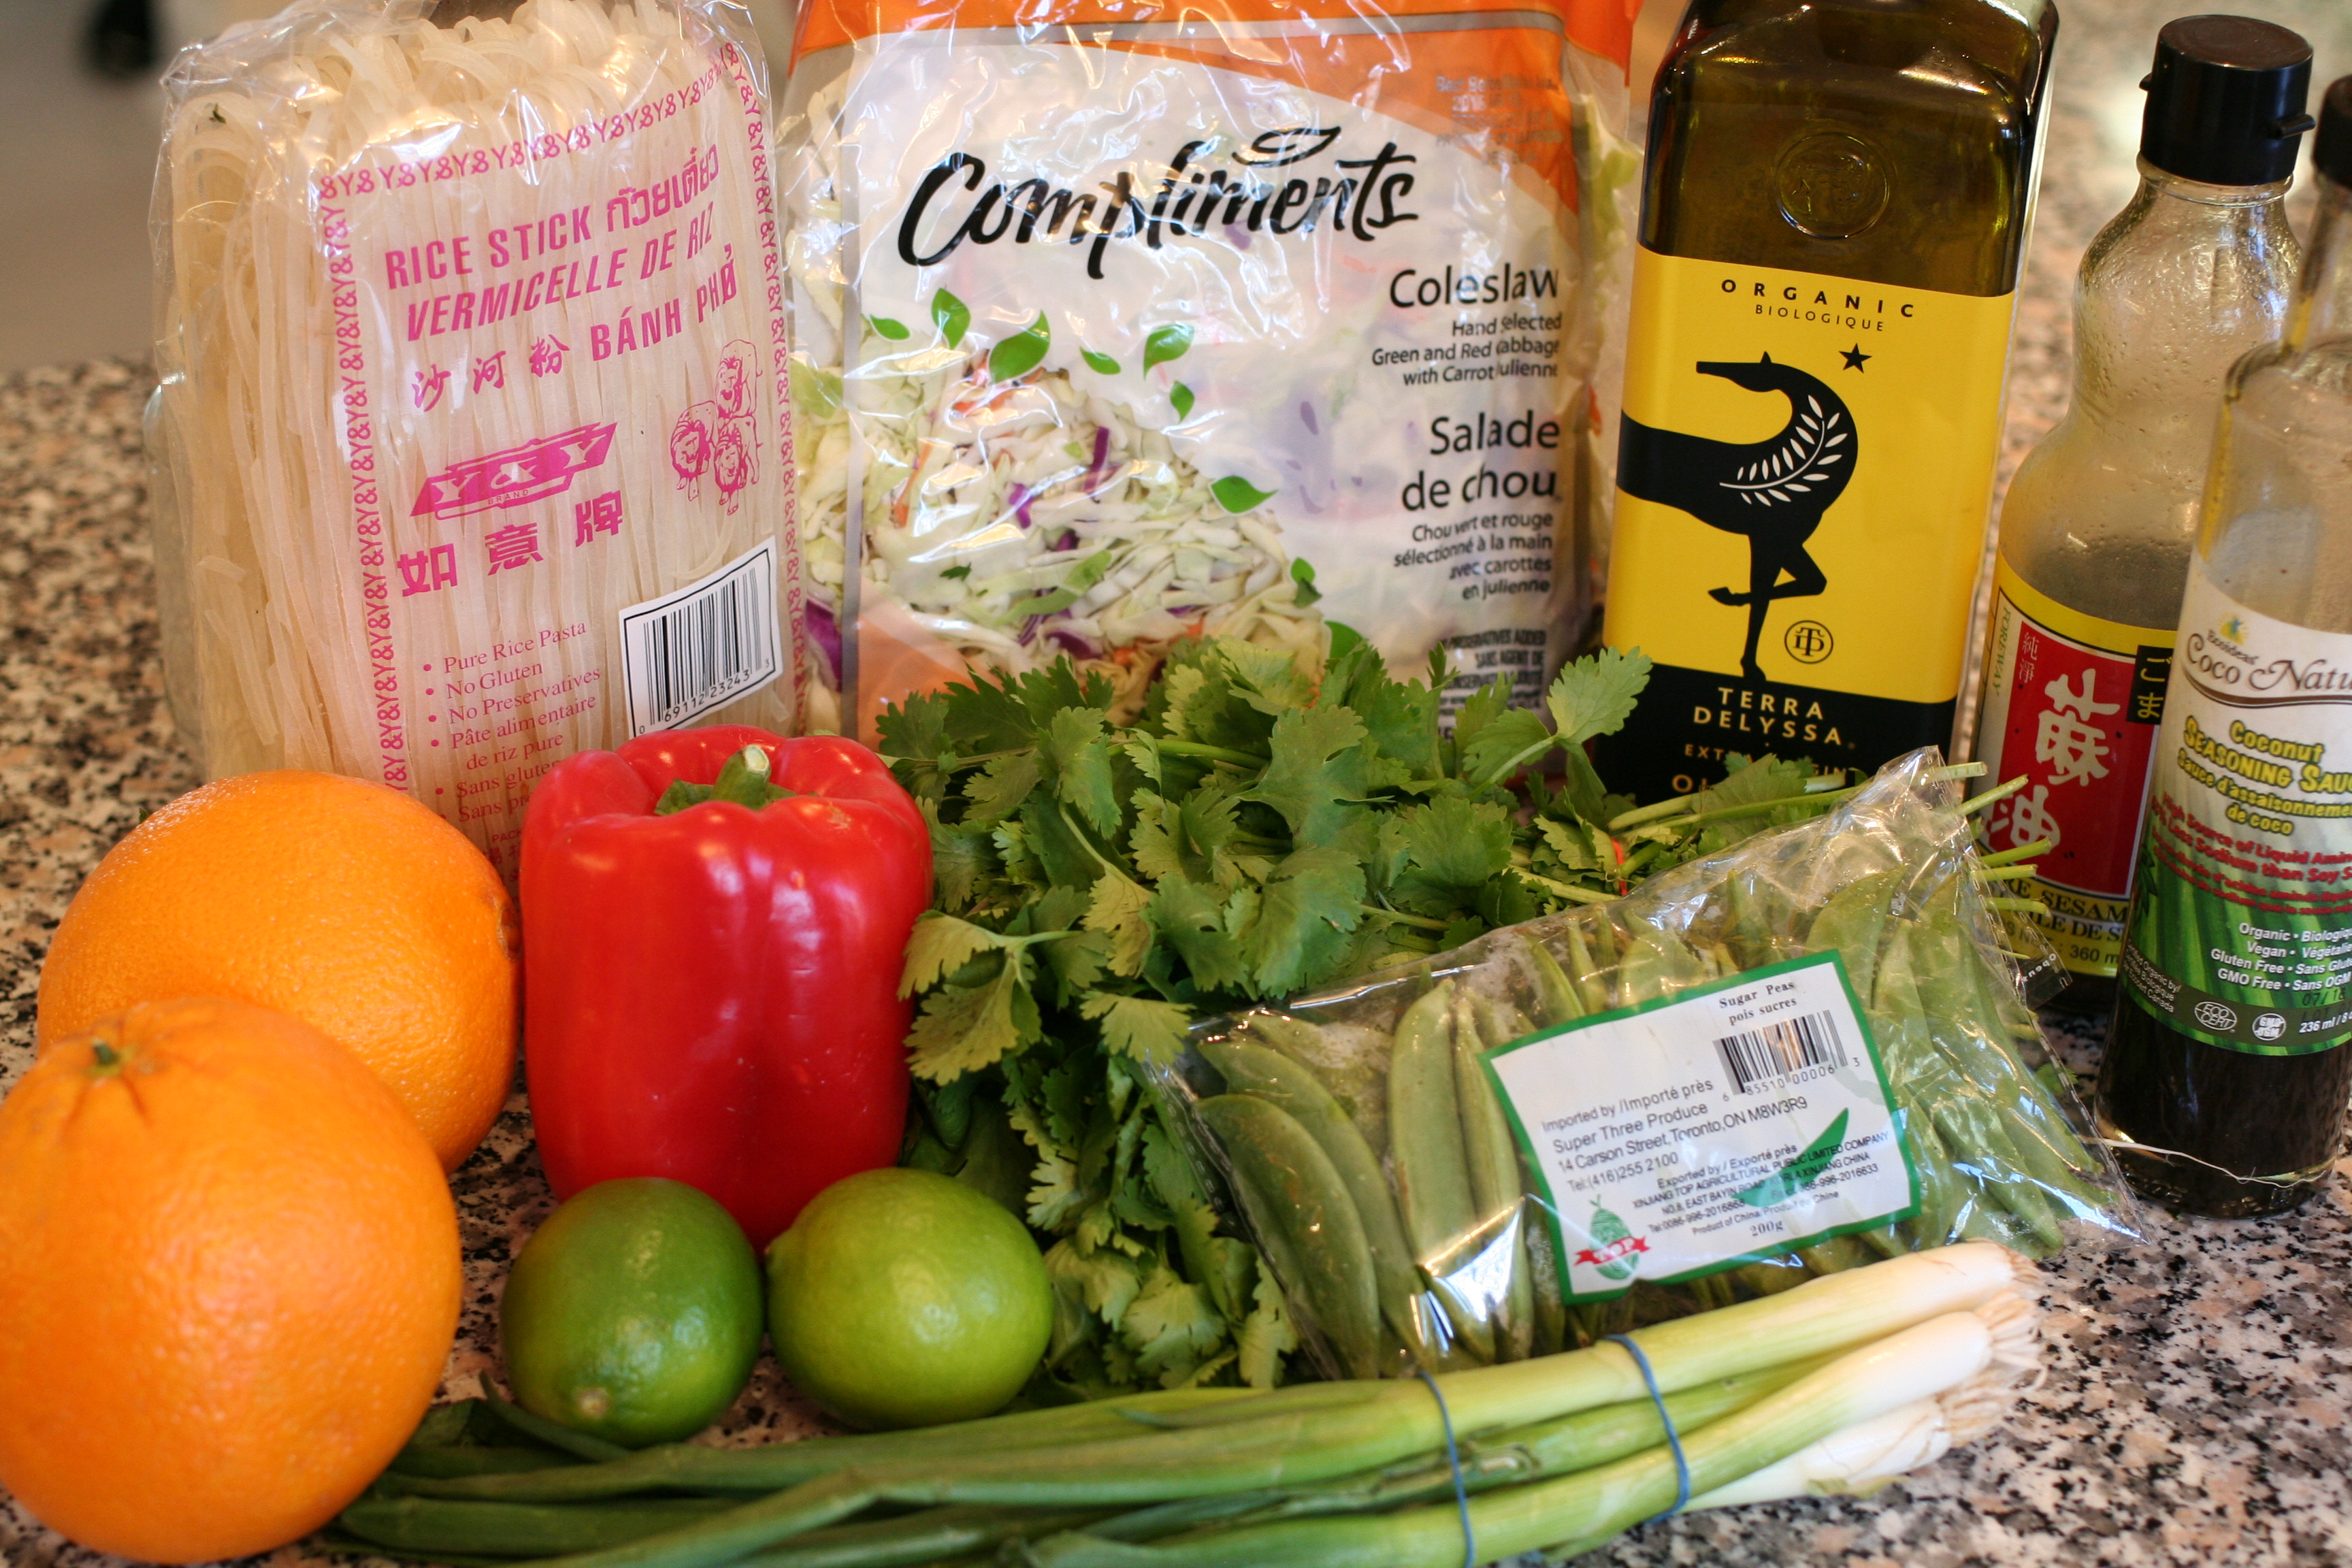
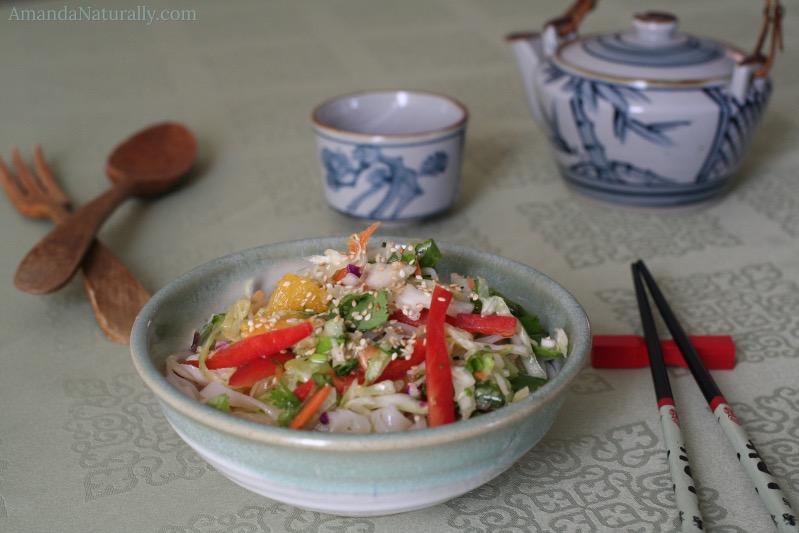
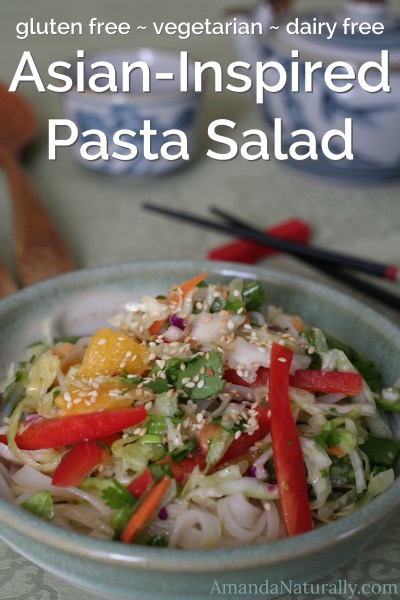
So you might be curious as to why this grain-eschewing gal is posting a recipe for a pasta salad. Let me tell you!

I am a huge fan of balance, as long as it doesn’t harm you. There are foods that I am physically unable to eat (dairy, legumes), chemicals that I avoid like the plague (artificial sweeteners, colours), foods that I choose to avoid because of my genetic predispositions and our understanding of how they damage our gut (gluten), and foods that aren’t the end of the world if I eat, but do mess up my system a little (vegetable oils, brown rice, quinoa, corn). Then there are some grey-area foods that my body tolerates just fine, such as white rice.

Wait what? White not brown rice? Correct. But what about the fibre? Vegetables contain fibre, it’s a non-issue. But white rice is a grain! Correct. And grains cause gut irritation, nutrient deficiencies and inflammation! Correct.

So why white rice? 

Well first of all – let’s take a look at the cultures who have eaten rice for thousands of years. I challenge you to find a single culture who eats brown rice. Spoiler: you won’t be able to. Why not? There was an inherent understanding, a wisdom passed down through generations, about the importance of polishing rice.

Rice is harvested “brown”, which means the bran and the germ are still on the grain. The bran is the plant’s defence mechanism against predators. These defence mechanisms (phytates, lectins) can cause an awful lot of damage to the gut – especially in those susceptible. Not to mention they bind to minerals which prevents us from absorbing them. So even if technically the whole rice grain contains more nutrients than the polished grain, it does not take into account our inability to obtain nutrients from them. Next is the germ. It contains most of the nutrients required for nourishing the grain and allowing it to reproduce. But it also specifically contains protease inhibitors, that prevent germination until the ideal environment is achieved. You don’t see rice grains germinating while still on the plant, or in your cupboard, do you? But create the right environment and they will start to sprout! Protease inhibitors are responsible for this. What exactly are protease inhibitors? They inhibit enzymes that break down proteins – so if you’re relying on whole grains and legumes as your primary protein source, keep in mind that these protease inhibitors are significantly reducing the small amount of protein that these plants actually contain. (note: it is possible to reduce the impact of phytates, lectins and enzyme inhibitors by soaking, sprouting and fermenting your grains and legumes)

Since most of the gut-irritating, nutrient-binding, inflammatory compounds of rice are found in the bran and the germ, people who have relied on rice for thousands of years, learned quickly that by polishing the grain, you can remove most of the irritating compounds!

Unfortunately our ego-centric, North American approach has gotten us in trouble once again. We accused these cultures of eating rice the wrong way, because they’re getting rid of the fibre! Heaven forbid! Little did we understand how important removing that fibre really was…

Okay, so how bad is brown rice for you really? Well if your health is on point, then be my guest, eat it. But I can speak from both personal and clinical experience when I say that brown rice does a number on the digestive tract. I have not had a single client be able to reintroduce brown rice without experiencing some kind of digestive distress. And if you have an autoimmune condition? Well it’s out of the question. Learn more about that here.

So what does this all mean? For my personal health issues, I have discovered that I do very well on white rice. It is often called a safe starch – which is exactly how I feel about it. Now, don’t get me wrong, I am in no way expecting to obtain all sorts of nutrients from white rice! But I also know it’s not going to hurt me. So while it doesn’t routinely replace nutrient-dense starches like root veggies and tubers, it does make an appearance in my diet from time to time! And now we’ve come full circle to how I started this post…

Balance!

White rice is not only delicious (hello Thai food and sushi!), but it is fairly ubiquitous. Most restaurants have rice as a side dish, many gluten-free treats use white rice and to be honest, when my gut has been damaged by an accidental dairy-bombing, white rice is one of the only foods I can tolerate for the first 24 hours. That and broth of course!

Back to the pasta salad! Last week I was asked to bring a pasta salad to a party I was attending. There were several dietary limitations to consider – namely a child with nut allergies, a few people who follow a vegetarian diet, and my own. I decided to use white rice noodles, also known as vermicelli, instead of gluten-free pasta. Gluten-free pasta is usually made with brown rice, quinoa, corn etc. so I can eat it in a pinch, but I really prefer not to. Since vermicelli is an Asian pasta, I used that as my inspiration and created this Asian Inspired Pasta Salad! Enjoy!


Asian Inspired Pasta Salad
Serves 8
Gluten-free, Dairy-Free & Vegetarian!
Write a review
Print
Prep Time
25 min
Cook Time
5 min
Total Time
30 min
Prep Time
25 min
Cook Time
5 min
Total Time
30 min
Dressing
  1. ½ cup extra virgin olive oil
  2. juice of 2 limes
  3. 1½ tbsp sesame oil
  4. 2 tbsp coconut aminos (coconut seasoning in Canada) or gluten-free tamari
  5. sea salt
  6. black pepper
Pasta Salad
  1. 1 red pepper, cut into match sticks
  2. 2 cups of snap peas, ends trimmed, peas cut in half
  3. 3 green onions, diced
  4. 2 oranges, segmented and cut into bite-sized pieces
  5. 1 one pound bag of coleslaw mix
  6. ½ packed cup cilantro, chopped
  7. 1 bag of vermicelli, cook as directed
  8. 2-3 tbsp sesame seeds, toasted
Instructions
  1. Combine all dressing ingredients in a jar and mix well.
  2. Prepare all salad ingredients, except the vermicelli, toss together in a bowl.
  3. Add dressing to the veggies and toss to combine. Let sit for an hour or so, if you have the time!
  4. Prepare the vermicelli as directed - it usually only takes a few minutes in boiling water.
  5. As soon as the vermicelli is done (don't overcook it!), drain it, rinse under cold water, drain again and toss with the veggies.
  6. Chill before serving.
  7. Top with toasted sesame seeds.
Notes
  1. Chopped cashews or even peanuts (if tolerated) would be a great addition to this dish.
  2. Looking to add protein? Some cold shrimp would be perfect!
  3. Don't have bagged coleslaw? Not to worry. Simply add in veggies that stand up well in coleslaw - think carrots, cabbage, broccoli and kale. Shred or slice thinly and use in place of the coleslaw mix.
  4. You can make this 100% grain free by using zucchini noodles or sweet potato starch noodles (often found at Asian supermarkets)
Amanda Naturally http://www.amandanaturally.com/


Have you ever used vermicelli before? What’s your favourite way to use this safe starch?

Mayo

Mayo | AmandaNaturally.com
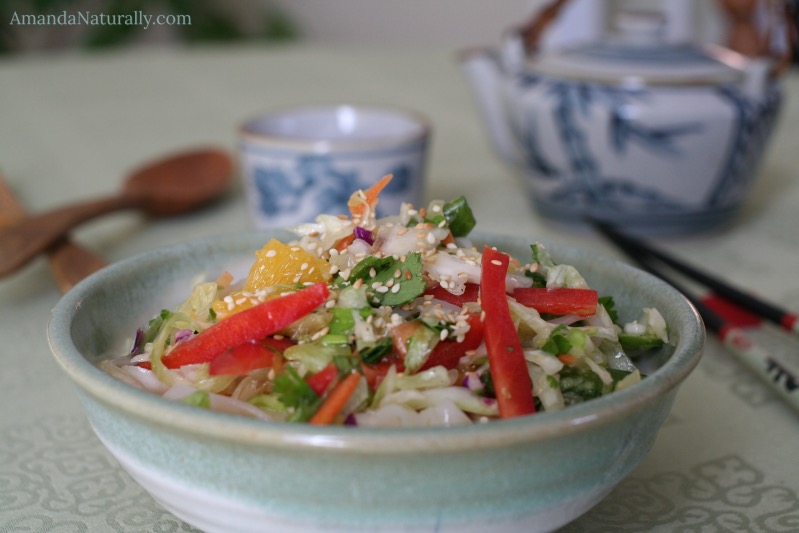
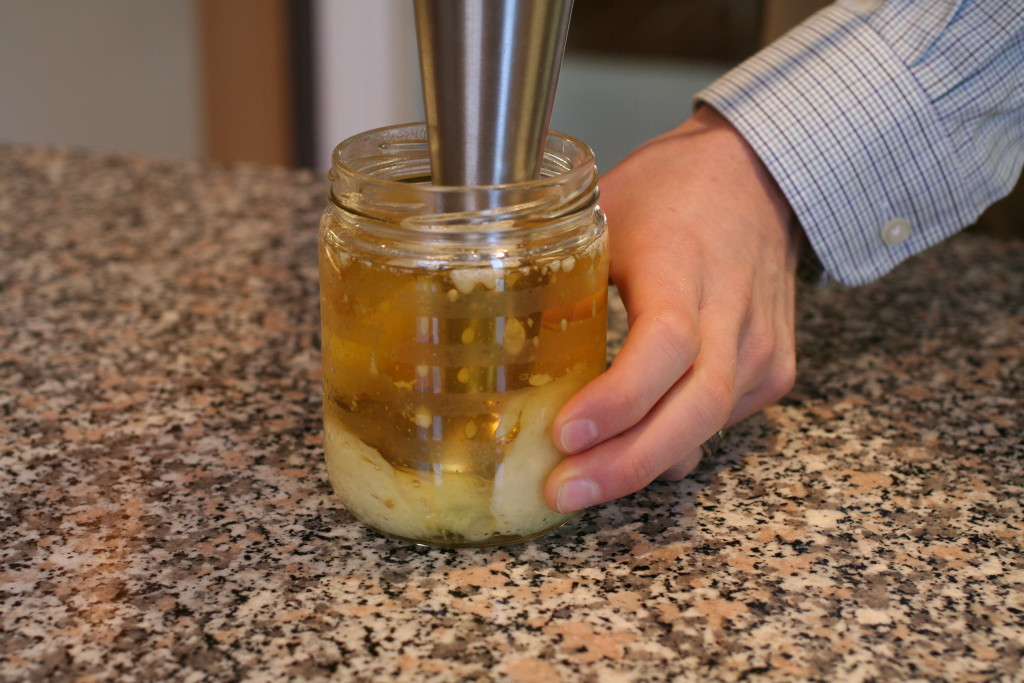
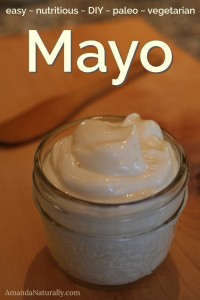
Mayonnaise has a very bad reputation, and honestly, that’s probably for good reason. At least that’s the case for the junk sold at the grocery store! Do you know what actually goes into real mayo? It’s simple: raw egg, oil and lemon or vinegar. Simple, straight forward and depending on the oil that you use, actually pretty darn healthy! So you might already be wondering… if it’s made with raw egg, how come it’s not found in the fridge? Well my friends, here’s the low-down on this artificial food we like to refer to as mayo. Check out the ingredients lists in these popular brands of mayonnaise:

Hellman’s Mayo

Canola Oil, Water, Liquid Whole Egg, Vinegar, Salt, Liquid yolk, Sugar, Spices, Concentrated Lemon Juice and Calcium Disodium EDTA

Kraft Mayo

Soybean Oil, Water, Eggs, Egg Yolks, Vinegar, Contains Less Than 2% of: Sugar, Salt, Lemon Juice Concentrate, Calcium Disodium EDTA As A Preservative, Dried Garlic, Dried Onions, Spice, Natural Flavor.

Miracle Whip

Water, Soybean Oil, Vinegar, Sugar, Modified Cornstarch, Eggs, Contains 2% or less of: Salt, Mustard Flour, Paprika, Spice, Natural Flavor, Potassium Sorbate (preservative), Enzyme Modified Egg Yolk, Dried Garlic.

Veganaise

Organic Expeller-Pressed Soy Oil, Filtered Water, Organic Brown Rice Syrup, Organic Apple Cider Vinegar, Organic Soy Protein, Sea Salt, Organic Mustard, Organic Lemon Juice Concentrate.


I bolded the ingredients that are questionable. Aside from the preservatives that are clearly required to make raw egg shelf-stable, my biggest concern is the junky, inflammatory seed oils they all use. Canola and soy oils Homemade Mayo | AmandaNaturally.com
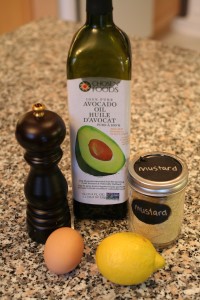
are not healthy in any way, shape or form. They are incredibly high in omega-6 fats and they are chemically unstable. Exposure to light, oxygen and heat will cause them to break down, creating free radicals and wrecking havoc on your tissues. Also, the term spice is a catch all term. The ingredients used are not disclosed. Also, sugar?? What the heck! And cornstarch in the Miracle Whip? They’re so scared of the fat and cholesterol from the egg, that they’ve added cornstarch as a thickener, instead of utilizing the egg. And don’t get me started on that enzyme modified egg yolk business…

It’s a shame, because when made properly, mayo is actually like a fat supplement! A pastured or organic egg brings a whole whack of nutrients to the table. Combine that with a high quality oil and you’ve got yourself a very healthy food! So without further ado, here’s my recipe for:

Homemade Mayo

Combine 1¼ cup avocado oil, 1  raw egg, the juice of ½ a lemon, a pinch of sea salt and a pinch of mustard in a jar and let sit for about an hour. Bringing the ingredients to room temperature is critical.


Once at room temperature, place your immersion blender in the bottom of the jar.


Turn it on and slowly pull the immersion blender upwards over the course of 10-15 seconds. If necessary, drop the blender back down to the bottom and repeat once more.


After about 20-30 seconds it will be fully emulsified ie. thick and creamy!

A few notes:

  • It lasts at least 7 days in the fridge, likely more.
  • It is a fabulous vector for other delicious flavours.
    • Add some sriracha for sweet potato fry dip.
    • Mix with lime juice and cilantro for a taco or nacho topping.
    • Turn into ranch dressing using this fabulous recipe by Melissa Joulwan at The Clothes Make The Girl.
  • Play around with oils. This recipe calls for avocado oil, because it’s a neutral taste. Substitute ¼ cup of avocado oil for another oil for a different flavour! Try bacon grease for a wonderfully smoky mayo. Coconut oil makes a thicker, sweeter mayo.
  • A handheld immersion blender is really key for this recipe. You can use a food processor, but it really works best with an immersion blender!

UPDATE: 9 times out of 10 this is fool-proof, however every so often you may experience the crushing blow of a broken mayo. This is super disheartening, especially if you feel like you have to throw out all those ingredients! But WAIT! You don’t need to toss the ingredients. Simply follow this amazing trick for repairing broken mayo!

Mayo
Write a review
Print
Prep Time
1 hr
Cook Time
2 min
Total Time
2 min
Prep Time
1 hr
Cook Time
2 min
Total Time
2 min
Ingredients
  1. 1 ¼ cup avocado oil
  2. 1 egg, pastured or organic
  3. juice of ½ a lemon
  4. pinch of mustard
  5. pinch of sea salt
Instructions
  1. Combine all ingredients in a jar and let sit for about an hour. Bringing them to room temperature is critical.
  2. Once at room temperature, place your immersion blender in the bottom of the jar.
  3. Turn it on and slowly pull the immersion blender upwards over the course of 10-15 seconds.
  4. Drop the blender back down to the bottom and repeat once more.
Notes
  1. Bacon Mayo = 1 cup avocado oil + ¼ cup bacon grease
  2. Sweet Mayo = 1 cup avocado oil + ¼ cup melted coconut oil
Amanda Naturally http://www.amandanaturally.com/
Copyright 2014 Amanda Naturally | Design by The Nectar Collective