Category Archives: Apps, Snacks & Sides

Gluten free, dairy free, paleo, sugar free, grain free appetizers and party foods

Instant Pot

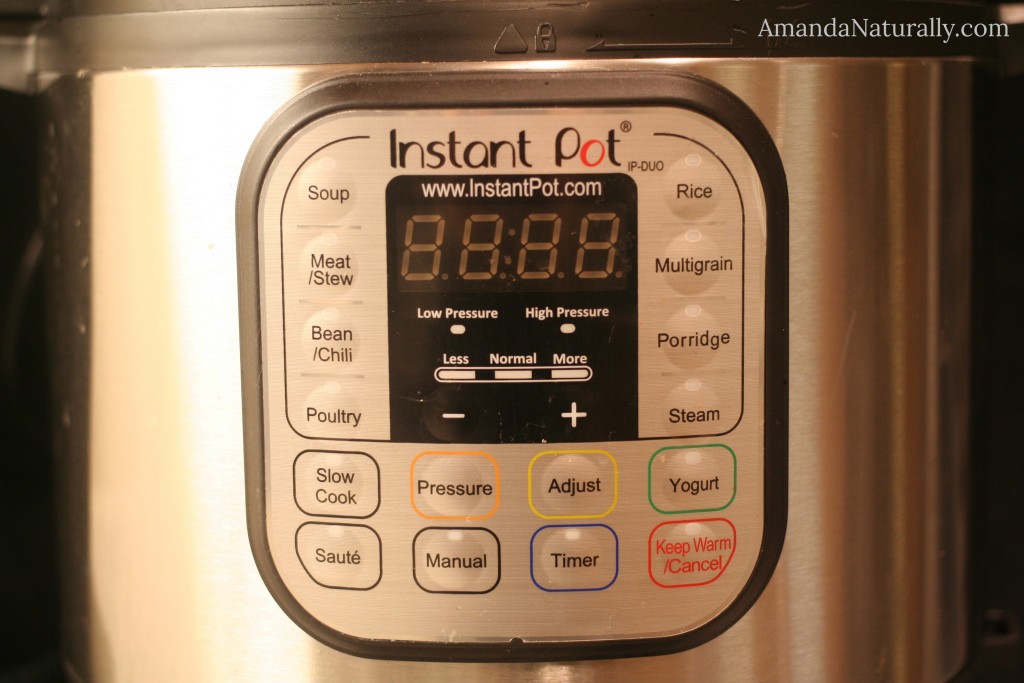
Instant Pot | Favourite Kitchen Gadget | AmandaNaturally.comI’ve had a lot of people recently ask me how I keep bone broth on hand all of the time. This is a totally fair question because in order to get a really nutrient-rich, gelatinous bone broth it needs to cook for a long time. We’re talking 24 hours on the stove top, or 2-4 days in the slow cooker. So how do I do it? Well, I got another gadget. It’s called…

The Instant Pot!

DISCLAIMER: this is not sponsored in anyway. If you click on any links, I may receive a small commission to support my blogging activities, but it does not in any way impact the price of the item, or my opinions on the product. These are my opinions and mine alone! I just want to inform my fellow foodies of fun new gadgets they might enjoy!


The Instant Pot

About a year and a half ago I started seeing people in the real food blogosphere posting about this new gadget on instagram. I didn’t really think I needed another gadget, until I heard that it makes bone broth in only 2 hours. I was sold. However, I’m not one to splurge on a big ticket item, so I waited and asked for one for my birthday. Luckily my in-laws are awesome and they made my day by gifting me one!

The 7-in-1

The setting I use for super speedy bone broth, is the pressure cooker setting. I’ve never used a pressure cooker before, and neither did my mom. It doesn’t seem to be a very popular kitchen utensil in the western world – however it is hugely popular throughout Asia and countries that utilize tougher cuts of meat. Prior to the Instant Pot, all I could picture was a pressure cooker exploding in my kitchen – which terrified me. However, the Instant Pot is an electric pressure cooker, with pretty much every fail-safe possible to prevent any user error. I have felt extremely confident using it, from the second time onwards! I now use it for making hard boiled eggs (see below), quick stews, homemade yogurt and cooking whole root veggies – fast! It’s probably the most used item in my kitchen right now.

Now, I got the Instant Pot for the pressure cooker / bone broth awesomeness. However, once I was able to play around with it, I learned about all of the other functions!

  1. pressure cooker
  2. slow cooker
  3. rice cooker
  4. saute/browning
  5. yogurt maker
  6. steamer
  7. warmer

Here are my favourite settings:

Saute / Browning Mode

This allows me to brown meat in the bottom of the pot, before either pressure cooking OR slow cooking. While not a huge deal, it does save on dishes by not needing to brown in a separate pan.

Warmer

This is one of my favourite settings. You can cook something on pressure mode for 45 minutes in the middle of the day (or morning, or at bedtime), and as soon as the 45 minutes are up, it will switch over to slow cooker mode, on low. So you don’t have to be in the kitchen an hour before you want dinner prepared. You can throw everything in the pot in the morning, pressure cook it, and let it stay on warming all day.

Steamer

All I can say is – steamed whole sweet potatoes take 15 minutes! Plus time to build up pressure, but again – you can throw them in, press steam and leave them. No need to monitor the oven for 1-2 hours when roasting. This is especially awesome when I want to make a recipe for things like sweet potato biscuits, that calls for steamed, roasted or pureed sweet potato.

Yogurt Maker

Since I don’t tolerate dairy, and the store-bought coconut “yogurts” are full of junk that really bug my gut (guar gum etc), my only option is to make my own. This is something I had always been interested in doing, but never dove into. Once I had this great gadget, I jumped in head first and boy was it a success! If you tolerate cow dairy, or goat dairy, here are a great set of directions for DIYing it. However, if you don’t tolerate milk (like me), full-fat coconut milk can make an awesome yogurt alternative! It’s actually a way simpler recipe, because you don’t need to pasteurize the milk first. See directions below.

Homemade Coconut Milk Yogurt

1. Heat 4 cups of full-fat coconut milk (I prefer the Aroy D brand) in a pot, to 110F. Use a candy thermometer, or an electronic meat thermometer ( <– another favourite kitchen gadget). As soon as the temperature hits 110F, pull it off the heat.

2. Immediately whisk in ½ cup of a previous batch of yogurt (you can use dairy if tolerated, store-bought or your previous batch) or 2 packets of Vegan Yogurt Culture (I love the Cultures for Health product, although it does have a bit of rice starch in it – something to note if you’re sensitive or following the AIP protocol). Apparently you can use 2 or 3 probiotic capsules, but I haven’t tried this. (UPDATE: a friend told me she uses ¼ tsp of probiotic powder, or 2-3 capsules, and 1-2 tbsp maple syrup)

3. Whisk in 2 tsp grassfed gelatin. Without this, it won’t thicken. You will still have a yummy, tangy coconut milk, but it will definitely be milk, not yogurt. Apparently you can use agar agar to keep it vegan, but I haven’t tried this since I’m always looking for extra ways to get in gelatin!

4. Pour into jars, or a glass bowl (that fits in the pot), and place in the bottom of the Instant Pot. Secure the lid, press the “yogurt” button, adjust the time to 12 hours and walk away. (NOTE: don’t put the yogurt directly in the Instant Pot. Since it is stainless steel, mine retains a slight hint of what was previously cooked – usually broth. And trust me, broth-flavoured coconut yogurt is not good.)

5. 12 hours later, remove from Instant Pot and store in fridge for a few hours to let set. 

NOTE: if you don’t like really tangy yogurt, start checking the flavour around 8 hours.


Favourite Recipes using the Instant Pot

Bone Broth – in only 2 hours!

  • Fill pot with bones.
  • Add in some aromatics (onion ends, smashed garlic) and some bonus nutrients (egg shells, sea weed).
  • Add water until bones are just covered.
  • Add 1 tbsp apple cider vinegar.
  • Close pot, make sure pressure valve is set to closed and press “Manual”, adjusting the time to 120 minutes.
  • Use slow release method so it doesn’t spray up through the pressure valve!

Hard Boiled Eggs (fool proof, easy to peel – even if truly farm-fresh). This is hands down my favourite way to make HB eggs – nothing else compares!

  • Place as many eggs as you want, on a steamer or the trivet.
  • Pour 1 cup of water into the bottom of the pot. 
  • Close the lid, make sure the pressure valve is closed.
  • Press “manual” and set for 5 minutes. Let it do its thing. 
  • As soon as it beeps, use the quick release method and dunk the eggs in an ice bath. Once chilled, store in the fridge. (UPDATE: As of May 2016 I no longer do the ice bath. As soon as the eggs are done, back into the carton and in the fridge they go!)

Other Egg Recipes

Baked Sweet Potatoes – you don’t need to wrap in tin foil before, but it will help if serving individually.

Squash – this is great for steamed squash (for soups) or spaghetti squash. However, the squash won’t have that caramelized, roasted taste. So if that’s what you’re going for, use my Squash Tutorial.

  • Slice squash in half, remove the seeds.
  • Place trivet in the bottom of the Instant Pot. Add 1 cup of water.
  • Place squash on top of trivet.
  • Close lid and make sure pressure valve is closed. Set to “Manual” for 5 minutes (for spaghetti, acorn… for a large butternut, you might need to do 7 minutes).
  • Use the “Quick Release” method when the 5 minutes is up!

Instant Stew You can follow these directions, or you can do what I do and put the stewing beef on the bottom, add onions, garlic, quartered potatoes, carrot chunks, a can of tomatoes, 1-2 cups bone broth (cover the food with liquid), sea salt, pepper, bay leaf, oregano. Press “beef/stew” and go.

Nom Nom Paleo (an incredible cook and foodie) is also obsessed with the Instant Pot, and has converted dozens of her slow cooker recipes. Definitely check her out!

Instant Pot Website – hundreds of resources!

Tips and Lessons Learned

  1. Unlike the slow cooker, this loses liquid instead of creating it. So make sure there is enough liquid! 
  2. Time to reach pressure needs to be accounted for. Quick things like eggs take 10 minutes to reach pressure, and then 5 minutes to cook. Sweet potatoes only take 5 minutes. However, larger volumes (like stew or broth) can take up to 20 minutes to reach pressure. If lots of frozen items are going in (like when I make broth), it can take 30+ minutes to reach pressure. Make sure to factor this in!
  3. The quick release valve releases a lot of steam that can burn you if you’re not careful. I always throw a dish towel over it before turning it to release.
  4. If you fill up the pot too far, you can’t use the quick release. It will shoot liquid out of it. Not ideal.
  5. You can only use your previous coconut milk yogurt to inoculate your new batch about 2 or 3 times before the bacterial concentration drops too low. There’s very little sugar in coconut milk, so nothing to feed it once it uses up all the rice starch! You could probably add some rice/potato starch, or cane sugar to further stretch your starter culture, but I haven’t tried this yet.

Liver – A True Superfood!

Liver, a True Superfood | AmandaNaturally.comWhen we think of superfoods, things like kale, acai, chia and other plants come to mind. However if we actually put a definition to the word superfood, it becomes quite obvious that these are not true superfoods. Here are my requirements for a superfood:
  1. It needs to be jam-packed with nutrients (i.e. incredibly nutrient dense). So every single bite delivers a high concentration of nutrients.
  2. Nutrients need to be life-giving. They should include (but not be limited to) things like vitamins A & D, folate, zinc, omega-3’s (the usable forms, not the plant-based forms) and a full spectrum of B’s.
  3. They should impact most if not all systems in the body – endocrine, nervous, digestive, immune and detoxification.

While the acai berry contains vitamin C and antioxidants, it definitely doesn’t contain a full spectrum of life-giving nutrients. My favourite true superfoods are vegetables (of course), egg yolks, grassfed butter, seafood (especially bivalves like mussels, oysters and clams), fermented foods (like sauerkraut) and….

LIVER!

But wait? I’ve always heard that liver is a filter organ and it stores all our toxins so we should avoid it!


How the Liver Actually Works

The liver has a variety of responsibilities (including storing vitamins and minerals – more on that later), but the most notable one is detoxification. What does that mean? Well true detox (not the juice-cleansing, fasting, only eating salads BS) is the process of transforming and clearing toxic substances from the blood. 

What are toxic substances?

A toxin is simply a substance that can cause damage or injury to cells, or cause disease. That’s a pretty broad definition, which unfortunately means the term toxin gets thrown around a lot, often inappropriately. Some examples of true toxins are:

  • byproducts from cellular metabolism (like carbon dioxide from cell respiration, ammonia from protein metabolism)
  • byproducts of gut microbes which we absorb (another reason why you want to have a super healthy gut and make sure you’re not constipated!)
  • oxidative stress (free radicals)
  • substances that cause antibody production like food and environmental exposure (especially if those antibodies accidentally attack areas of the body, which is common with gluten)
  • environmental toxins like car exhaust, cigarette smoke
  • alcohol
  • pesticides
  • chemicals in personal care products and cleaning products
  • pharmaceuticals (note: drugs are defined by having a toxic upper level, otherwise they are considered a supplement)
  • plastics
  • heavy metals (mercury, lead, aluminum etc.)

What the Liver Does

The Paleo Mom has a great article on exactly what the liver does – in quite a bit of detail – so if you’re interested go check it out here. But in an effort to streamline this already involved article, here’s a brief description:

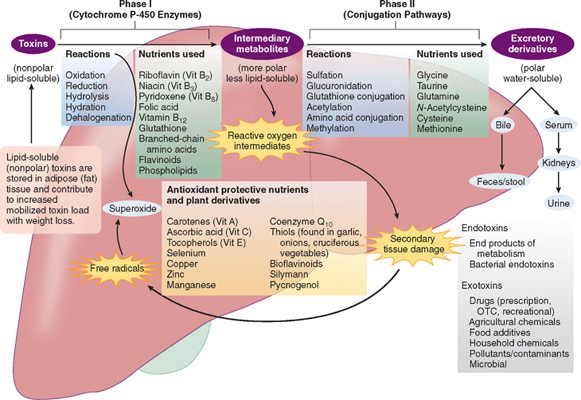
Phase 1 – the liver starts to transform the dangerous chemical into less dangerous ones (although sometimes this phase ends up creating more toxic substances – for example alcohol gets converted into formaldehyde, a known carcinogen).

Phase 2 – the partially transformed chemical gets attached to other molecules which make them water soluble. They are now able to be excreted by the kidneys in the urine, or by the gall-bladder/stool through bile (another reason why you don’t want to be constipated – slow transit time will allow toxins that have already been excreted).

from: http://primaldocs.com/members-blog/detox-101-how-to-enhance-your-bodys-detoxification/#!prettyPhoto


If phase 1 is working great, but phase 2 is sluggish (usually due to lack of nutrients required for the specific processes) then there can be a build up of phase 1 byproducts. This build up gets shuttled out of the liver and into fatty tissue where it is inert and won’t damage the body (in theory – but if the fatty tissue it hangs out in is the brain, it can cause big problems).

Moral of the story:

The liver is not a sponge. It does not store toxins. It stores vitamins and minerals to aid in detoxification.

Pay special attention to that last line. The liver stores vitamins and minerals. Why? We forget that food is more than just fuel. It is the building blocks for all new tissue, and the machinery for all of our systems to function. Detoxification processes are run by enzymes that are created from vitamins, minerals and proteins. So in order for it to do its job, the liver must be chock full of nutrients. 


Liver is a Potent Superfood!

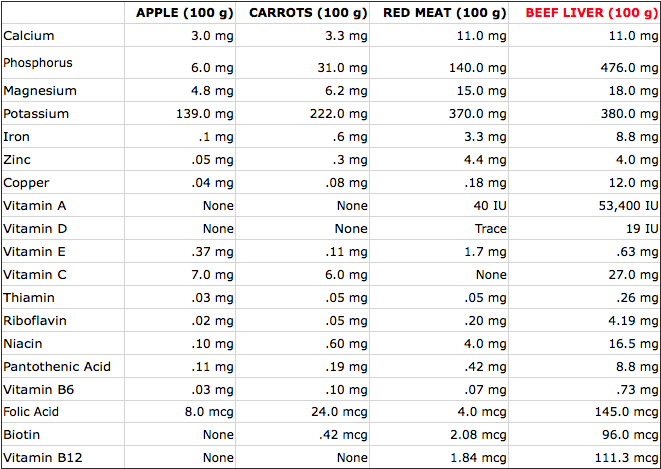
Nutrients stored in the liver (because they’re required for phase 1 and 2 detoxification) include:

  • Vitamins B2, B3, B5, B6, B12
  • Folate
  • Glutathione
  • Flavonoids
  • Methionine
  • Cysteine
  • Magnesium
  • Vitamin C (more than an apple!)
  • Glycine
  • Taurine
  • Glutamine
  • Choline

Other nutrients it stores:

  • Vitamin A (the real form, not b-carotene found in orange plants)
  • Vitamin D (important especially in fall/winter months up north)
  • Vitamin K (specifically K2, an absolutely critical nutrient for bone formation that is only found in organ meats and grass-fed raw dairy – everyone is so worried about calcium, when they should be worried about K2!)
  • Iron
  • Copper
From: http://chriskresser.com/natures-most-potent-superfood/

Additional Benefits:

  • full of enzymes to break down any residual toxins that may hang around (minimal)
  • very low in fat, so very unlikely to store toxins 
  • the amino acid balance is different than muscle meat, in a good way. Case in point – glycine. This important amino acid is very low in muscle meat and high in offal. So if you’re not consuming the entire animal (or worse, you’re not consuming any animal protein), you are definitely going to be deficient in glycine. Glycine is critical for gut health, connective tissue health and immune system regulation.

In many traditional cultures only the organ meats were consumed. In others they were reserved for royalty or recently married couples (as fertility aids).


Okay so it’s not full of toxins, but what about the cholesterol?

Cholesterol in our diet has very little impact on our systemic cholesterol levels. Elevated cholesterol in our body is a symptom of inflammation, stress and degeneration. It in itself is not the disease. Over half of people who are hospitalized with a cardiac event (heart attack) do not have high cholesterol. In fact, as you age, low cholesterol is much more dangerous than high cholesterol.

 Elevated cholesterol needs to be looked at as a warning sign, not the problem itself. It would be like every time we see a house on fire, we also see loud, noisy, fire trucks. So we start assuming that the fire trucks are causing the problem. If we just stop the fire trucks, the noise stops! But does the fire actually go away? No. That’s what’s going on when we treat cholesterol as the problem. Remember – cholesterol is a vital, life-giving substance, without which we will die. Elevated cholesterol is a symptom.

Life-giving you say? Why yes! Cholesterol is the building blocks of vitamin D, testosterone, estrogen and progesterone (among other steroid hormones). It also makes up about 25% of our brain (hence the massive cognitive decline that many people taking statins like Crestor and Lipitor experience). In fact, there are many arguments for why you should eat more cholesterol – namely because foods high in cholesterol are also high in choline, an absolutely essential nutrient (albeit recently essential – it was added to the list in 1998). Most North Americans are significantly under-consuming choline due to fear of cholesterol. This is especially a problem for pregnant and breast-feeding women since choline is critical for fetal growth and milk production.


Does it have to be organic?

In an ideal world you are able to source all of your meat from grassfed and pastured sources, however I know that is not always possible (both physically and financially). I always recommend to clients to start by purchasing the fatty cuts of meat organic (since those cuts store the most junk). So things like bacon, marbled steaks, and sausages really should be a priority. 

But if we consider everything we said above – that the liver doesn’t store toxins and it’s so low fat so even if the animal has been exposed to a ton of junk during its lifetime in a confined animal feeding operation (CAFO), there isn’t really anywhere for the liver to hold on to those toxins. Buying organic bacon is way more important than buying organic liver.

Standard liver is still way better for you than no liver at all!


So, who needs liver? Everyone!

But there specific cases where I use it therapeutically:

  • recovery from illness (either acute or chronic)
  • autoimmune disease recovery (the immune system is a massive drain on our nutrient reserves, so to re-regulate it, organ meats are a must)
  • post-surgery
  • pregnancy (for development of baby, but more importantly to keep mom sufficient in nutrients – baby will take everything it needs, leaving mom deficient)
  • low iron / anemia (it’s particularly helpful on day 1 and 2 of your menstrual cycle)


What’s the best way to eat liver?

Now I know liver isn’t everyone’s favourite food… (those of you who love it and have been avoiding it because it’s toxic – you lucky ducks). I wasn’t raised on it and I can certainly tell you I did not enjoy it the first time I ate it. However, I knew how important it was as part of a healing, nutrient-dense diet. I also knew that it would be important for me to consume when we decide to have kids. So I sucked it up and started eating it. I definitely did not enjoy it at first, but trying it a few different ways, and exposing myself to it on the regular, eventually changed my taste buds. As Diane SanFilippo says “time to put on your big girl pants and just eat some liver!”

One quick tip – if you don’t like it, start with chicken livers – they are much more mild in flavour. I still struggle with beef liver (our pup gets the beautiful grassfed beef liver from the cow we purchased, sighhh), but I actually find chicken livers quite delicious now! Oh and I also recommend starting with pate – it completely eliminates the chewy, texture issue people have with fried livers.

Here are some great ways to prepare liver:

Note: many recipes say to soak livers in milk or buttermilk for a few hours or overnight to reduce. If you’re sensitive to dairy, the alternative suggestion is often soaking it in lemon juice. I’ve never done this, but I likely will the next time I try beef liver.

Pate

Easy Chicken Liver Pate from Practical Paleo (this is my absolutely favourite way to eat liver. I use balsamic vinegar instead of wine, and duck fat or even olive oil in lieu of butter, and I eat it on apple slices. Amazing.)

Raymond Blanc’s Chicken Liver Parfait (my uncle made this for us last week, and used duck fat in stead of butter. Holy heck it was amazing! 2 quick things though (1) There is a typo in the recipe – it should say cook until 65 degrees C (150F), no more! Once you hit 70C all the proteins are overcooked, and the pate will be grey, grainy and thick. See video here and (2) the indicated baking time is too long. Start checking at around 30 minutes.)

Chicken Liver Mousse from Paleo Parents

Bacon Beef-Liver Pate with Rosemary and Thyme from AutoImmune-Paleo (AIP)

Chicken Liver Pate with Mushrooms and Bacon from Eat, Heal, Thrive (AIP)

Liver in its Whole Form

Liver and Caramelized Onions from The Domestic Man

Beef Liver with Bacon & Mushrooms from Starbright’s Kitchen

Liver & Bacon Sautee with Potatoes & Parsley on The BBC

Crispy Spiced Chicken Livers from Melissa Joulwan

Hidden Liver

50/50/50 Burgers from The Paleo Mom (note: I actually use ground beef heart in this recipe, and add onions, garlic and toasted cumin. I make a large batch and freeze the patties on parchment paper for quick dinners later on.)

Frozen Raw Liver Pills from Primally Inspired

Liver Supplement from Vital Proteins

Raw Liver Smoothie Shot from Real Food Liz


So tell me, have I convinced you to eat liver? Newbies – are you going to give it a try? Or do you already like it and are relieved you can finally eat it again?

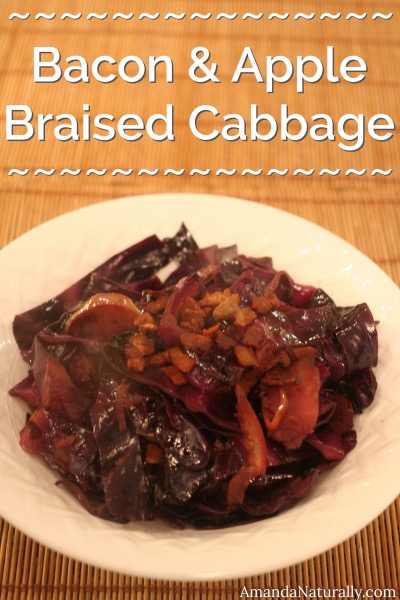
Bacon and Apple Braised Cabbage

Bacon & Apple Braised Cabbage | AmandaNaturally.comCabbage isn’t many people’s first choice of veggie. It has a bad reputation that it simply doesn’t deserve! Cause you know what? It’s one of my favourites and I’m not a notorious eat what most normal people don’t like person. I have learned that if you cook food properly, it can taste amazing. Case in point – cabbage and brussels sprouts. When I ask clients what their dislikes are, the overwhelming majority responds “brussels sprouts” (which btw are the same family as cabbage – they’re pretty much just baby cabbages). To which I respond, “have you ever had it cooked any other way than boiled?”
<< silence >>

Exactly. I wouldn’t want to eat that $h*t boiled either! So trust me when I say that as long as you cook it right, cabbage and brussels sprouts can be amazingly delicious!

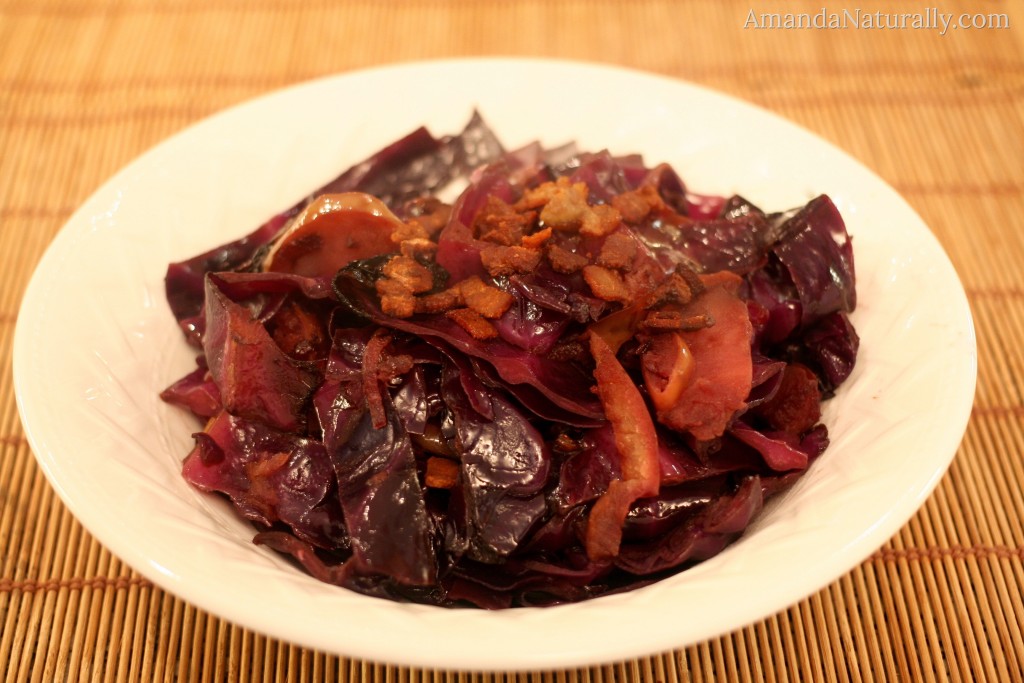
I love cabbage in slaw form, but hands down my favourite way to eat it is braised, or more specifically as Bacon and Apple Braised Cabbage. It turns deliciously sweet as the onions and apples get caramelized! My favourite dishes to pair braised cabbage with are pork chops, sausages or roast chicken. 

One of the best parts about cabbage is it’s super inexpensive, local, easy to find organic (and reasonably priced!) and it makes a huge amount. The leftovers seem to get better as they sit in the fridge, and they reheat amazingly well. I love the leftovers because they pair so wonderfully with breakfast! (anyone who works with me knows I am always trying to get people to eat veggies at breakfast!) Scramble up a few eggs, cook up a few extra pieces of bacon, side of apple braised cabbage – boom. Incredibly healthy breakfast.

Speaking of healthy, I’m just going to remind you the incredible health benefits of cabbage (I listed these over in my Simple Coleslaw recipe, but it can’t hurt to be reminded!).

Cabbage, along with other cruciferous veggies (kale, chard, collards, brussel sprouts, broccoli, cauliflower, bok choy), are nutritional powerhouses. Here are some of their health benefits:

  • very high in the sulfurous compound, glucosinolate, which is metabolized by the body into potent antioxidants isothiocyanate and thiocyanate.
  • isothiocyanates have also been shown to be effective in protecting against cancer, specifically breastcoloncervical and prostate.
  • help the body excrete excess estrogens (this is particularly helpful for someone coming off of birth control, or anyone who has estrogen dominance. Also a good idea for everyone, because many of the chemicals we are exposed to daily, from plastics to fragrances to pesticides, are xeno-estrogens, which means they mimic estrogen in our body) (additional source)
  • contains sulforaphane which may reduce hypertension and improve kidney function
  • packed with nutrients – vitamins, minerals, phytonutrients, fibre
  • contains indole-3-carbinol which supports phase 2 liver detoxificationphase 1 is also supported via the sulforaphane content. This balance is important because many “liver supporters” only up regulate phase I. Phase 1 often turns chemicals into more toxic substrates, before phase 2 neutralizes them. Only supporting phase 1 liver detox can result in nasty symptoms. (Note: supporting phase 1 and 2 liver detoxification is real detox, not juice-cleansing, cayenne shooters, no protein “detox” – that’s a load of crap.)

Cabbage Prep

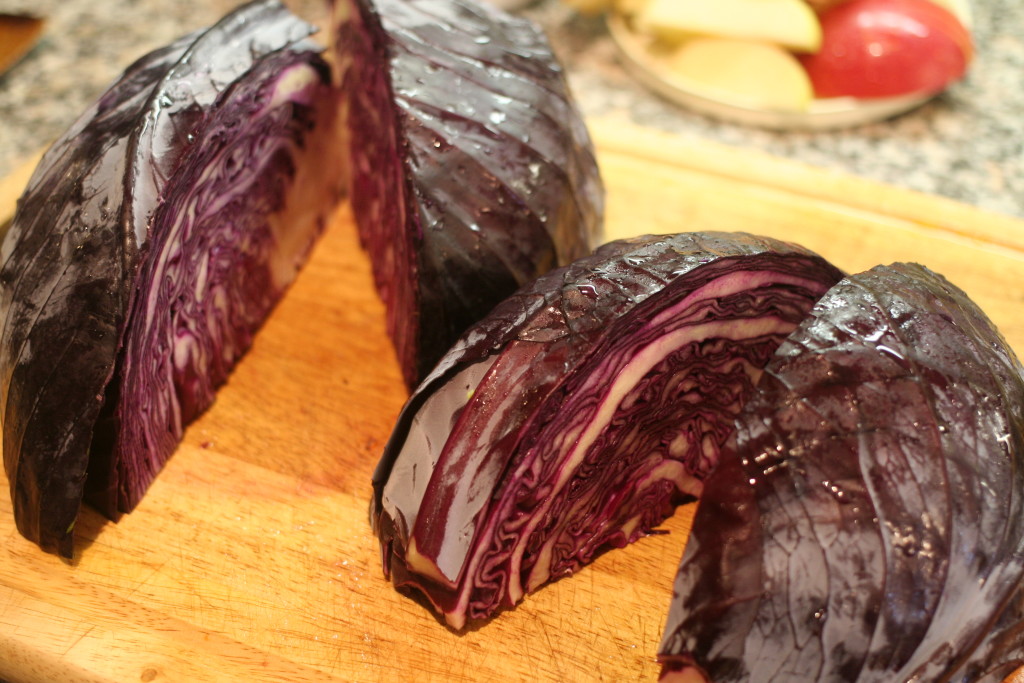
Never prepared cabbage before? Here’s how I do it for braising:

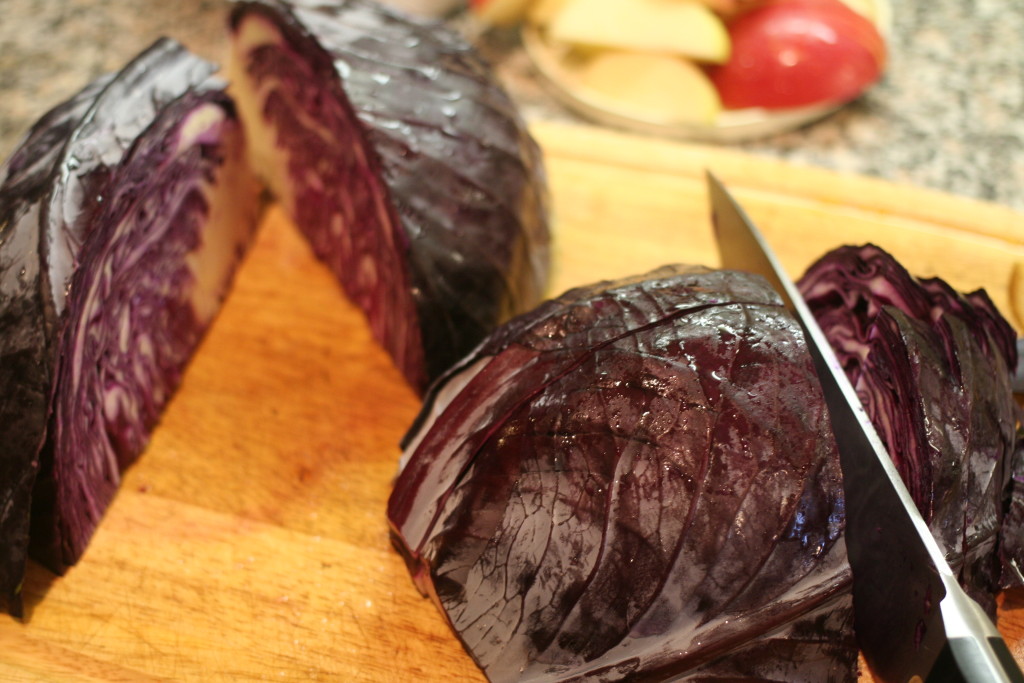
1. Remove the outer few layers of the cabbage.

2. Chop the thick end off.

3. Cut into quarters. If the core is really dense, slice out a bit of it and discard. (I didn’t have to for this cabbage)

4. Roughly slice.

Bacon and Apple Braised Cabbage
A trusted recipe for making cabbage actually taste delicious!
Write a review
Print
Prep Time
5 min
Cook Time
45 min
Total Time
50 min
Prep Time
5 min
Cook Time
45 min
Total Time
50 min
Ingredients
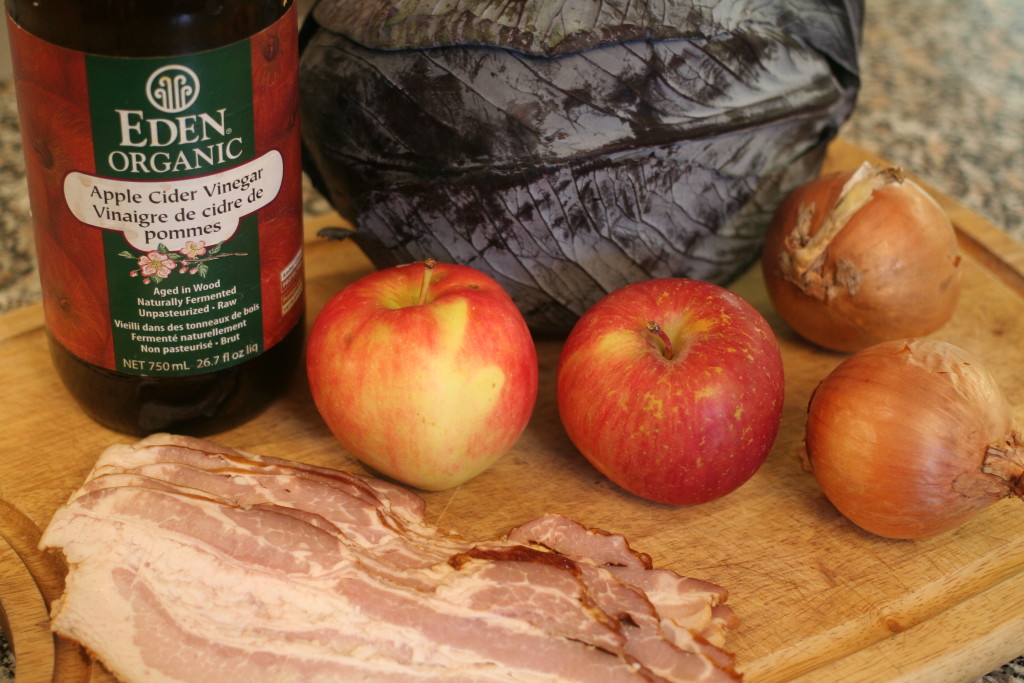
  1. 1 large head of cabbage, roughly sliced
  2. 2 apples, sliced thin
  3. 2 onions, sliced thin
  4. ½ lb pastured bacon, diced
  5. ¼ cup apple cider vinegar
  6. sea salt
  7. black pepper (optional)
Instructions
  1. In a large pot, braiser or sautee pan (make sure it has a lid), cook the bacon pieces over medium heat, until crispy. Approximately 10 minutes.
  2. Remove the bacon pieces and set aside. If there is an excessive amount of rendered grease, pour of some to use another time.
  3. Reduce heat to medium low, add onions to remaining bacon grease and sauté for 5 minutes.
  4. Layer apples over the onions and immediately top with the sliced cabbage.
  5. Add in apple cider vinegar, and about 10 grinds of sea salt.
  6. Cover and cook for 45 minutes, stirring every 10 minutes or so. (if you find it's starting to burn, reduce temperature to low)
  7. Season with additional sea salt and pepper (to taste), top with crispy bacon bits and serve!
Notes
  1. You can absolutely make this without the bacon (but why would you?) For a bacon-free/vegetarian option use your favourite cooking fat such as avocado oil, olive oil or butter.
  2. Feel free to sub in apple cider (the juice or the alcoholic beverage) in lieu of ACV if you want! I'm sure beer would work well too if you tolerate it.
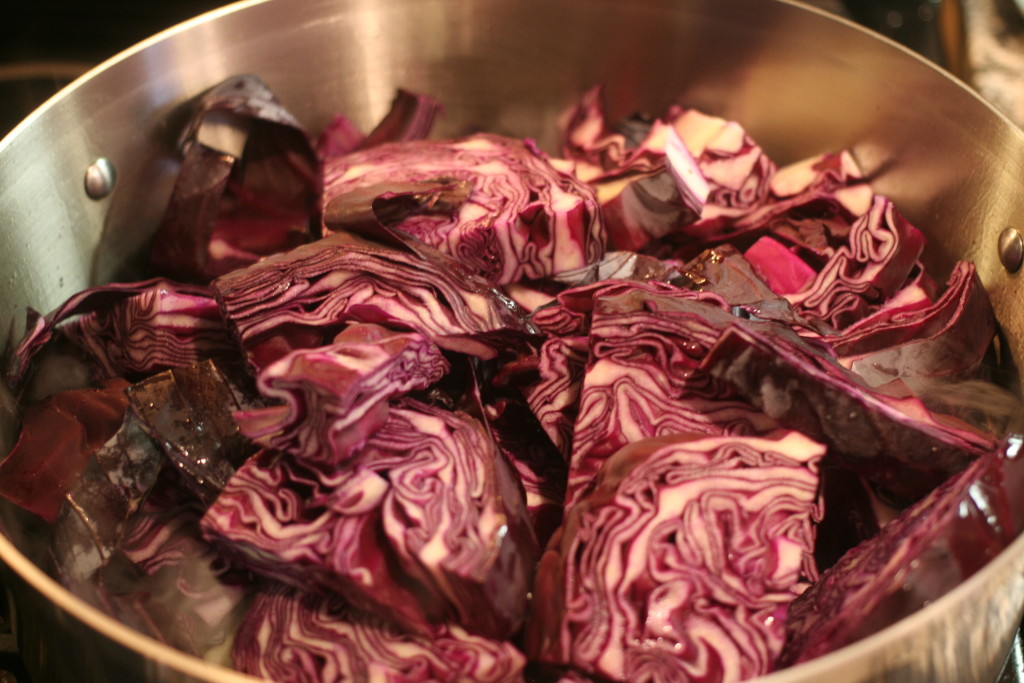
  3. You can use red or green cabbage. I just think red is prettier!
Amanda Naturally http://www.amandanaturally.com/

Copyright 2014 Amanda Naturally | Design by The Nectar Collective