When I first started cooking, I would follow a recipe exactly as it was written. As I got more comfortable in the kitchen, I started loosening up a bit. One tablespoon of oil? Approximately a quick circle around the pan. One tsp of cumin? I’d eyeball it in the palm of my hand. The more I practised, the better I got. I started to inherently know when an additional spice should be added, or what ingredients were okay to omit if I didn’t have them. Before I knew it, I stopped following recipes altogether! I learned some basic flavour combinations such as chill powder, cumin and oregano; lemon, garlic and rosemary; dijon and thyme – and started applying them to various cuts of meat and veggie dishes. Now I rarely follow a recipe, which can actually make it challenging when I’m trying to post my recipes for you guys!
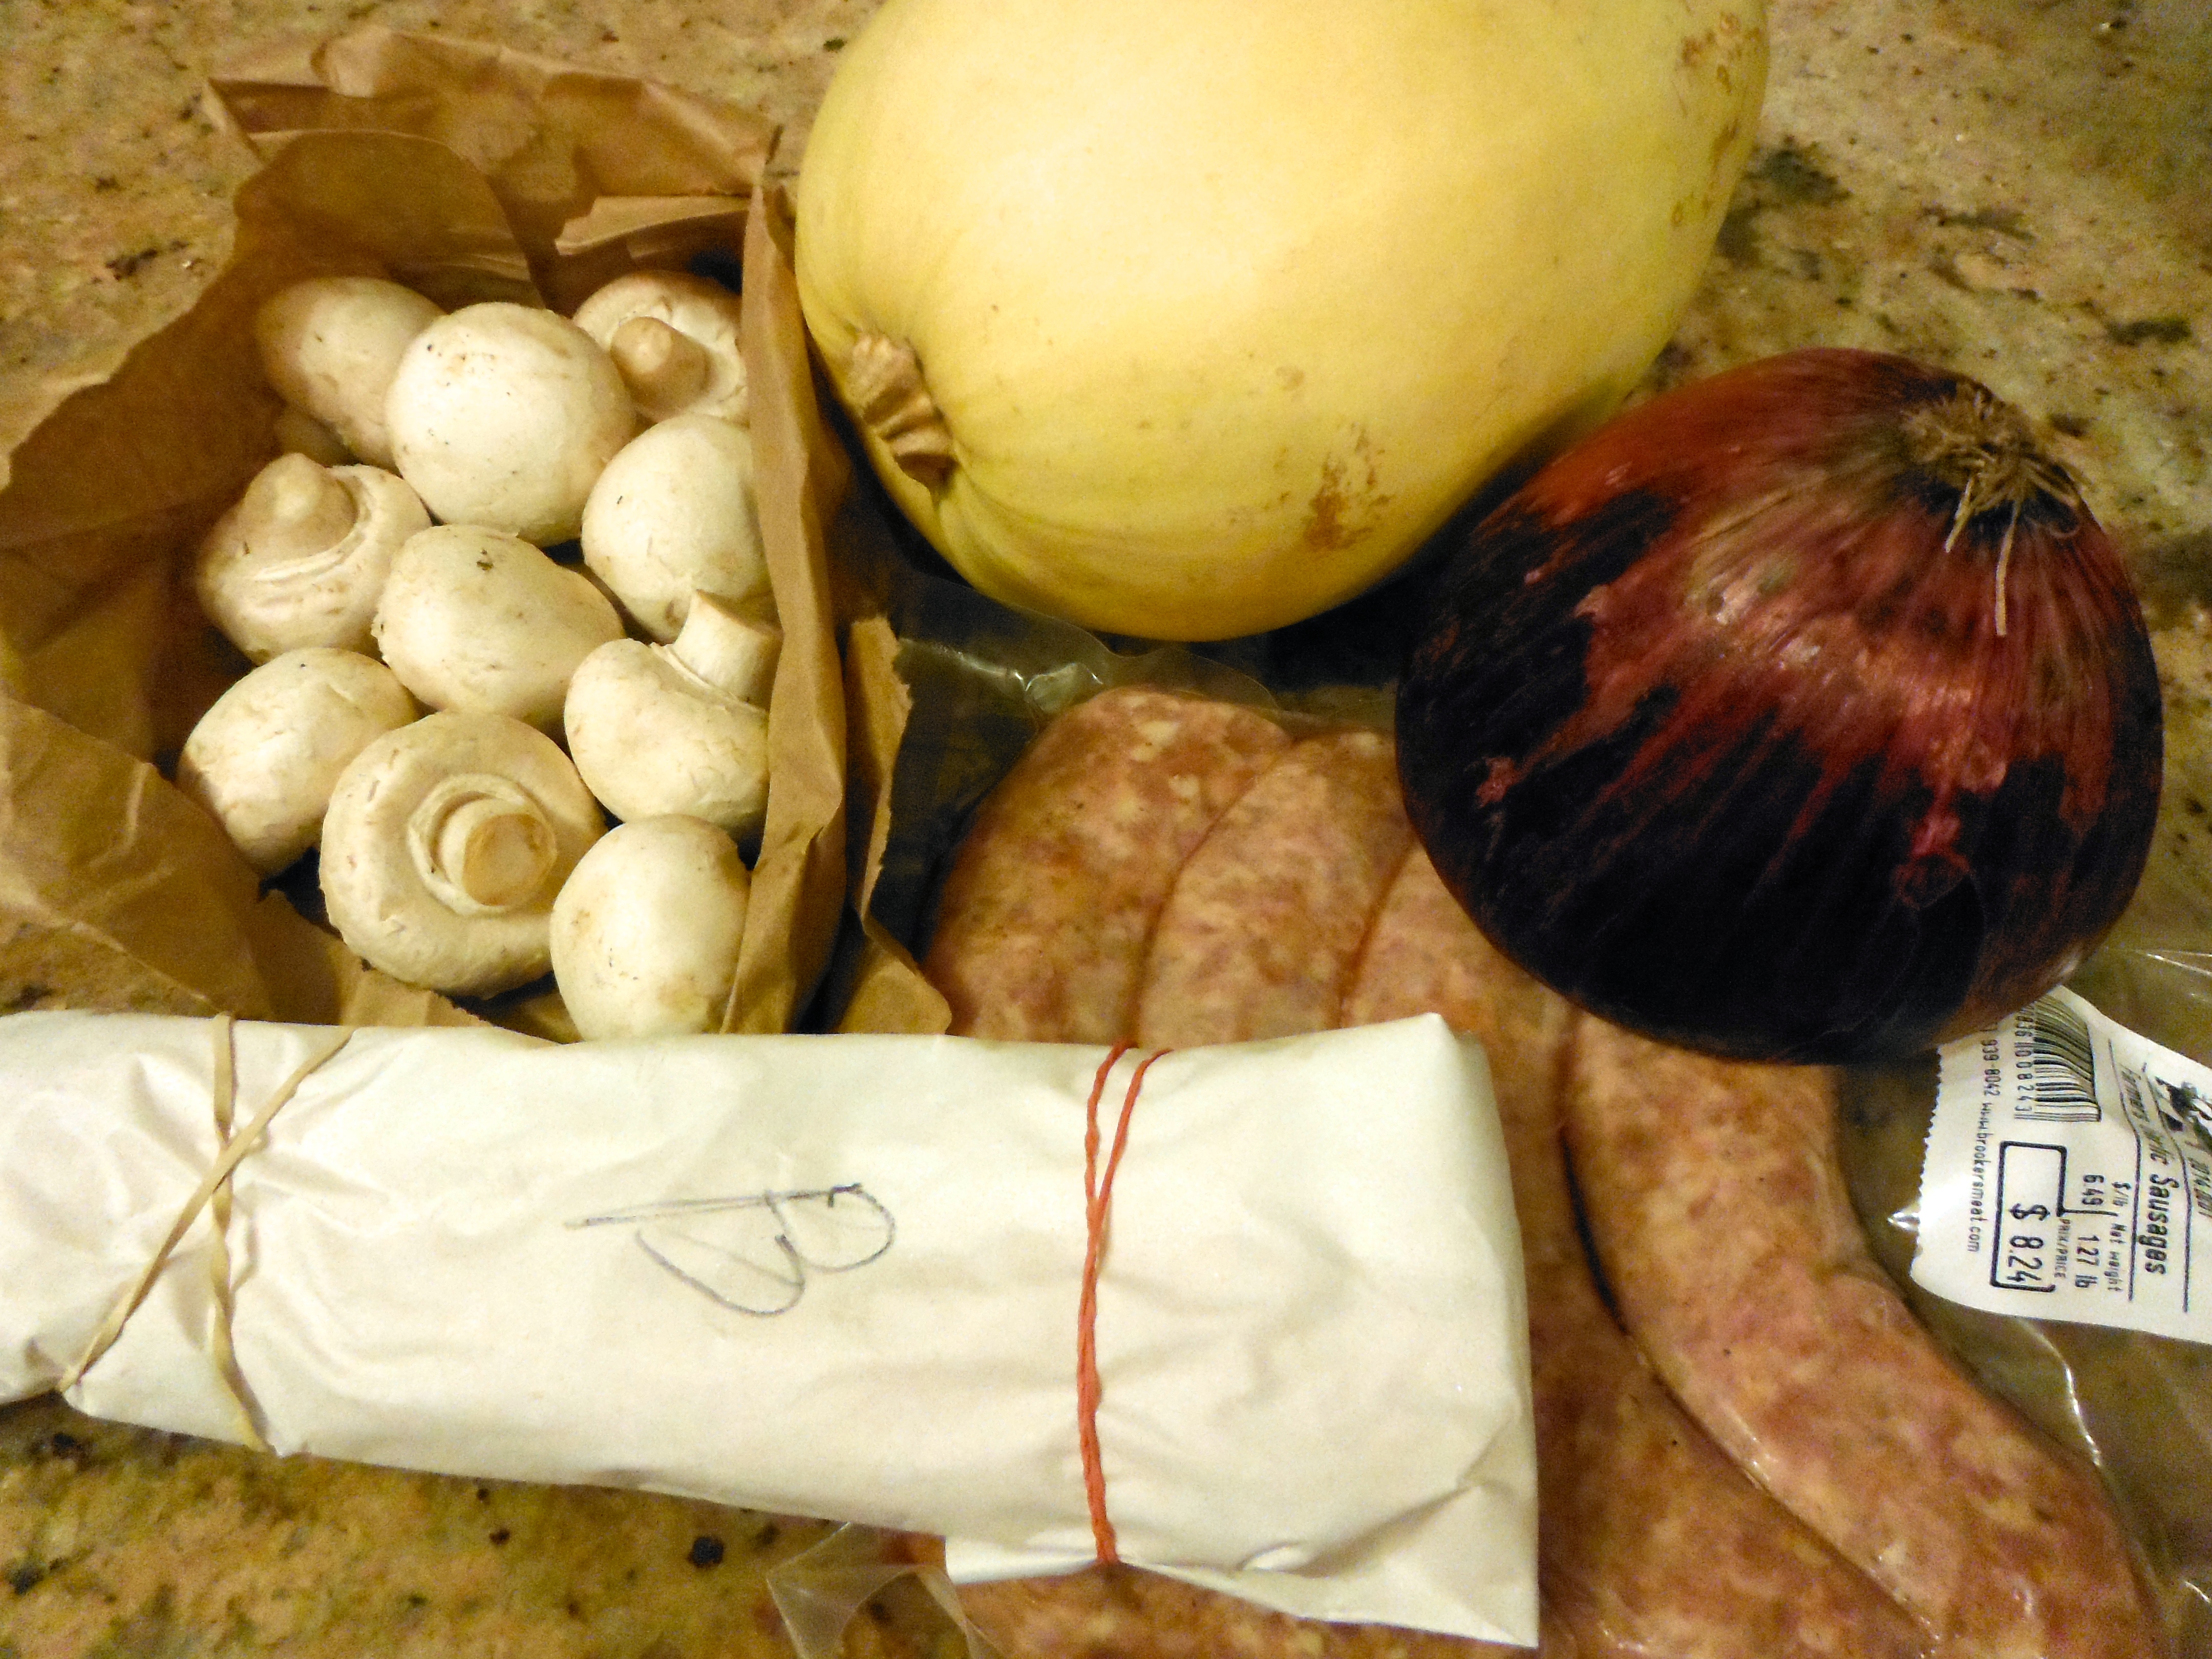
This recipe is a perfect example of that. I had a few ingredients in my kitchen, but no plan. I started with sausage and wanted to do something different with it. I mean, I love grilled sausages topped with sautéed onions and mounds of sauerkraut, but a girl’s gotta have some variety! I was trying to think about other ways that sausage is used and I instantly flashed back to the Sausage and Pepper Penne we served at the East Side Mario’s I worked at back in school. I decided on a pasta!
As I do with all my squash, I turned the oven on to 400F and threw the squash in whole as it was preheating, for 25 minutes. It has never exploded on me and it makes cutting it open WAY easier! After 25 minutes, cut in half width wise, scoop out the seeds and place cut side down in a pan. Roast for another 15-25 minutes until the skin gives slightly under pressure. Scrape noodles out with a fork!
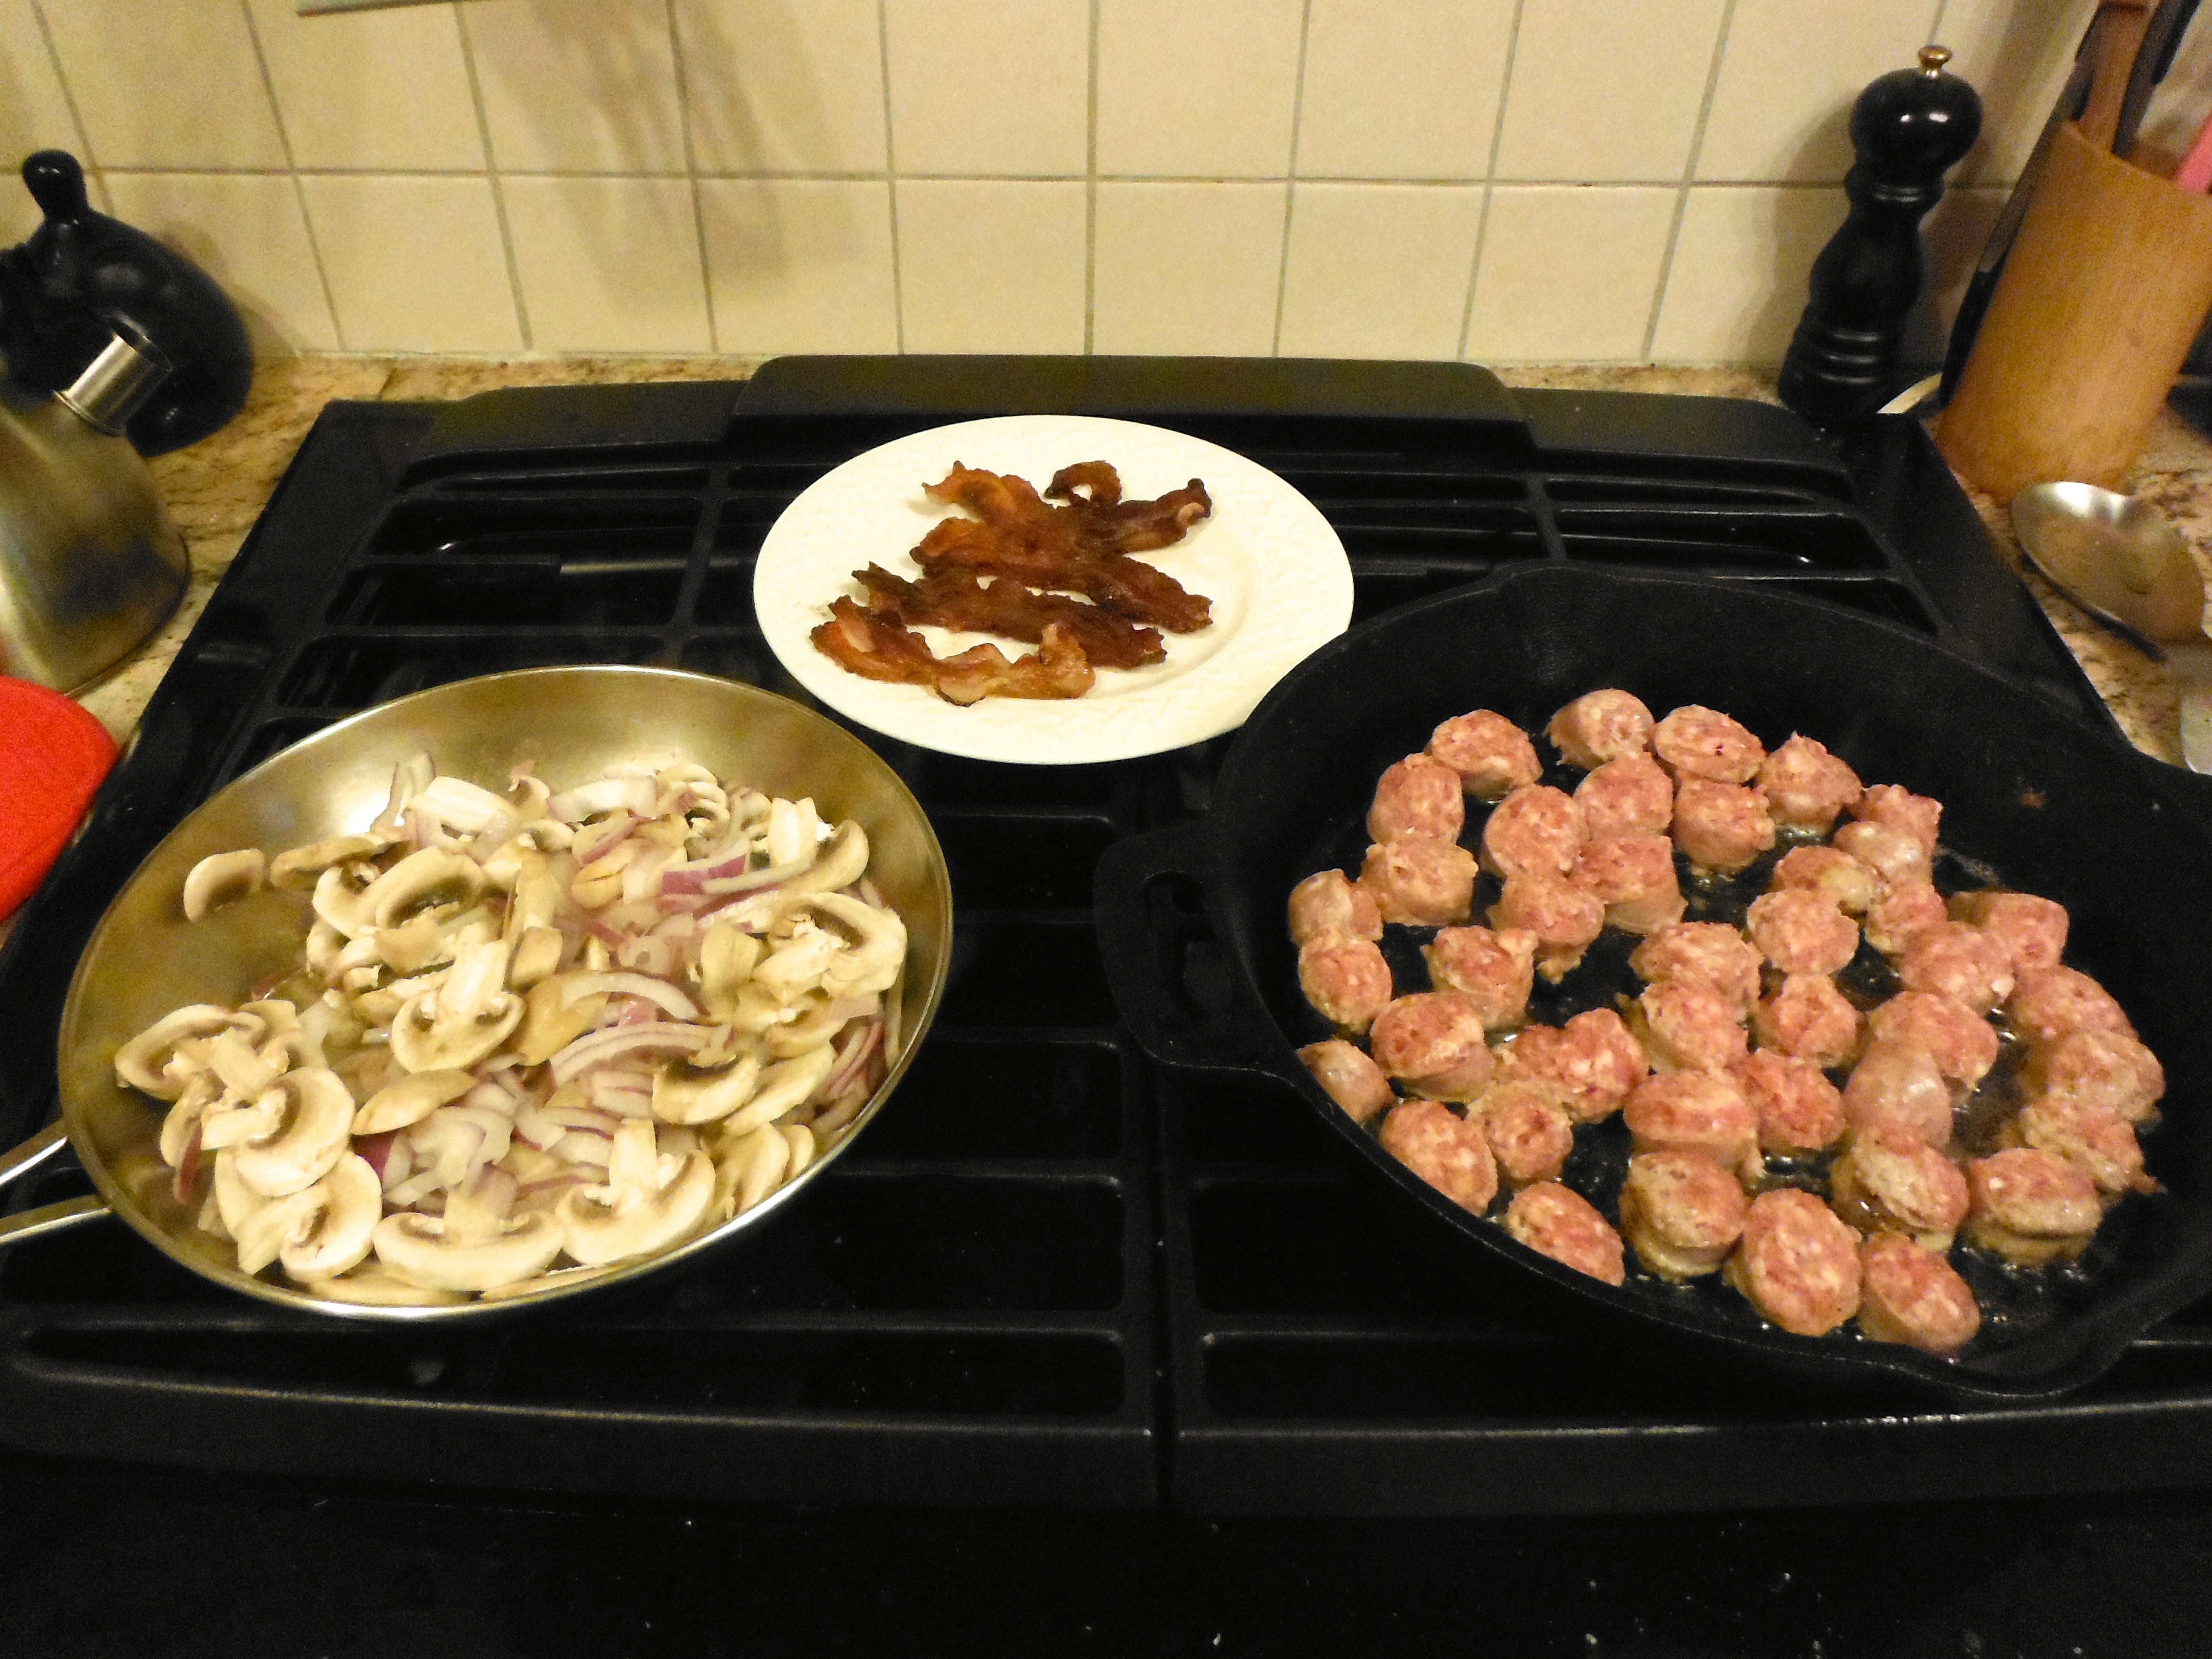
Cook the bacon, set it aside and sautée the veggies and sausage in the bacon grease.
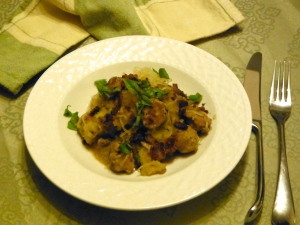
Toss sautéed veggies and sausage with spaghetti squash. Top with the bacon and fresh basil. Voila – Sausage & Mushroom Spaghetti (Squash)!
Sausage & Mushroom Spaghetti (Squash)
2014-10-30 15:48:45
Serves 6
Sausage & Mushroom Spaghetti (Squash) - an easy, low-carb pasta, jam-packed with healthy fats, protein and flavour!
Cook spaghetti squash - set the oven to 400F and throw the squash in whole. After 25 minutes pull the squash, slice it across the circumference, width wise and scoop out the seeds. Place the squash cut side down on a baking sheet and bake for another 15-25 minutes, until soft to the touch. Set aside until you're ready to assemble the pasta.
Cook the bacon until crispy. Chop into small pieces and set aside.
Pour half of the bacon grease into another pan. Add onion and mushrooms. Season with sea salt and pepper. Sautee.
Meanwhile, in the original pan, brown the sausage slices. Approximately 3-4 minutes per side.
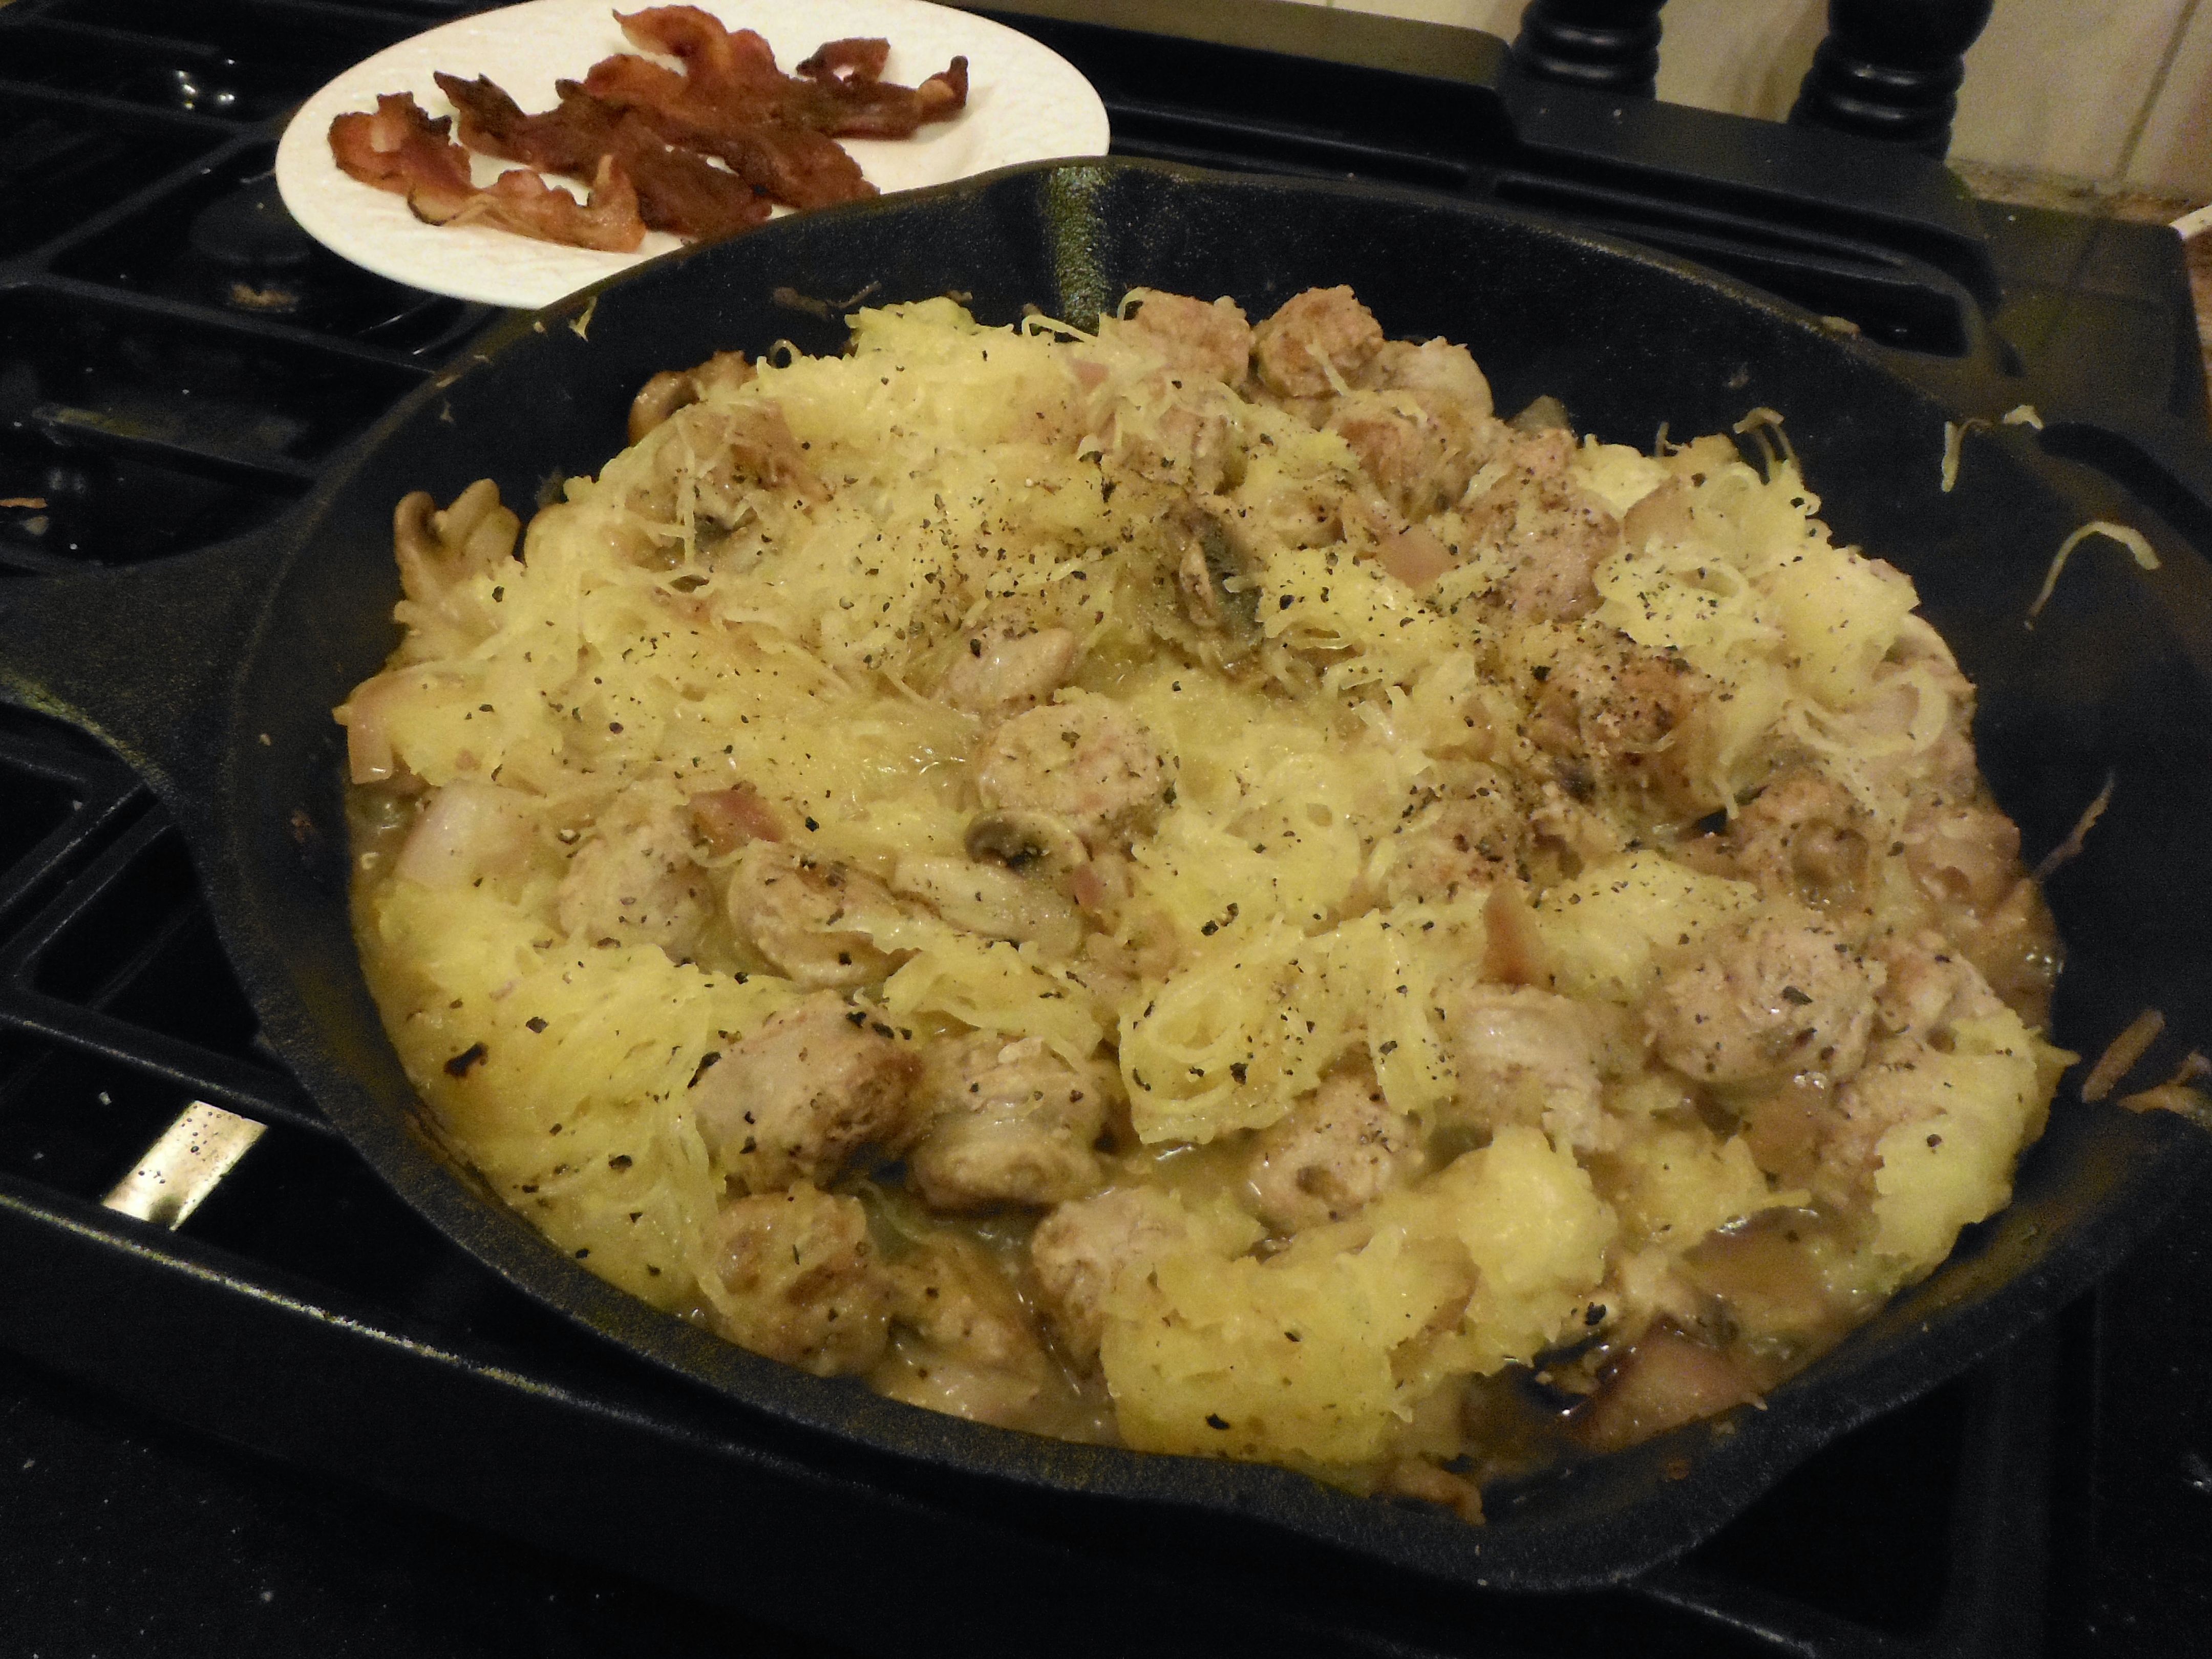
When the sausages are done, add the onion and mushrooms to the sausage pan. Using a fork, scrape the spaghetti squash into noodles into the pan. Season liberally with sea salt and pepper. Toss everything to combine well and distribute the yummy bacon grease.
Serve in pasta bowls topped with bacon and fresh basil.
Anyone else absolutely love nachos? I was a weird kid and actually kind of hated chips. There was one exception though – tortilla chips. Maybe it’s because I have such fond memories of ski vacations with my family…the 4 of us curling up together after a long day of skiing, watching NCAA basketball and sharing a bag of Tostitos. I don’t know what it is, but I can eat an entire bag of tortilla chips I love them so much!
Unfortunately corn is one of the riskiest foods to consume these days. While it’s technically gluten-free (and therefore used in practically every commercial gluten-free food product), it has 2 very serious properties.
1. The protein found in corn is incredibly similar to gluten, and as a result, is one of the top cross-reactors in the case of celiac disease. In plain english – if you’re sensitive, allergic or have an immune response to gluten, there is a fairly decent chance you might react to corn as well.
2. Corn has been aggressively genetically modified – and in an incredibly frightening way. Genetically modified corn has had the gene from the bacteria Bacillus thuringiensis inserted into it. This gene codes for the production of a pesticide. What this means is every single cell within the corn plant is secreting it’s own pesticides. Scary right? Well, it gets worse. The way this pesticide works is by damaging the digestive lining of the insect. This causes septicaemia (a blood infection) in the insect, which results in death. Have you read my post about Leaky Gut? This pesticide kills insects by creating leaky gut in them. Can you say terrifying? To be fair, there are no studies confirming the danger of Bt Corn. To be equally fair, there are no longterm studies proving the safety either. So pretty much, we are all the subjects in this study right now, which I am personally opting out of, thank you very much!
While I do enjoy some corn on the cob in the summer (most sweet corn is not Bt corn) and the occasional organic tortilla chip, I some how can’t ever seem to stop at a reasonable portion. And boy do I pay for it. So, I started looking for another option!
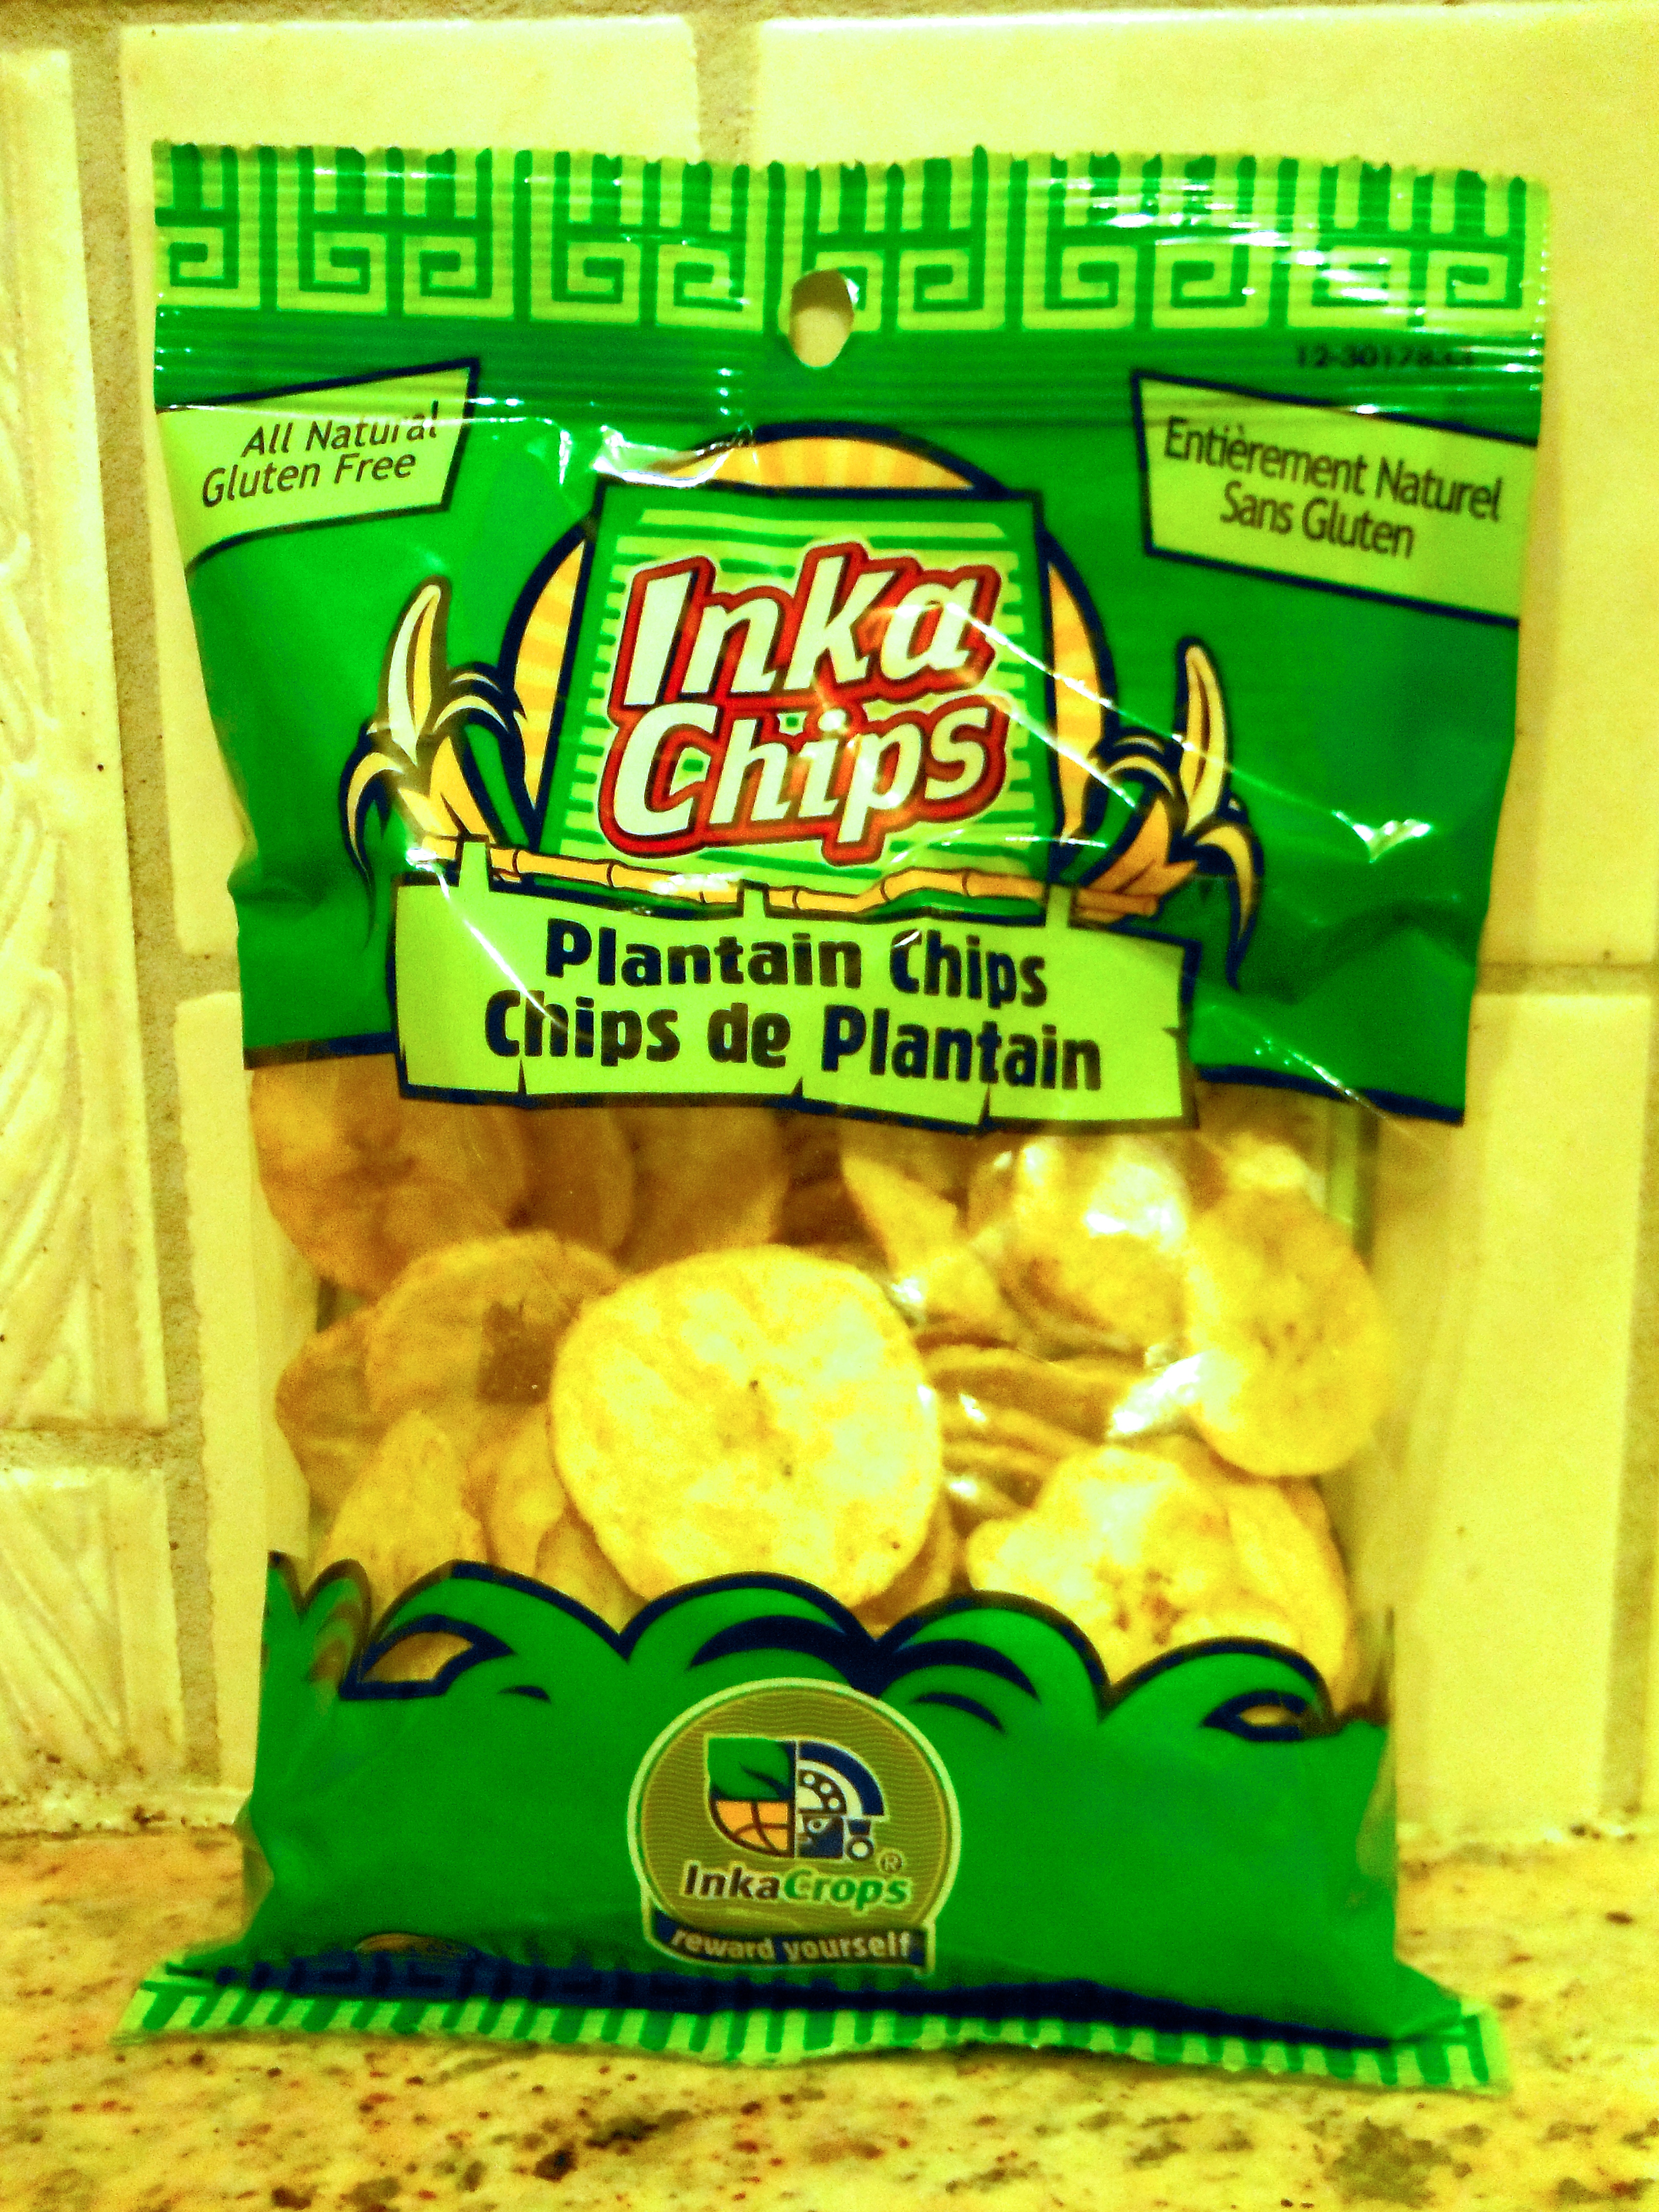
Enter: the plantain chip.
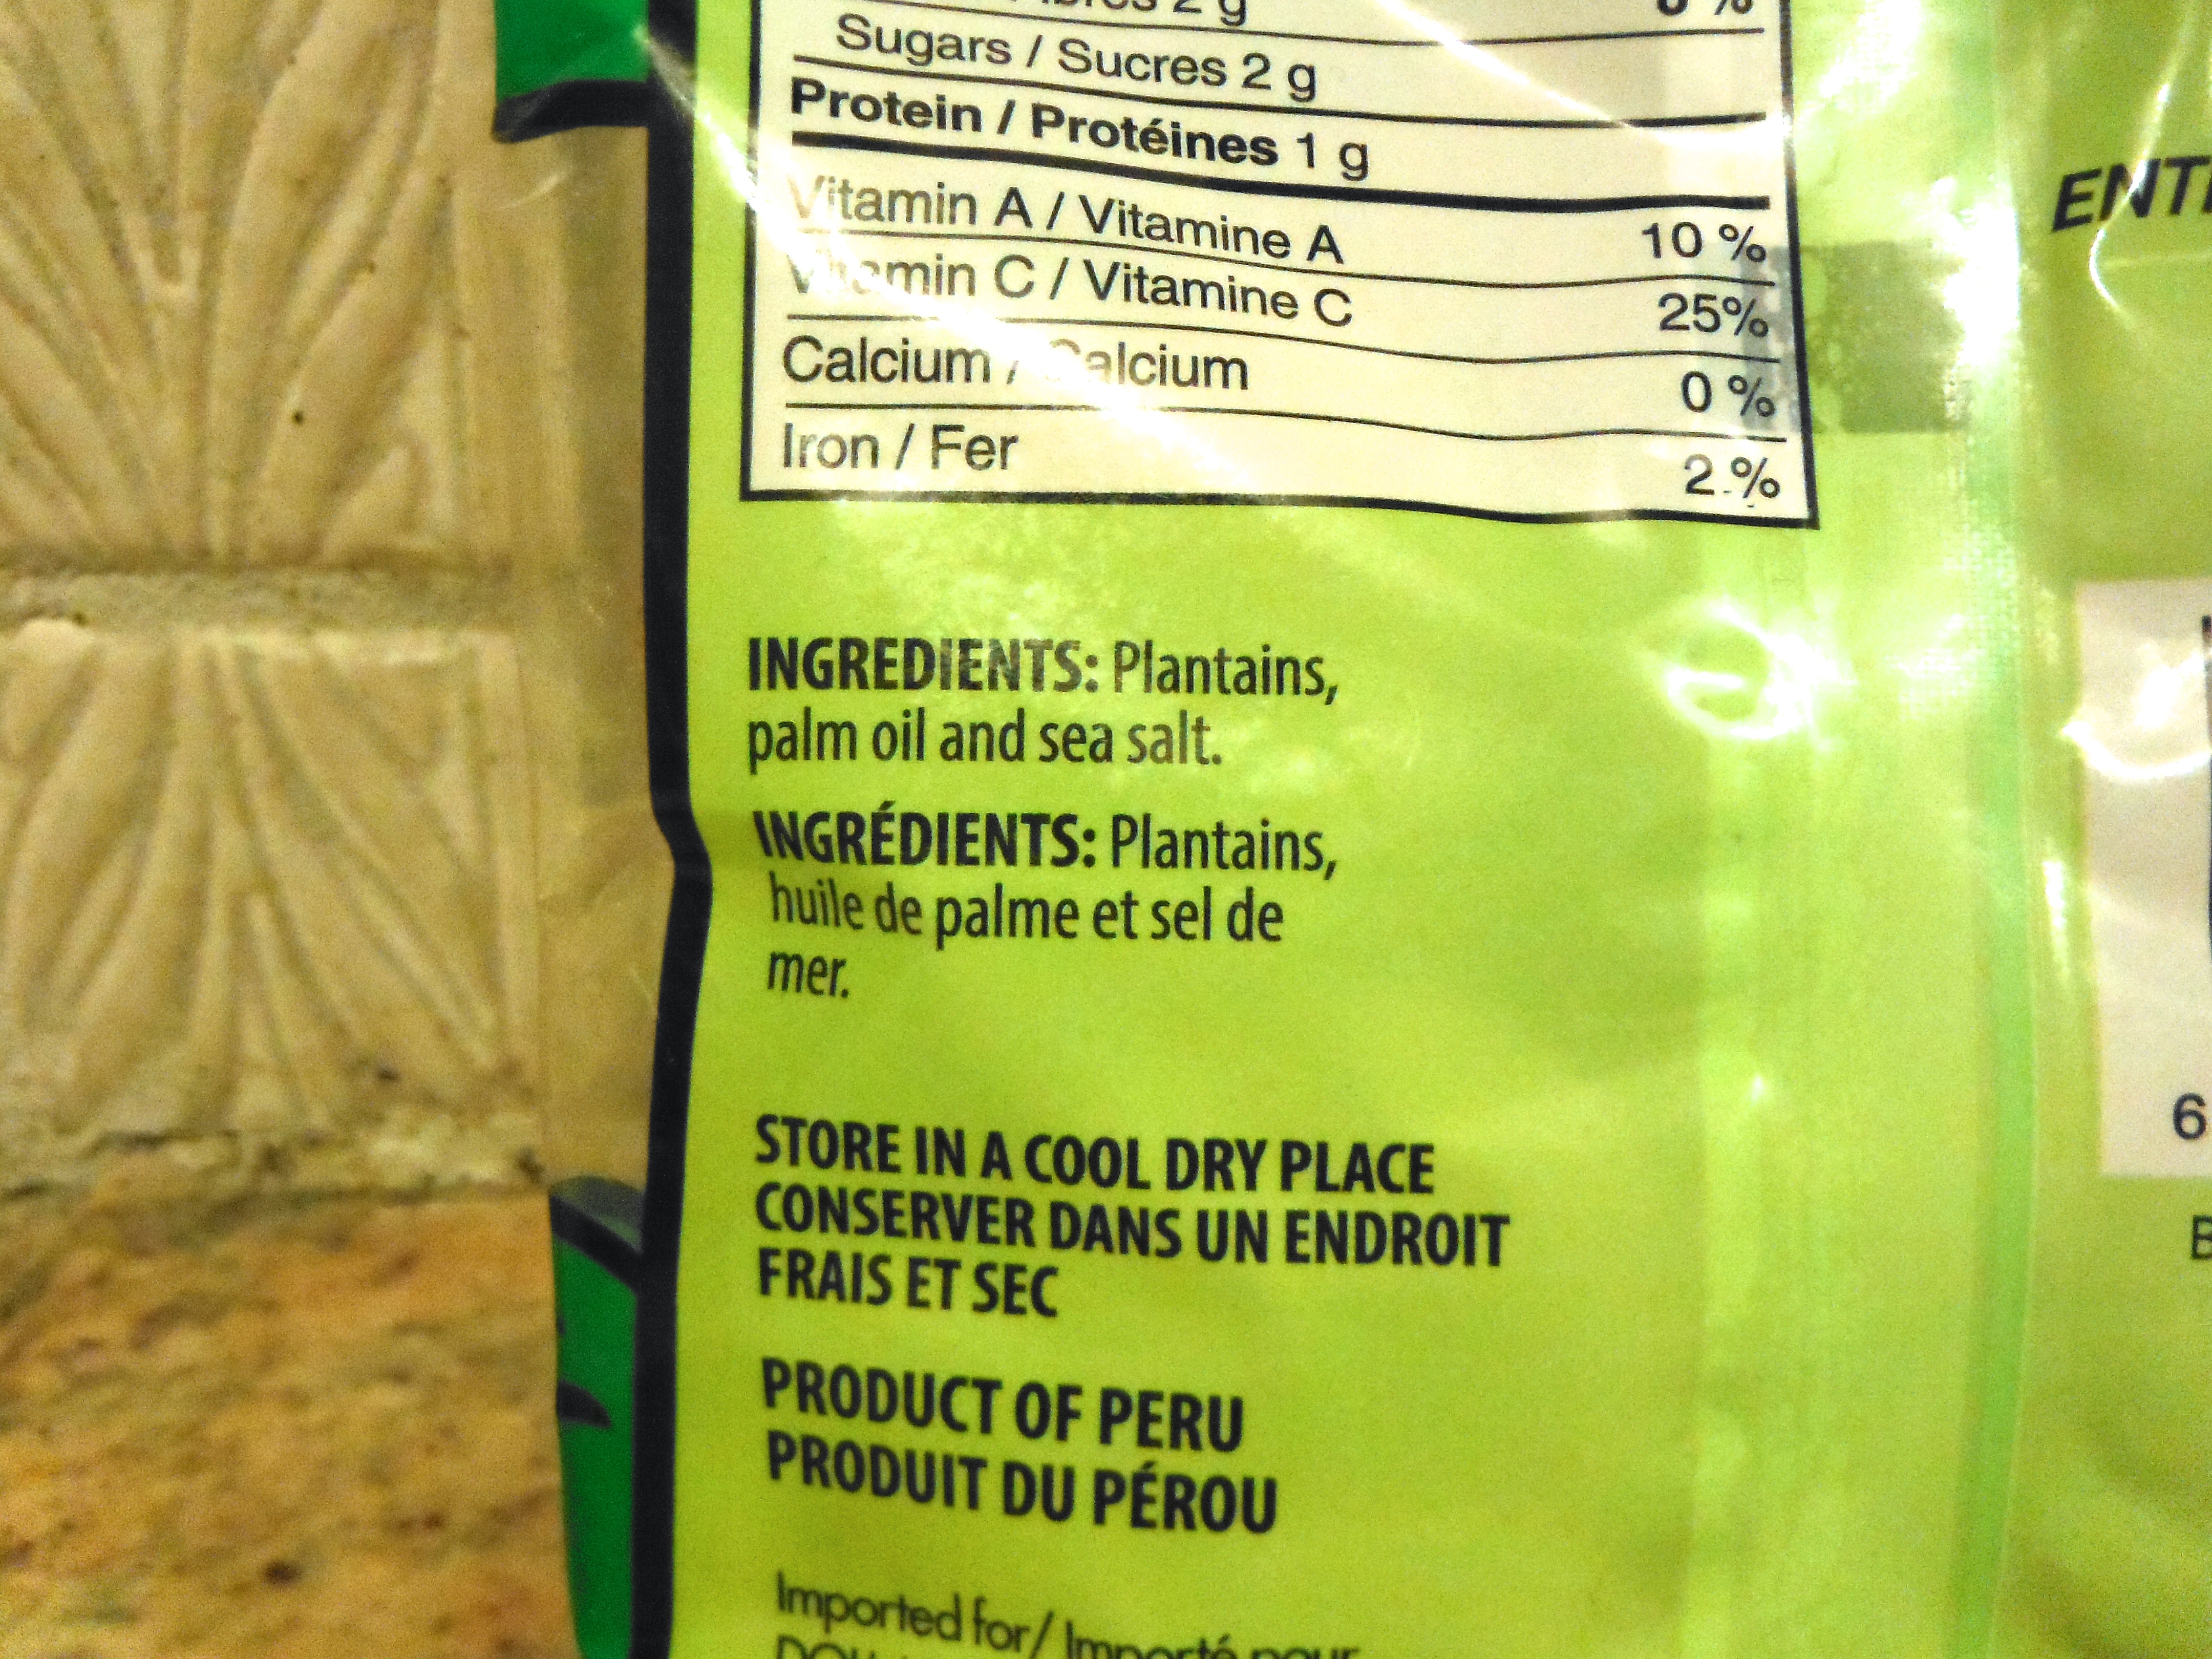
Oh man do I love plantains. I make pancakes and biscuits out of them; fry them up in coconut oil for breakfast or a side at dinner; and indulge in plantain chips on a semi-regular basis. They have a very low risk of being an allergen and are well tolerated by most people. They are naturally gluten-free, grain-free, corn-free (etc etc) and they are a fabulous prebiotic (ie. a food for your beneficial gut bacteria). The main problem with most plantain chips? They contain crappy, damaged, seed/crop oils that result in chronic inflammation in the body. That’s where this amazing brand comes in! Check out those ingredients: plantain, palm oil (a stable oil, like coconut oil) and salt! Winner!
Note: palm oil is not the most friendly oil to the environment. But let’s be scientifically fair when we talk about oils. Genetic modification, aggressive spraying with pesticides and mono-cropping all cause horrific damage to the environment as well. We just don’t talk about that because Big Ag makes a ton of moula off of seed oils (canola, soybean, corn), which utilize all 3 of these practices.
I’m pretty sure there are several brands of clean plantain chips in the USA, but in Canada, this is the only one I’ve ever found (ps. let me know if you know of another brand!). And the store? Dollarama! How funny is that? Any time I’m near a Dollarama, I go buy at least 10 bags of these guys. Oh man, they’re so delicious! Here’s how I turn them into nachos:
optional: raw cheddar cheese, goat cheddar or organic sour cream
Directions
1. Sautee a chopped onion, bell pepper and garlic for a few minutes. Add ground beef, seasonings, sea salt and pepper, and cook through. I usually make a full pound of ground beef and save some for leftovers or an egg scramble the next morning. I never measure my spices, so play around! If you want more specific measurements, check out my recipe for Lettuce Wrap Tacos.
2. Turn the oven to broil.
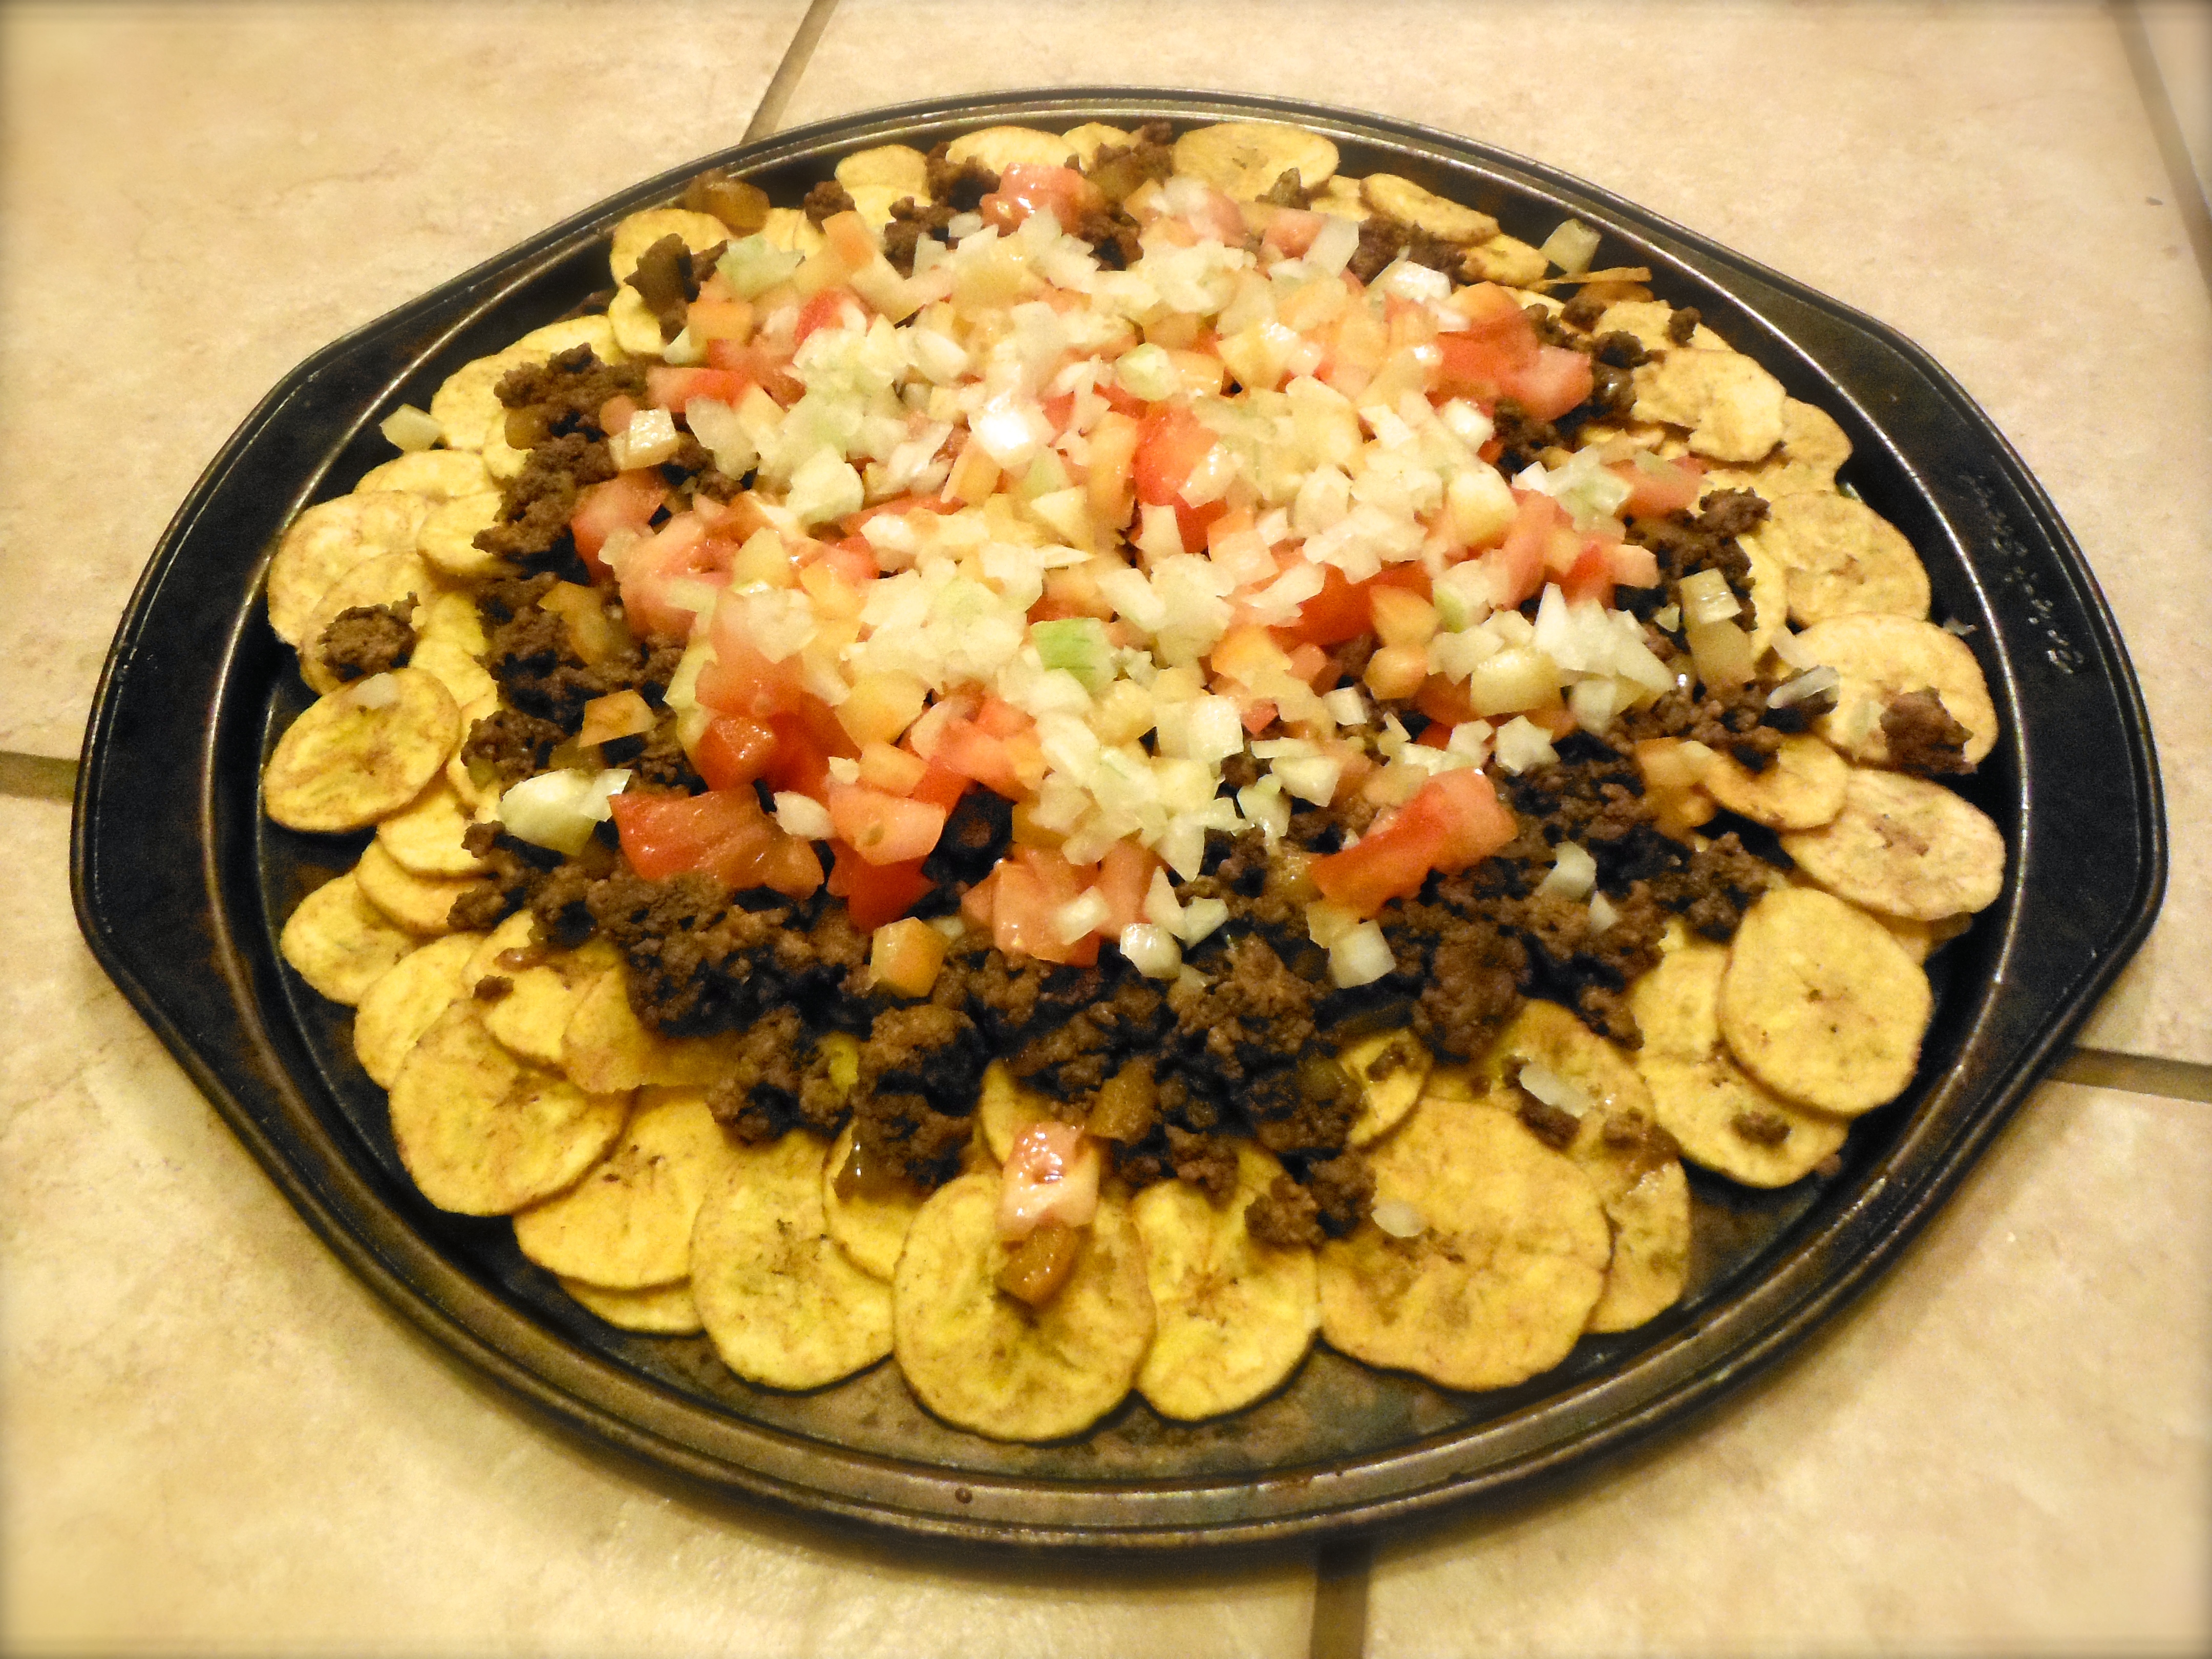
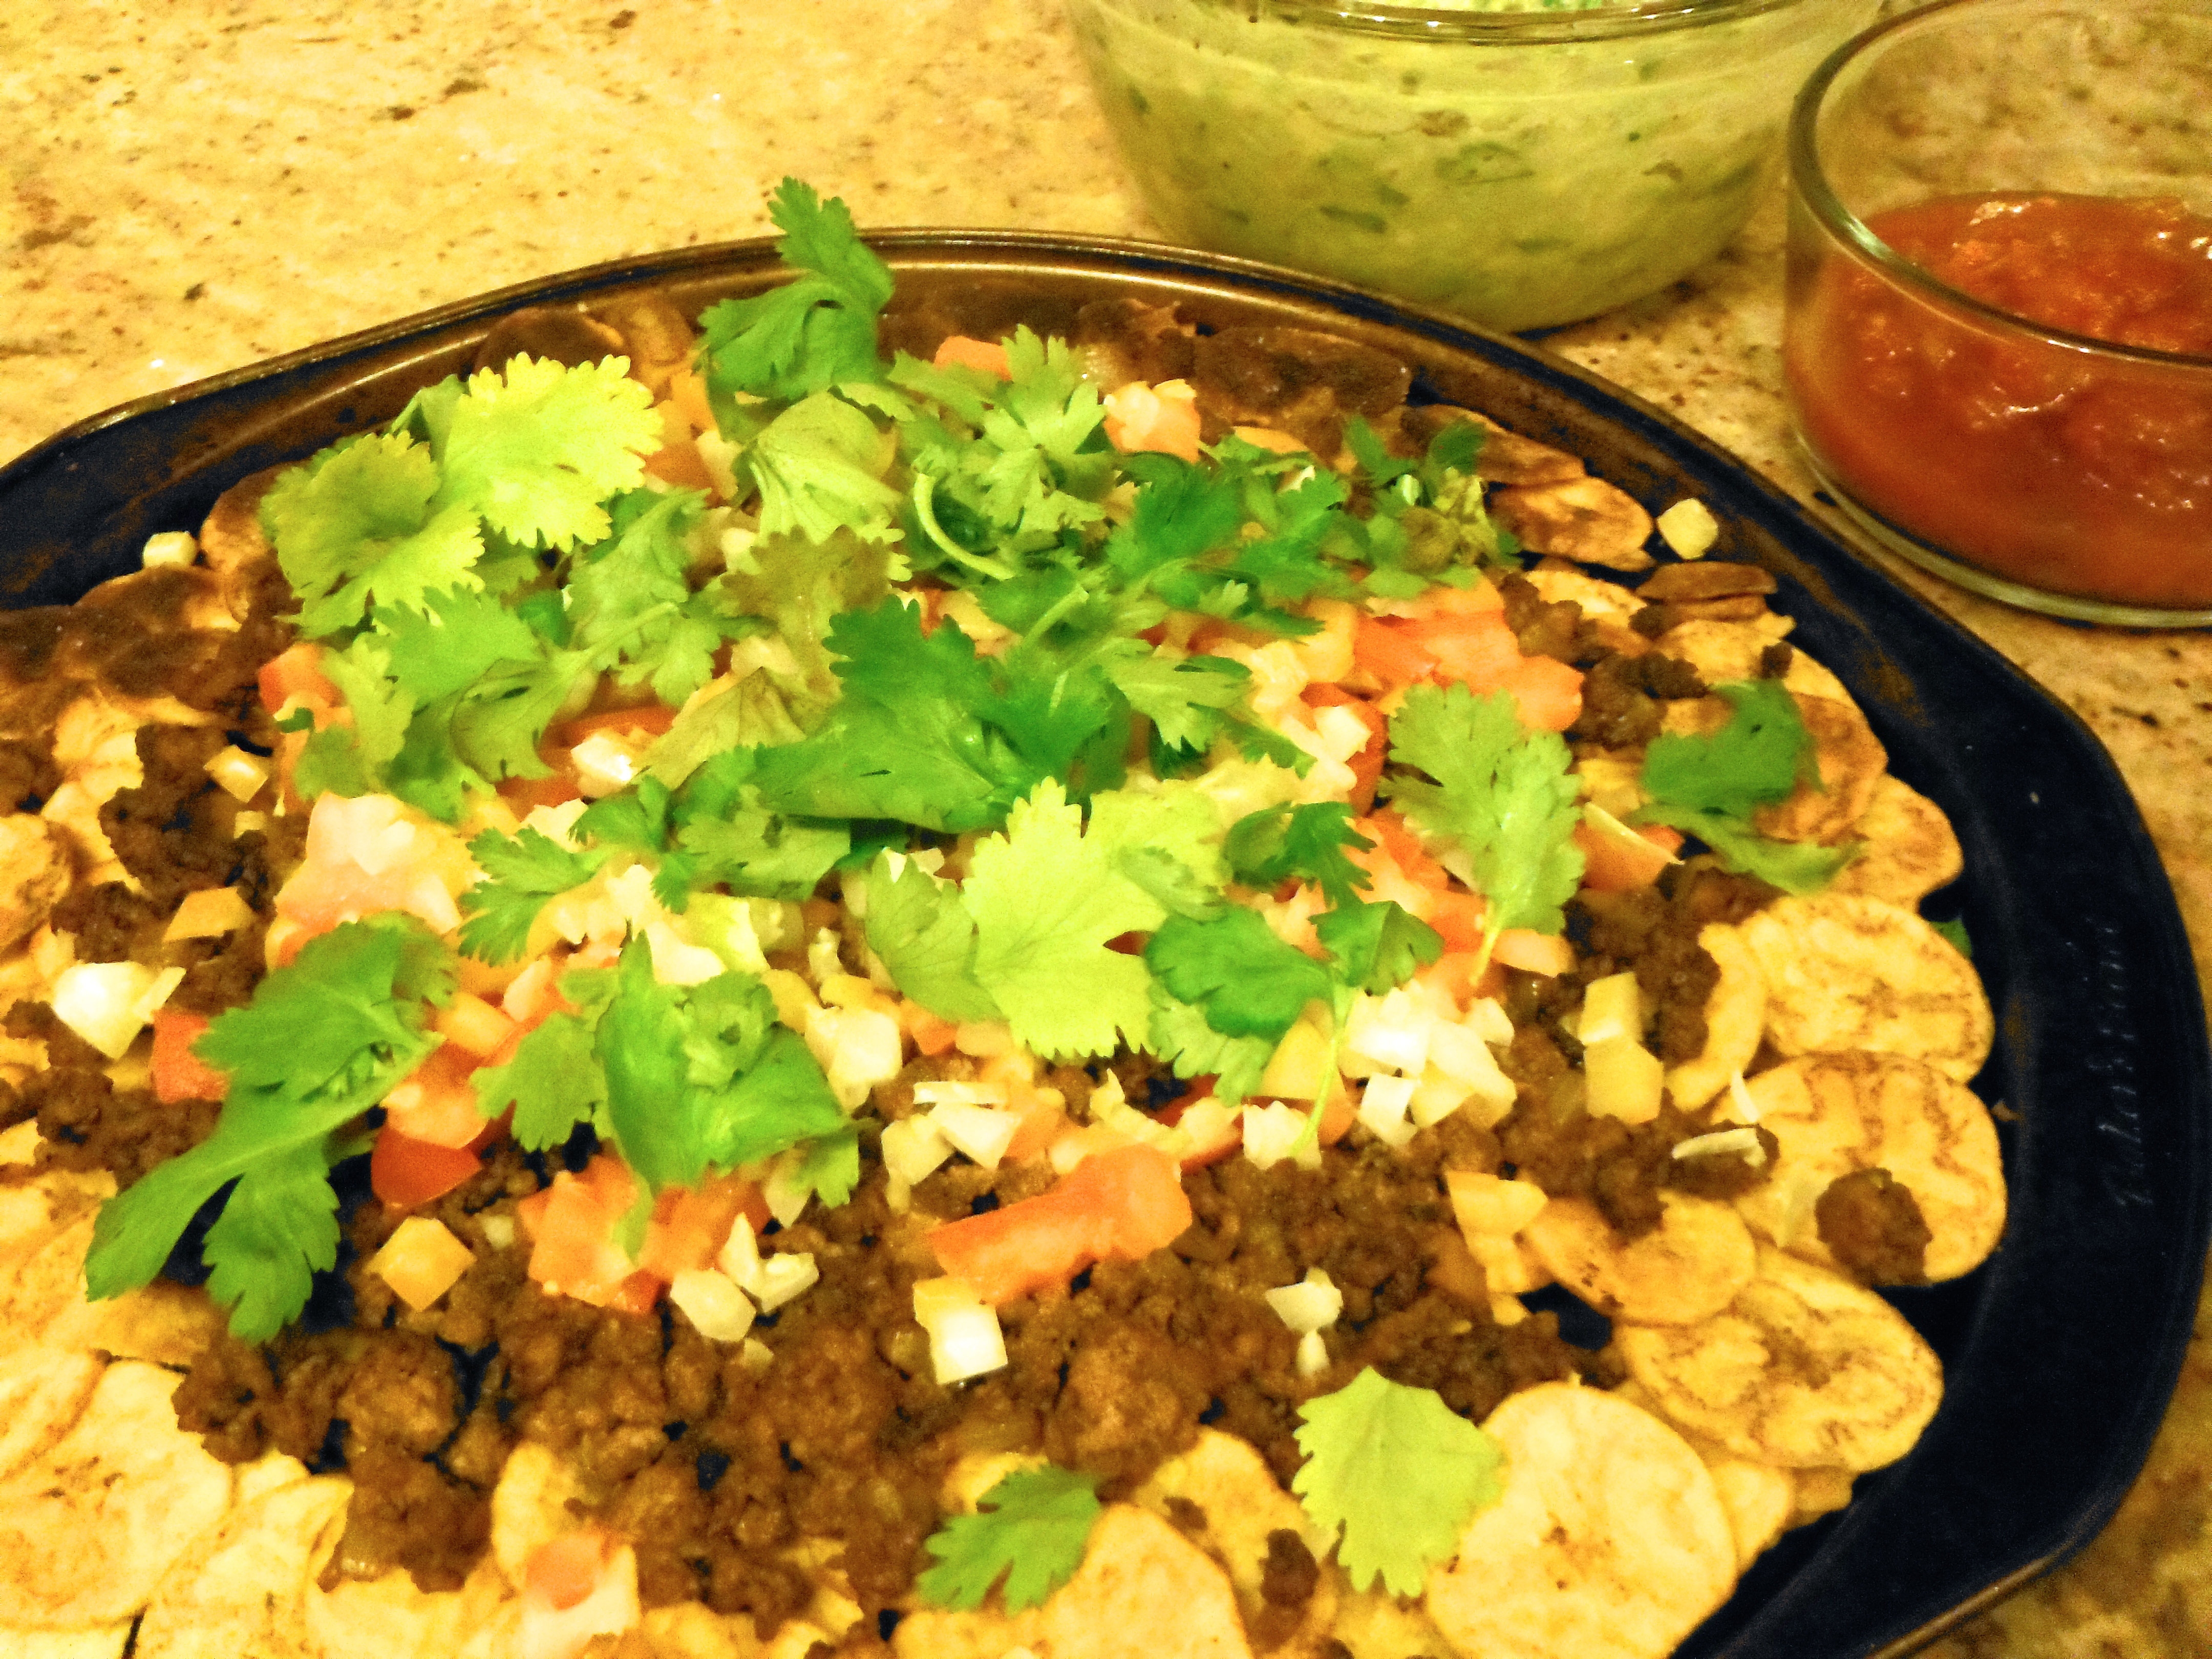
3. On a baking sheet, spread out the plantain chips evenly. Top with ground beef and additional toppings: red onion, diced bell pepper, tomatoes. Sprinkle with a little hot sauce. If you are using cheese, add it now.
4. Broil for 3-7 minutes, depending on the heat of your broiler. Don’t let it burn!
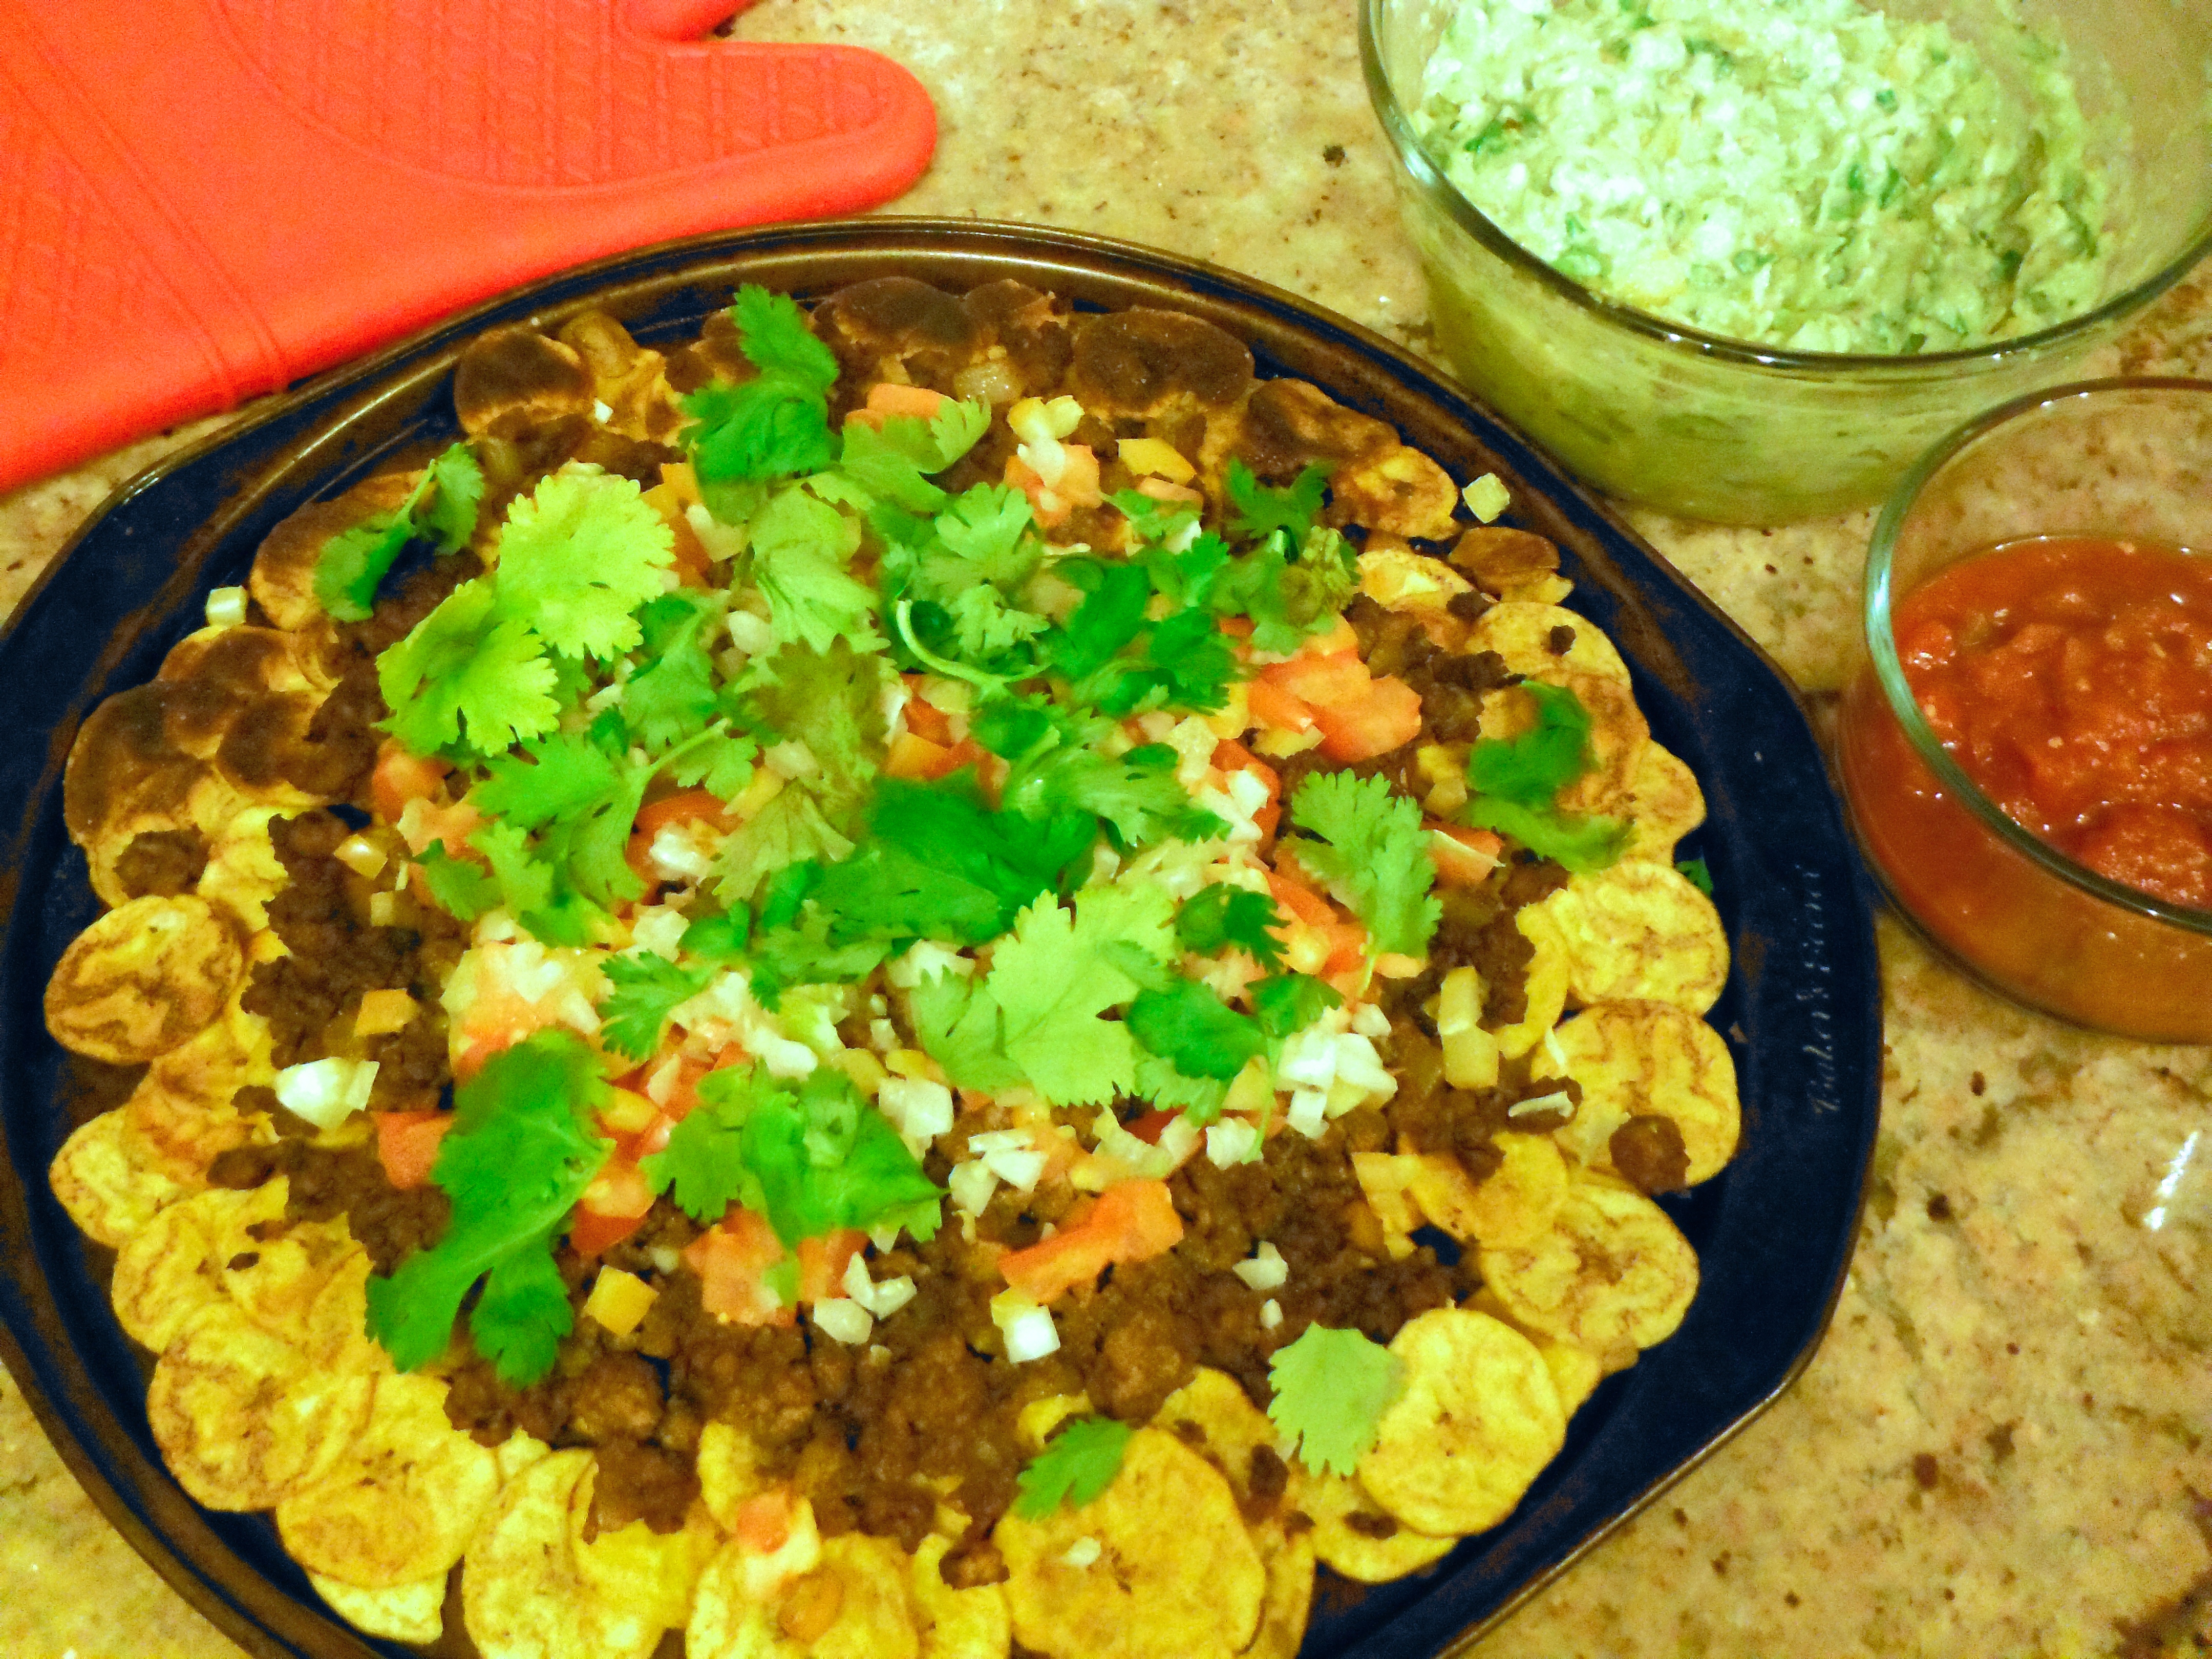
5. Top with cilantro and serve with guacamole and salsa.
You’ll notice that the ingredients list and directions are pretty open-ended. I did that on purpose, because I don’t actually follow a recipe. It’s pretty hard to mess this up, so get creative! What veggies do you like on your nachos? Olives, mushrooms, fresh lettuce? Throw them on there! Do you love black beans and tolerate them well? Give ’em a go as well. Have fun with this recipe!
Anyone who makes an effort to eat whole, real foods most (if not all) of the time, can totally sympathize with me when it comes to finding quick grab-and-go snacks. Sometimes I wish I was still in the dark about nutrition so I could grab a protein bar to throw in my purse for those just-in-case moments. Unfortunately, I still have not found a bar that I consider real food, so homemade snacks are my only option. The one exception are Larabars, which I do enjoy, but I find they’re very sweet and mostly dried fruit. Since they range from 3-5g of protein per bar, I don’t really classify them as high protein snacks. When you start to get into the actual high-protein snacks 3 things happen:
They start using whey (dairy) which I am allergic to.
They start adding all sorts of other garbage to make it taste remotely ok.
If they are striving for a “clean” bar, they use stevia (which messes up my stomach) and all sorts of grains, which can be problematic for some.
Nuts and seeds don’t cut it either. While they have some protein in them, they are mostly fat. Which is a good thing! But can be easily overdone and a lot of people don’t find them that satisfying. I know I don’t. I can bang back handfuls of nuts in a short period of time – which usually makes me feel pretty darn sick. But if I limit myself to a small portion, it really does not seem to do the trick.
So what options are there? I can’t do dairy so yogurt and cottage cheese are out. Beans are a no go for me – but they’re not really a nutrient dense protein source anyway. Protein powders – well there’s a time and a place for them, they’re heavily processed, very few have clean ingredients and those that are often have stevia (darn stomach). For the longest time, the only protein-dominant snack I could think of was eggs. Hard boiled eggs are still one of my go-to’s for a quick protein source that requires minimal refrigeration. But honestly, how many eggs can a girl eat? Most days I have 2-3 eggs for breakfast, and I don’t know what it is, but that usually seems to be my limit.
When I really started getting into the real, whole foods scene, I began seeing some incredible store-bought snacks that bloggers and instagrammers were raving about. Epic Bars, Exo Bars, Steves Paleo Goods, Sophia’s Survival Food – all of these would actually work within my food options! I was stoked, but soon learned that these products are only available in the US. You can have them shipped to Canada, but for a hefty fee, so I decided to do what I always do…make my own!!
Homemade beef jerky is actually an incredibly easy process – it just takes a bit of time! My first inspiration was this great tutorial for homemade jerky over on The Paleo Mom. I made my first 2 batches of jerky following this method and was hooked.
http://instagram.com/p/qHdbEWC9gL/?modal=true
I loved having jerky in the cupboard for so many reasons! It was perfect for long days at the office, days where I don’t have any leftovers for lunch, road trips, vacations, on airplanes, days when you are out and about all day long and even times when you might be eating with other people and there are not many options for you due to food sensitivities, or what have you. I could just throw it in my purse and not worry about it!
The only problem was it took so darn long in the oven. There were very few days that I could actually dedicate to the 7+ hours required to be at home. So I made a purchase that I swore I would never need – a dehydrator! I bought it used so it was a reasonable investment that has paid for itself over and over again! Now I make jerky every time I get a meat delivery, and while we try to save it for times of need, it rarely lasts us a week because it’s so freakin delicious!
Homemade Beef Jerky
The cut of beef is the most important part. You want a large piece of meat that has very little fat on it. Or if there is fat, that it is on the outside and easy to remove. Fat goes rancid pretty easily, so if there is fat on your jerky, it decreases the shelf life. This is the only time I recommend avoiding the marbled meat options! I did lots of research, but really struggled to know what to purchase because the names and cuts of the animal seem to vary dramatically between countries! I started experimenting and have now tried a few different cuts. Flank steak had a bit too much marbling. Brisket was good, but I was pretty devastated getting rid of the huge layer of fat that ran through the middle of the meat. The third time was the charm. I tried a blade roast from our favourite grass-fed meat delivery team – Brooker’s Meat – and it’s now my jerky cut of choice! I usually make 2 different flavours, to keep it interesting.
Ingredients
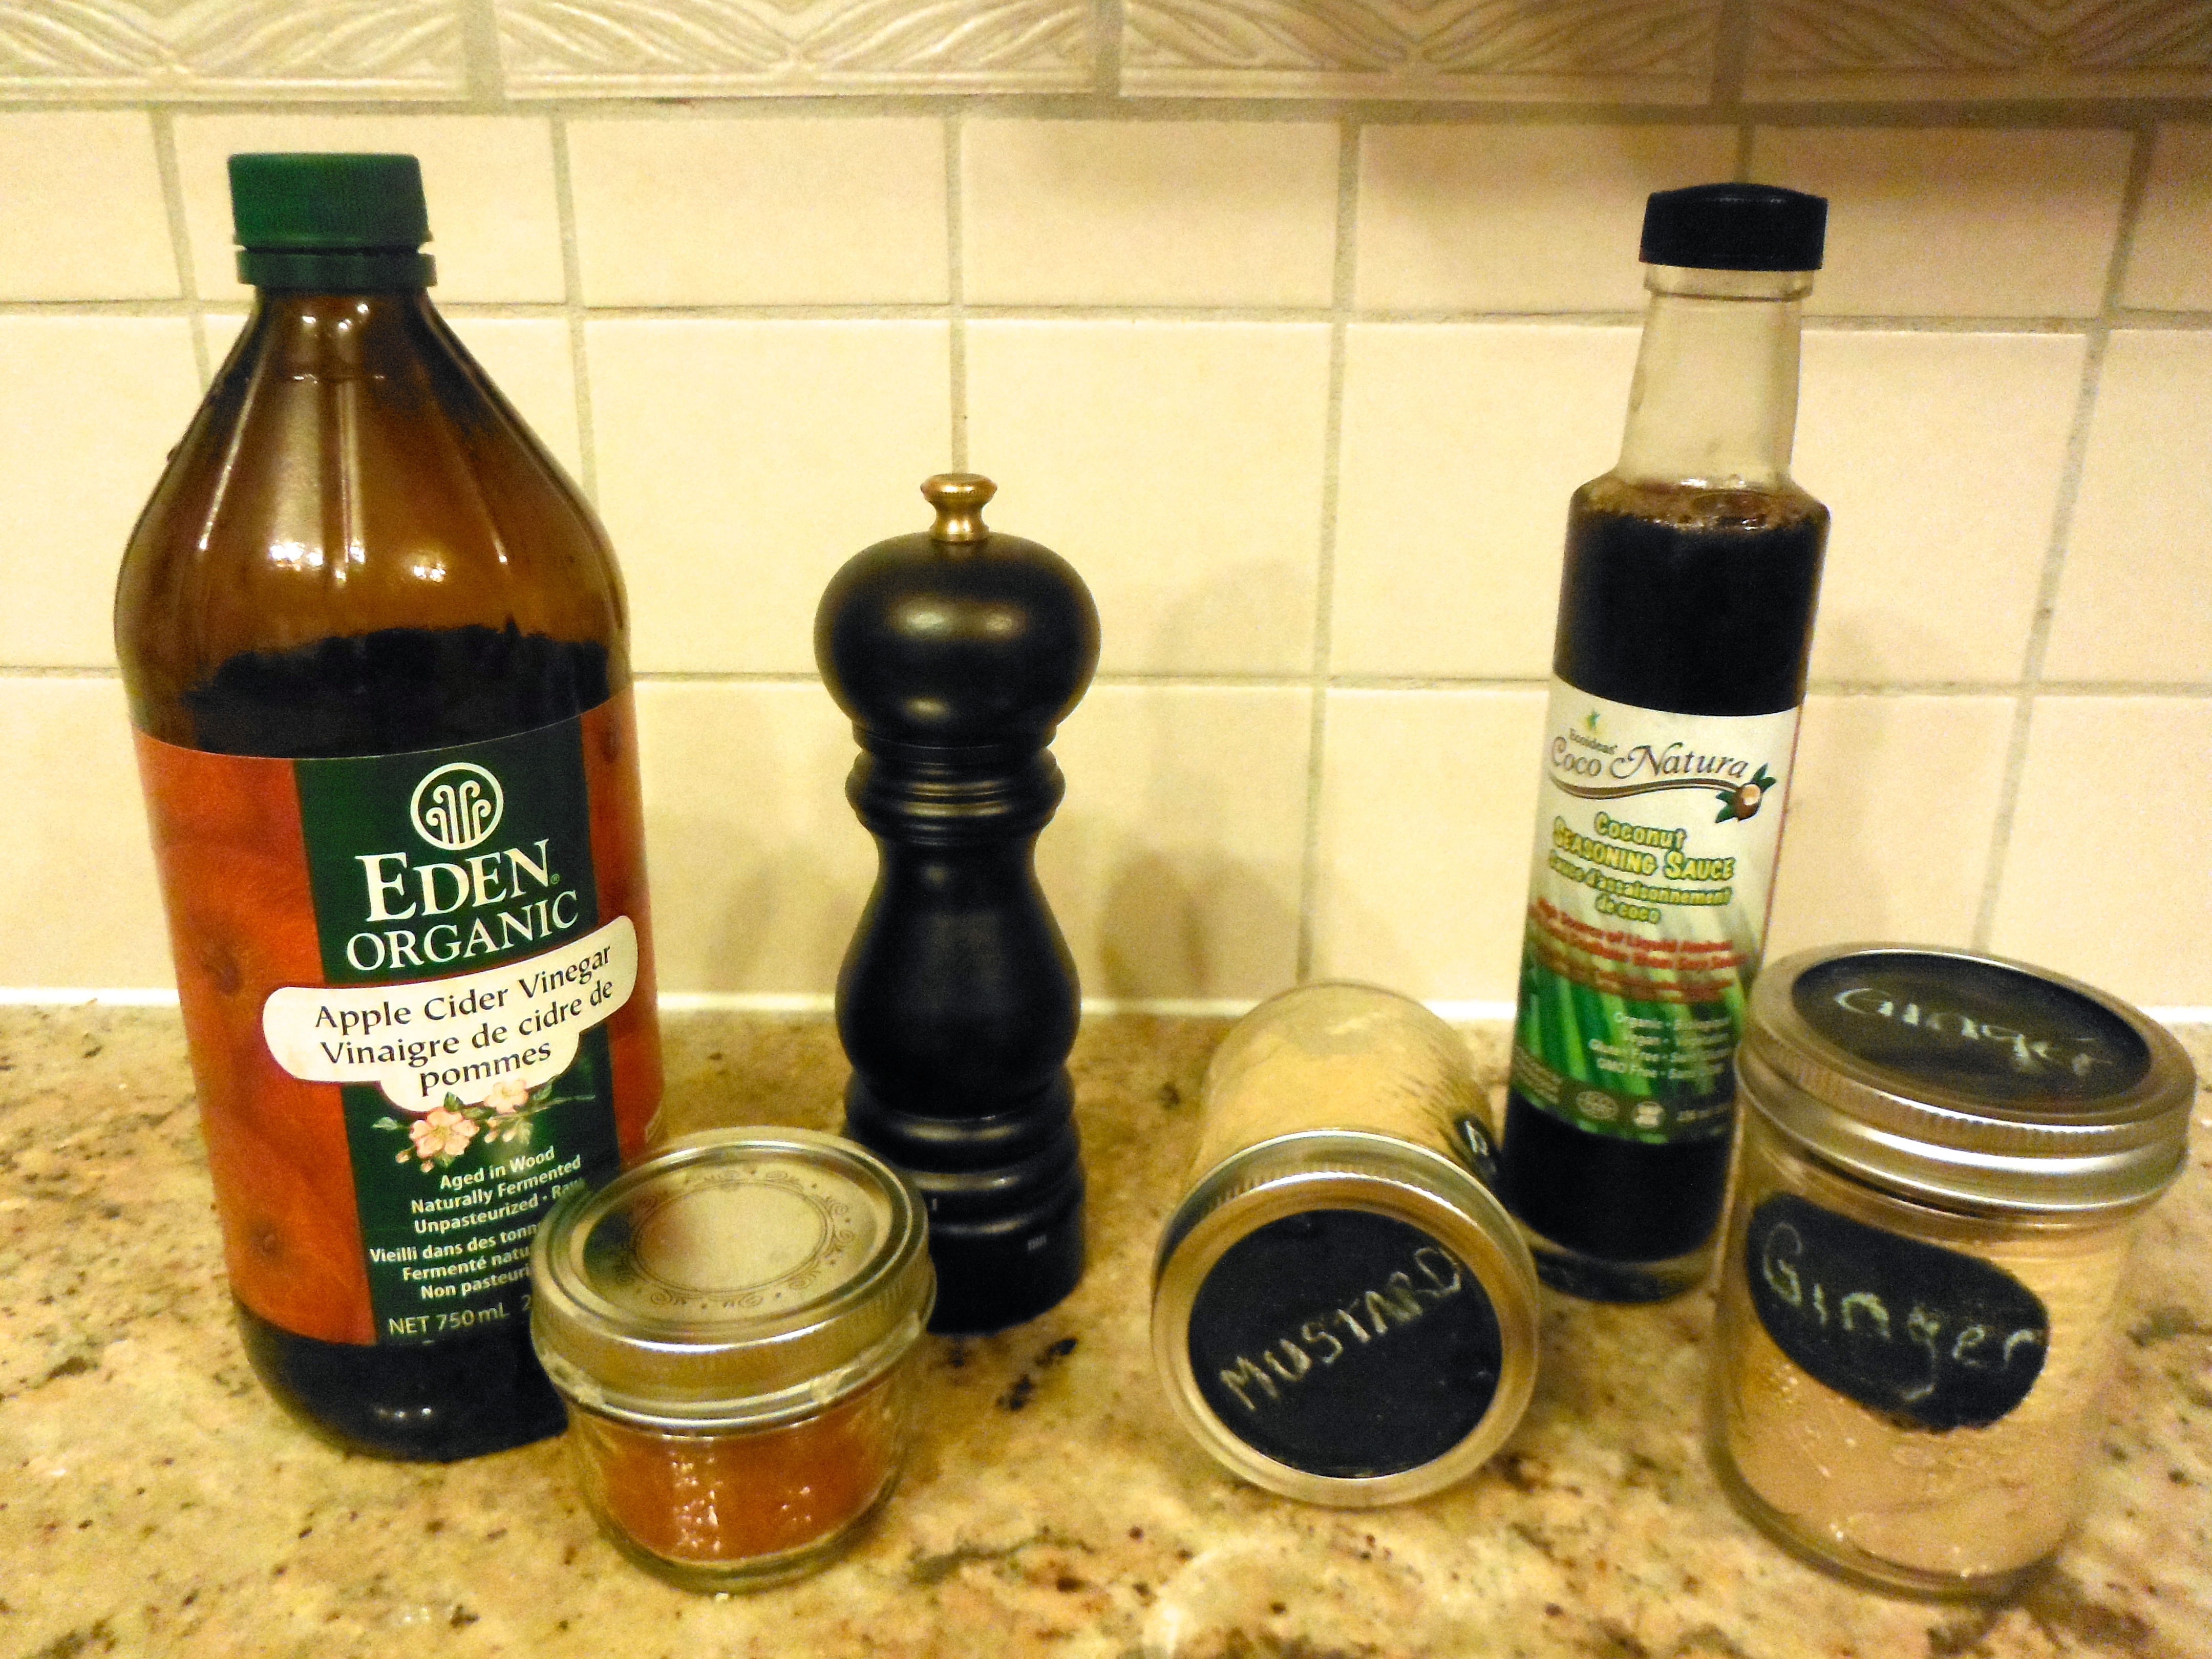
1 grass-fed Blade Roast (mine was 3.72 lbs and cost $27.86)
¼ cup coconut seasoning sauce(called coconut aminos in the USA. Alternatively, use gluten-free tamari or soy sauce) ½ tsp mustard powder 1½ tsp ginger powder
Sea salt, liberal amounts.
NOTE: Paprika is a nightshade, so may need to be avoided by some people. The coconut seasoning, mustard and ginger batch is nightshade free. If following the autoiommune protocol strictly, eliminate the mustard powder because it is made from a seed.
Directions
Meat is easier to cut when it’s on it’s way to frozen. So if previously frozen, let thaw in the fridge and slice when it’s still slightly firm. Alternatively, freeze for 30-60 minutes before starting to make cutting easier.
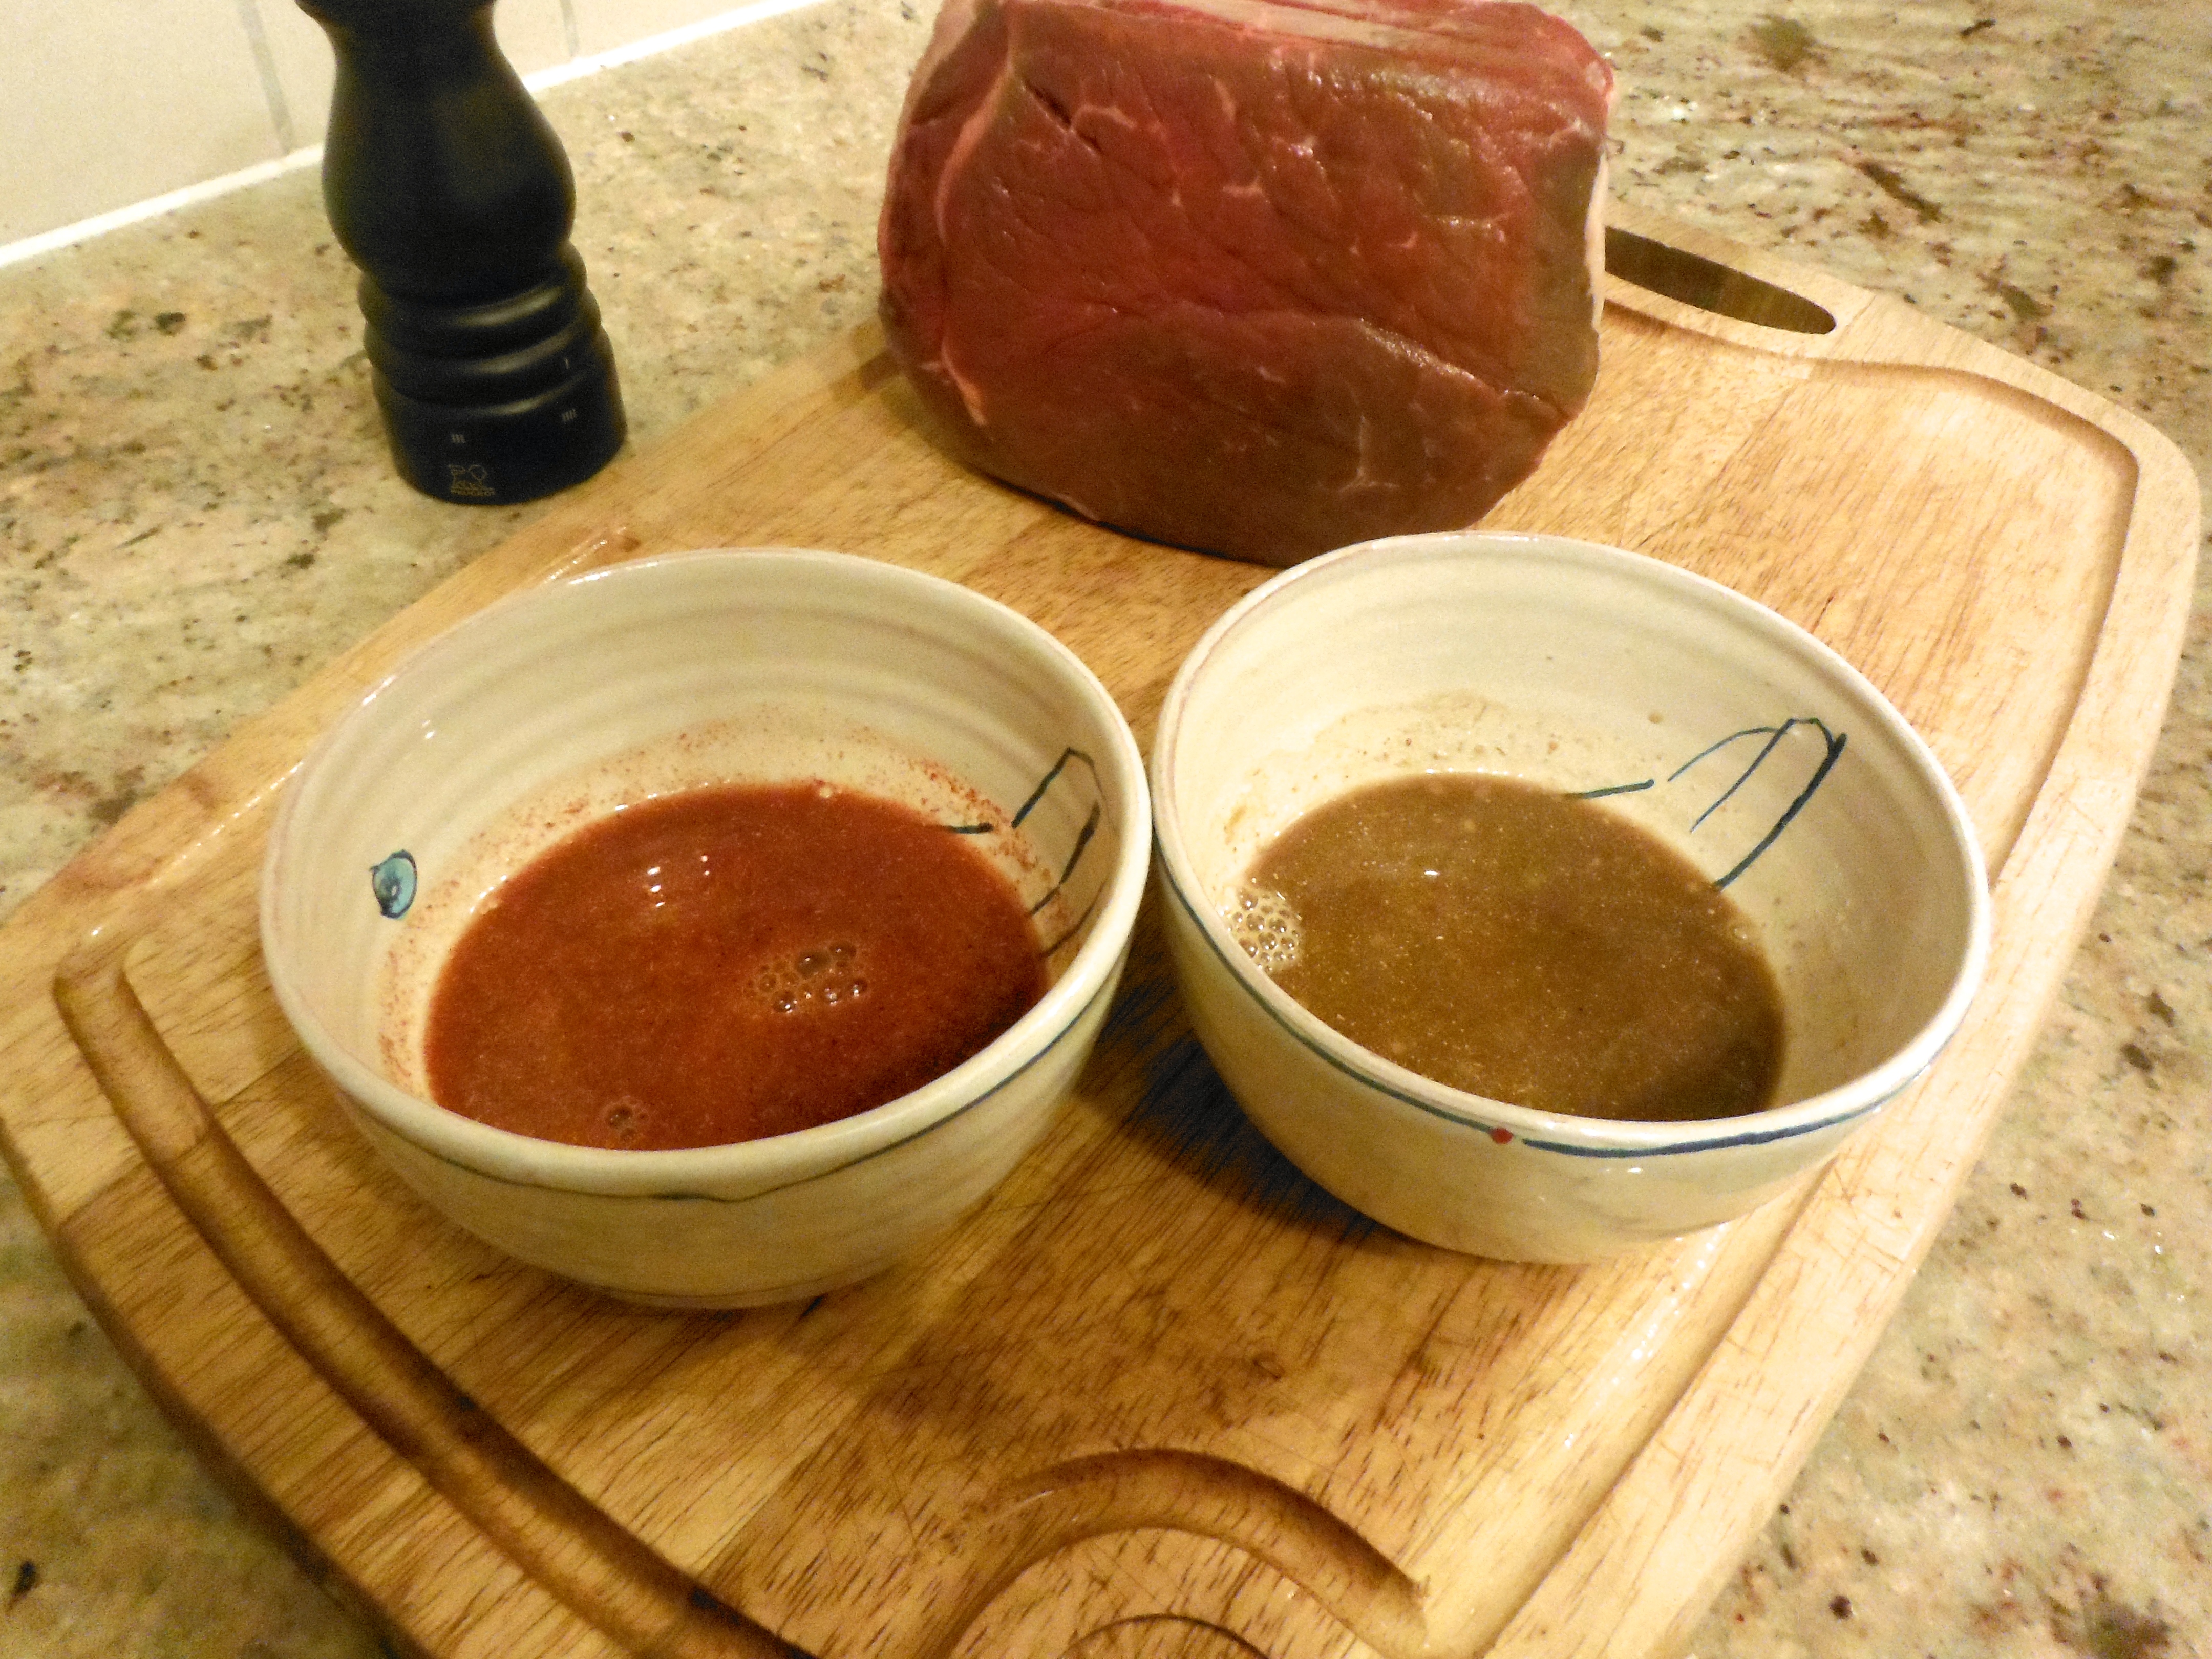
Combine the apple cider vinegar and hot paprika in one small bowl. Mix thoroughly. Combine the coconut seasoning (or tamari), mustard and ginger in another small bowl. Mix throughly.
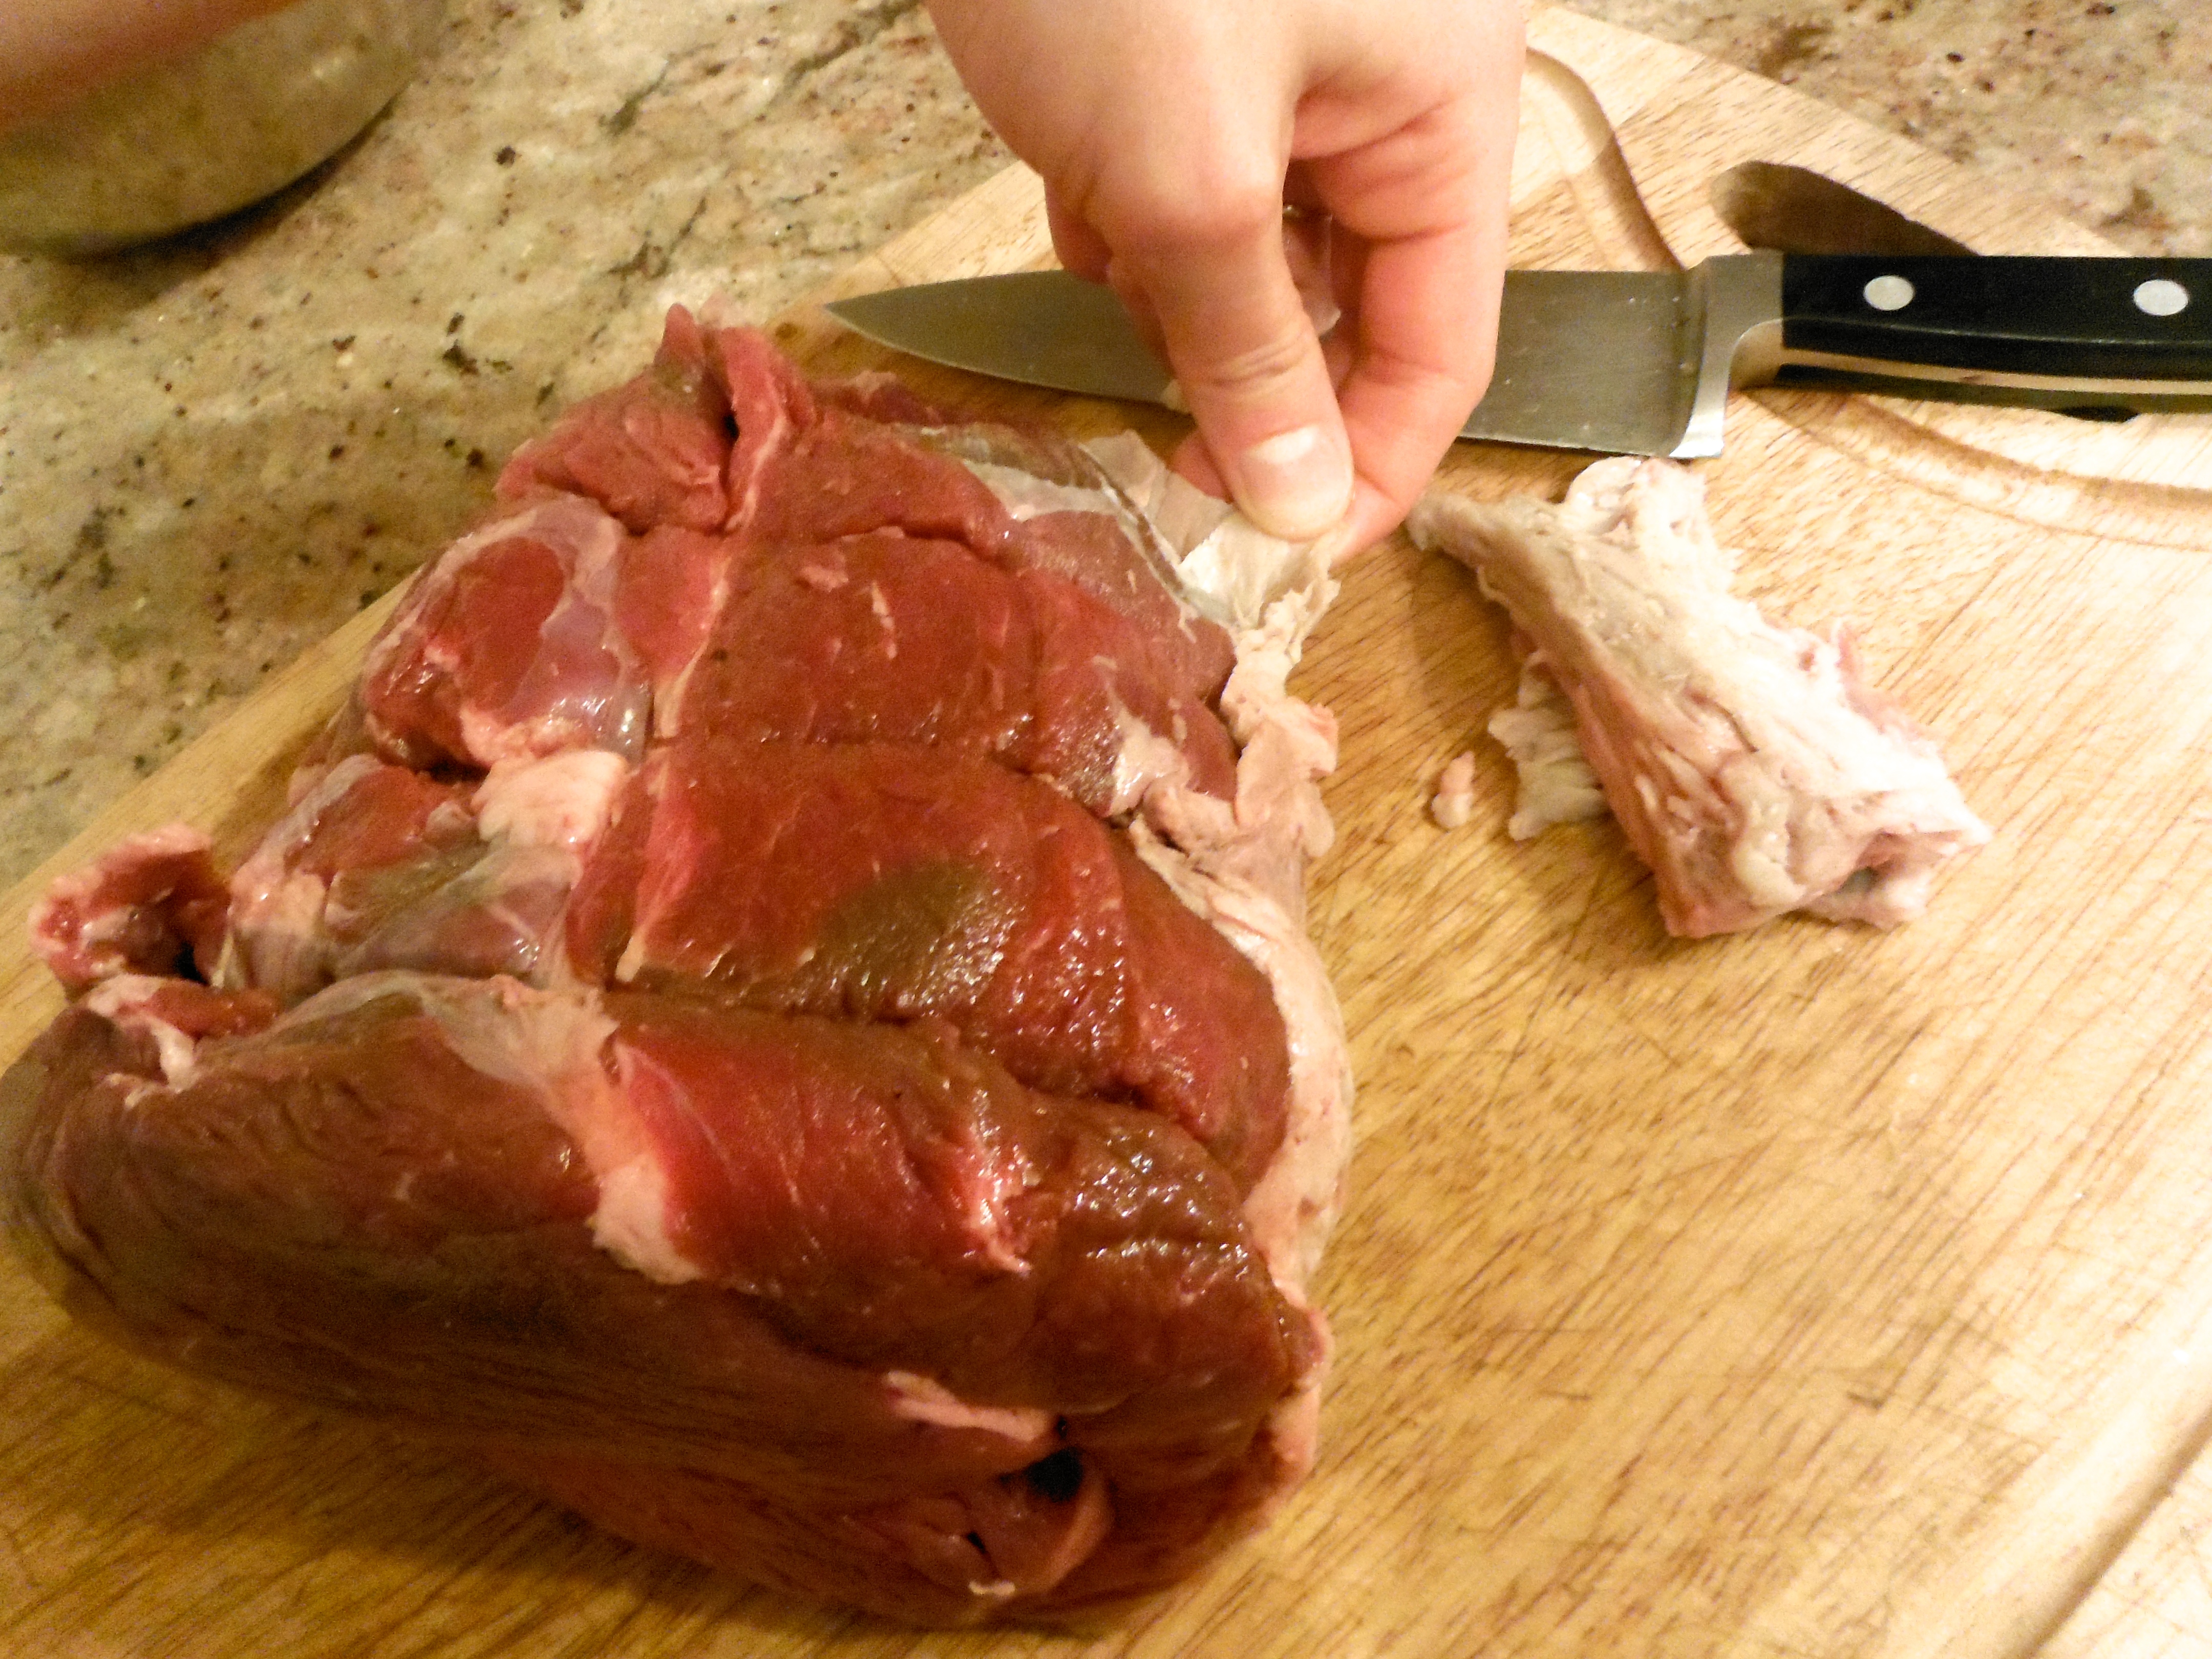
Prepare your cut of beef. Remove as much of the fat as possible.
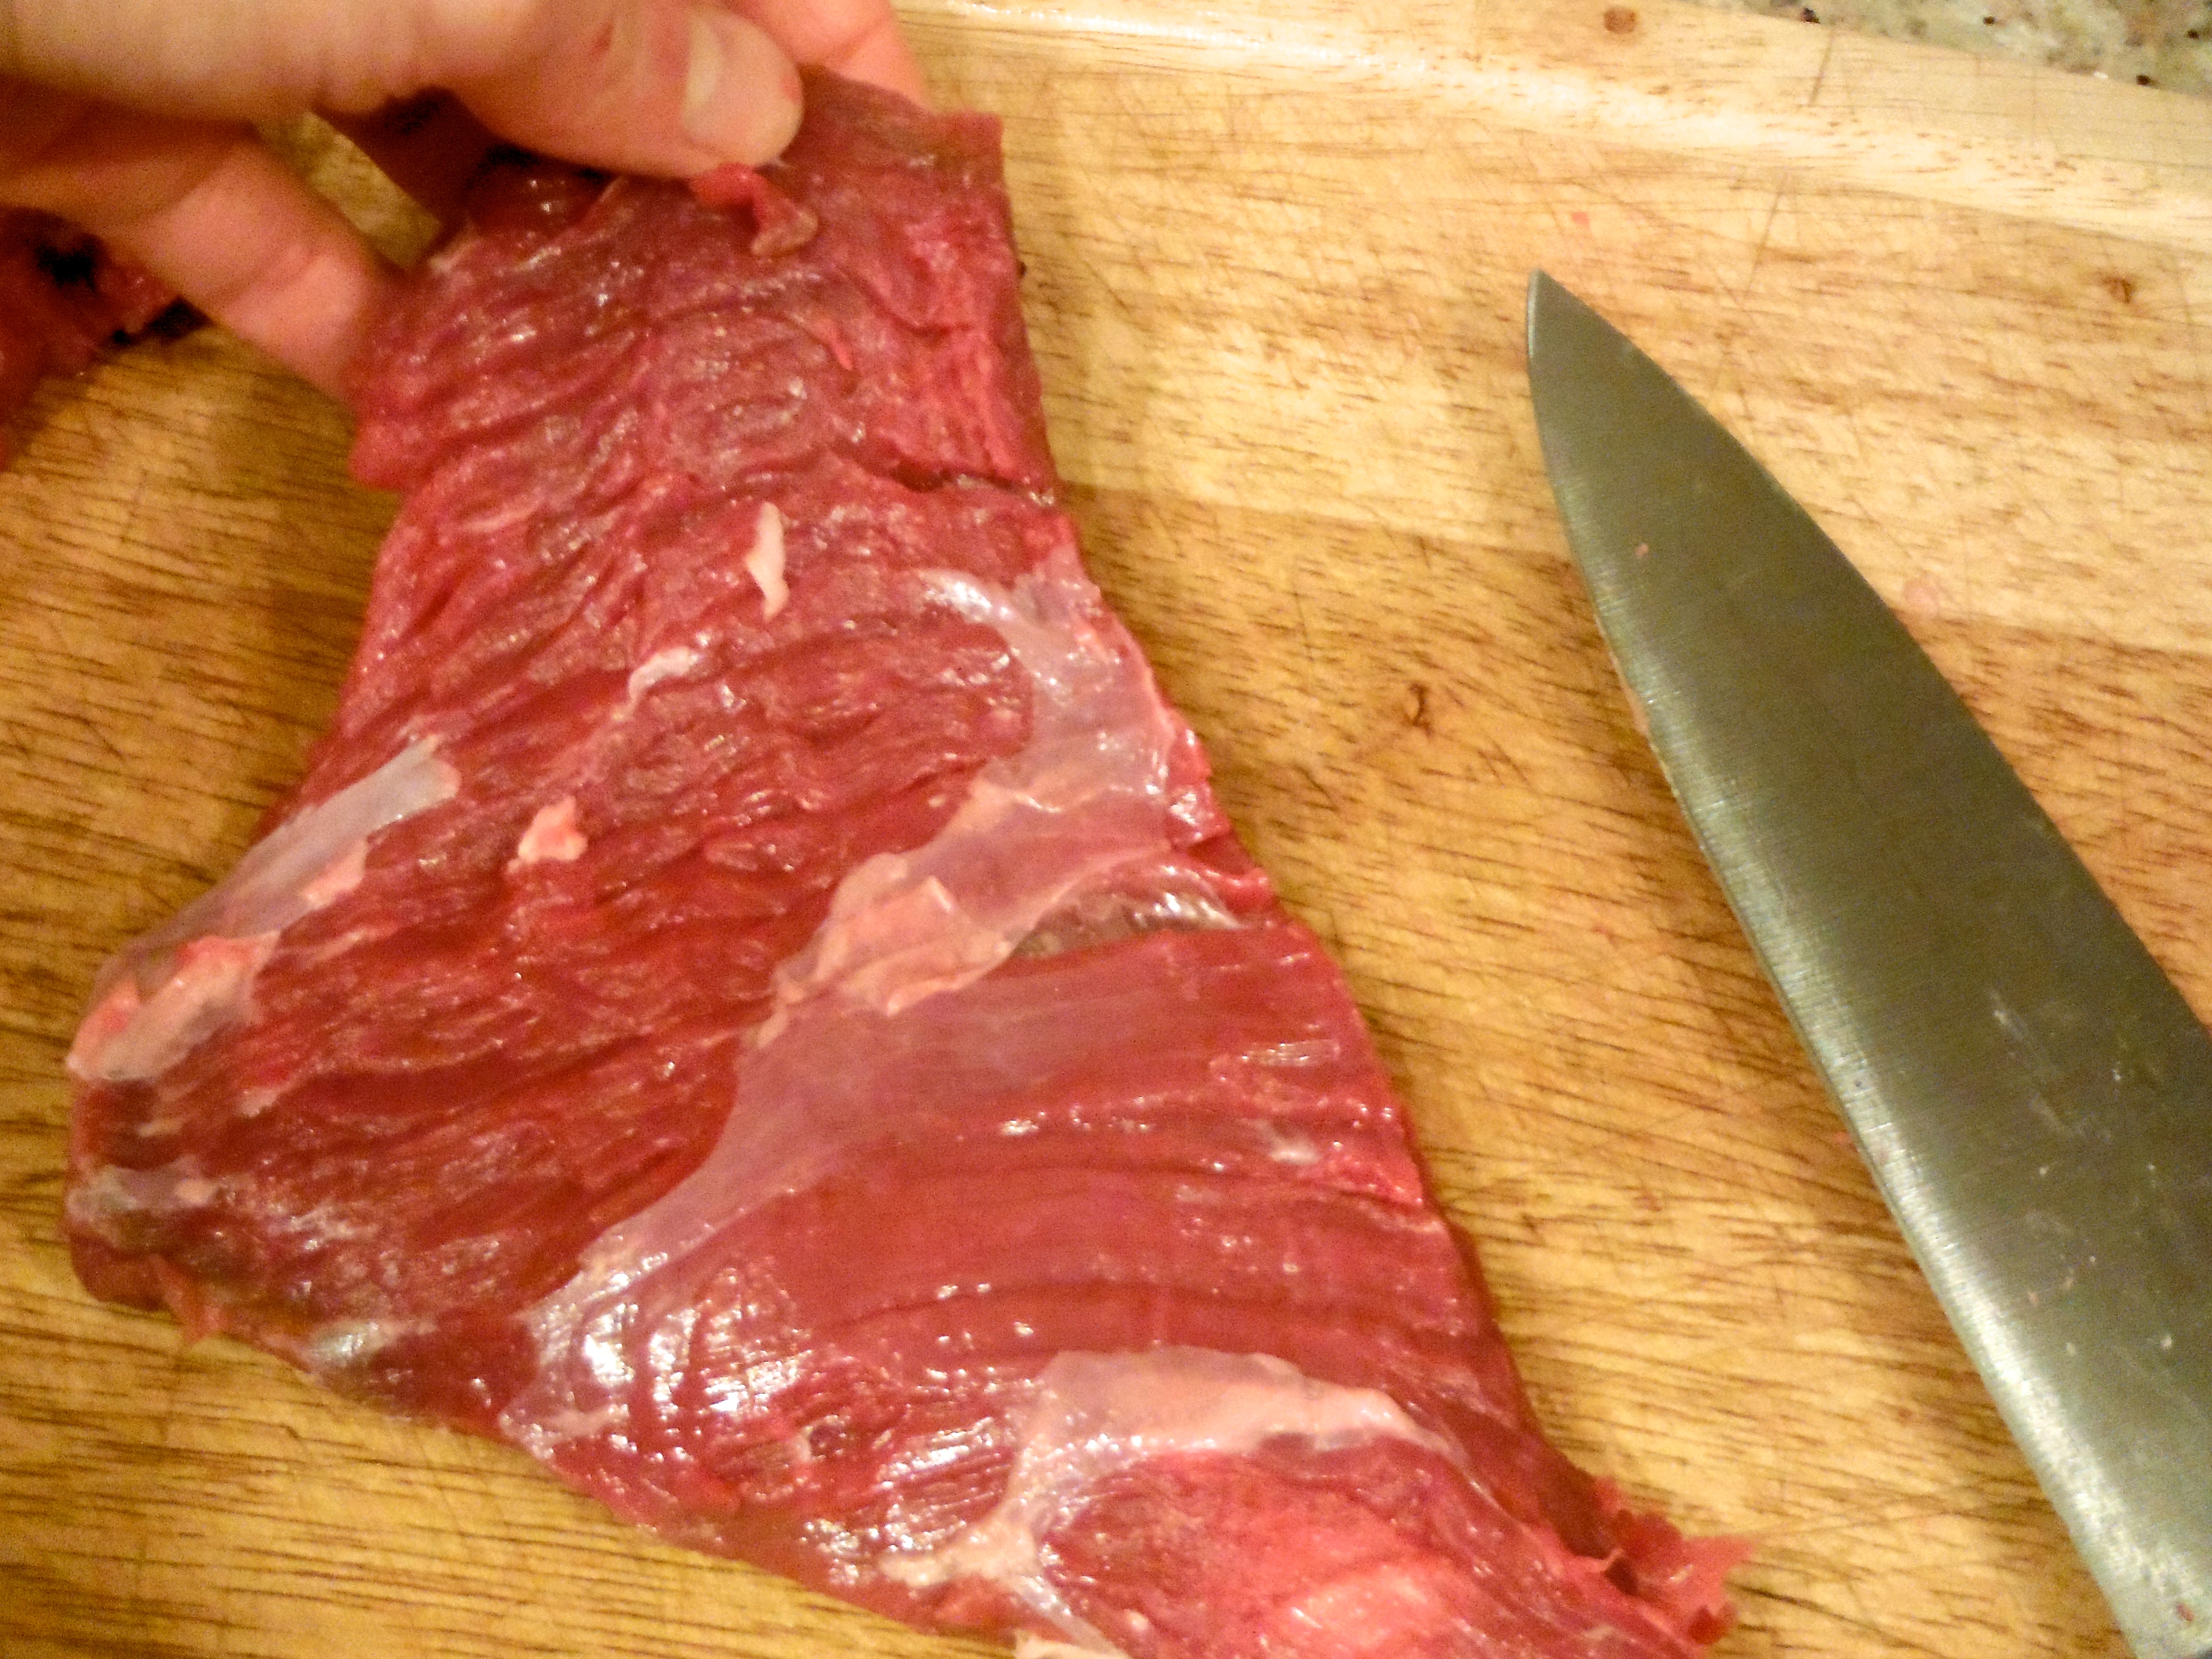
Then, cutting against the grain, slice the piece of meat into jerky sized pieces. Mine are about ¼ inch thick or less.
The grain is running side to side in this photo, so I am cutting “against” it, or perpendicular to it.
Divide the sliced meat into 2 bowls and pour the 2 seasoning mixes over them. Season liberally with sea salt, mix well and let marinate on the counter for 30 minutes.
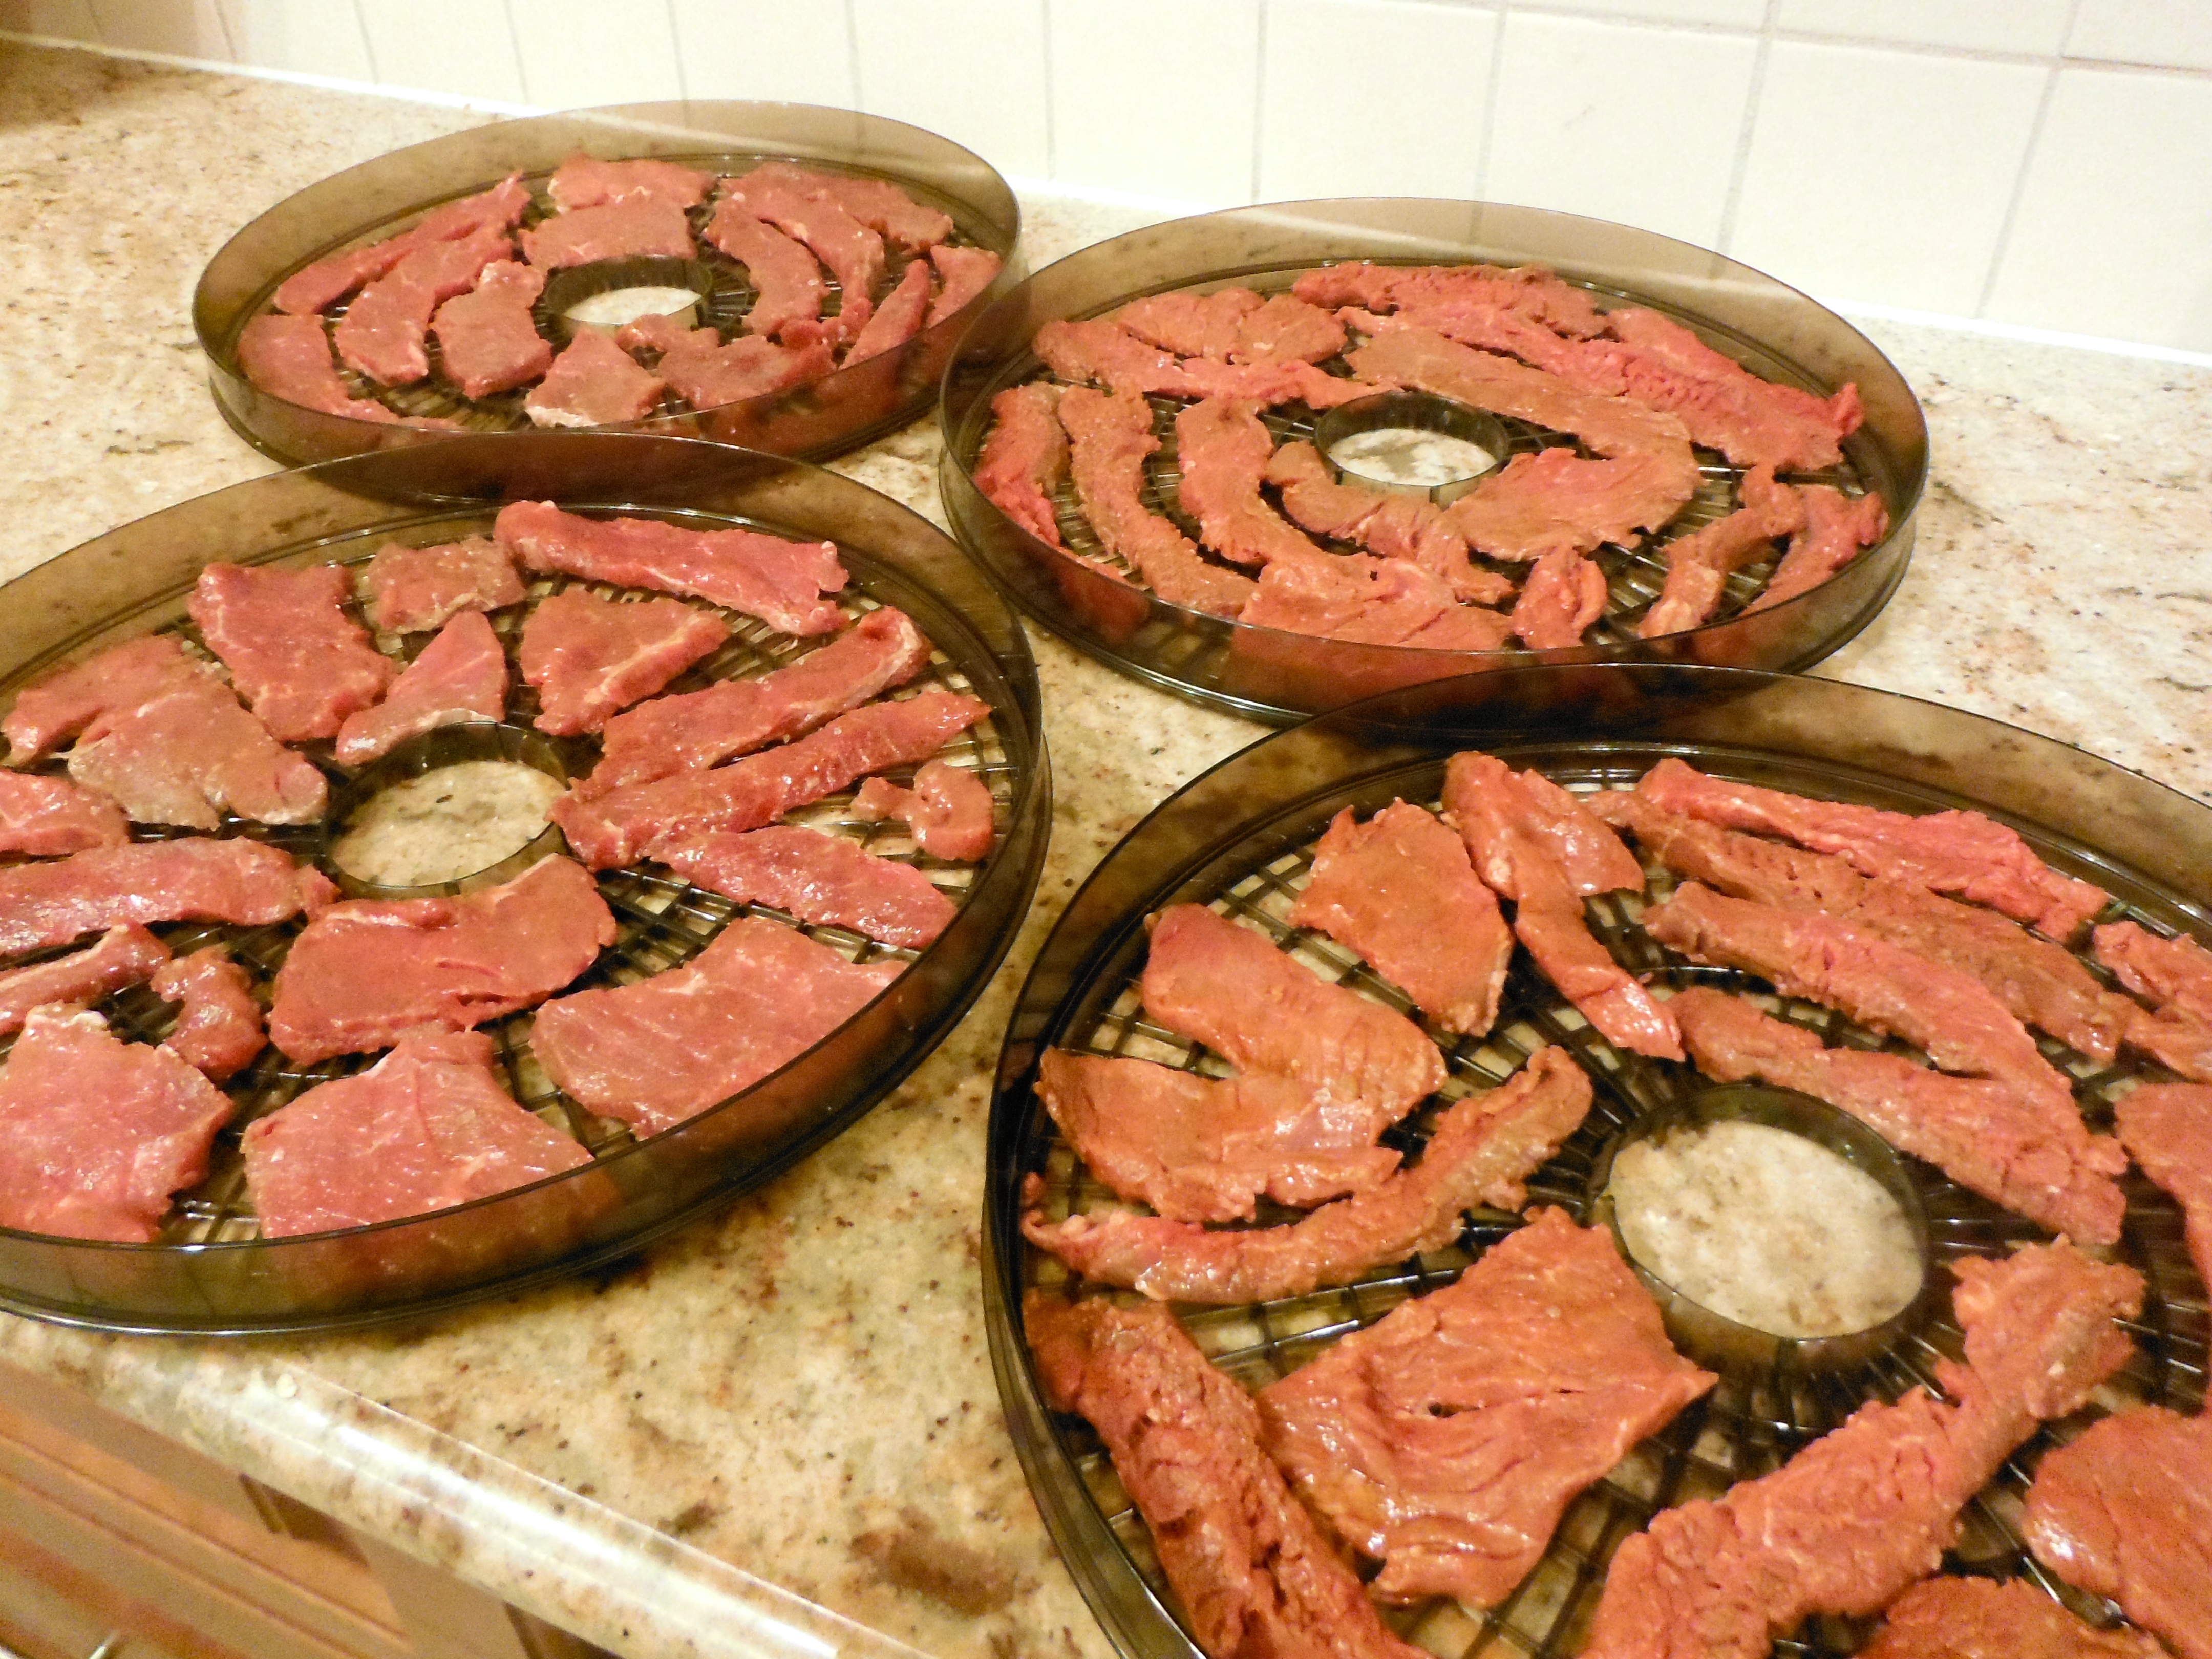
Lay your jerky pieces on to your dehydrator trays making sure they don’t touch. Season again with sea salt.
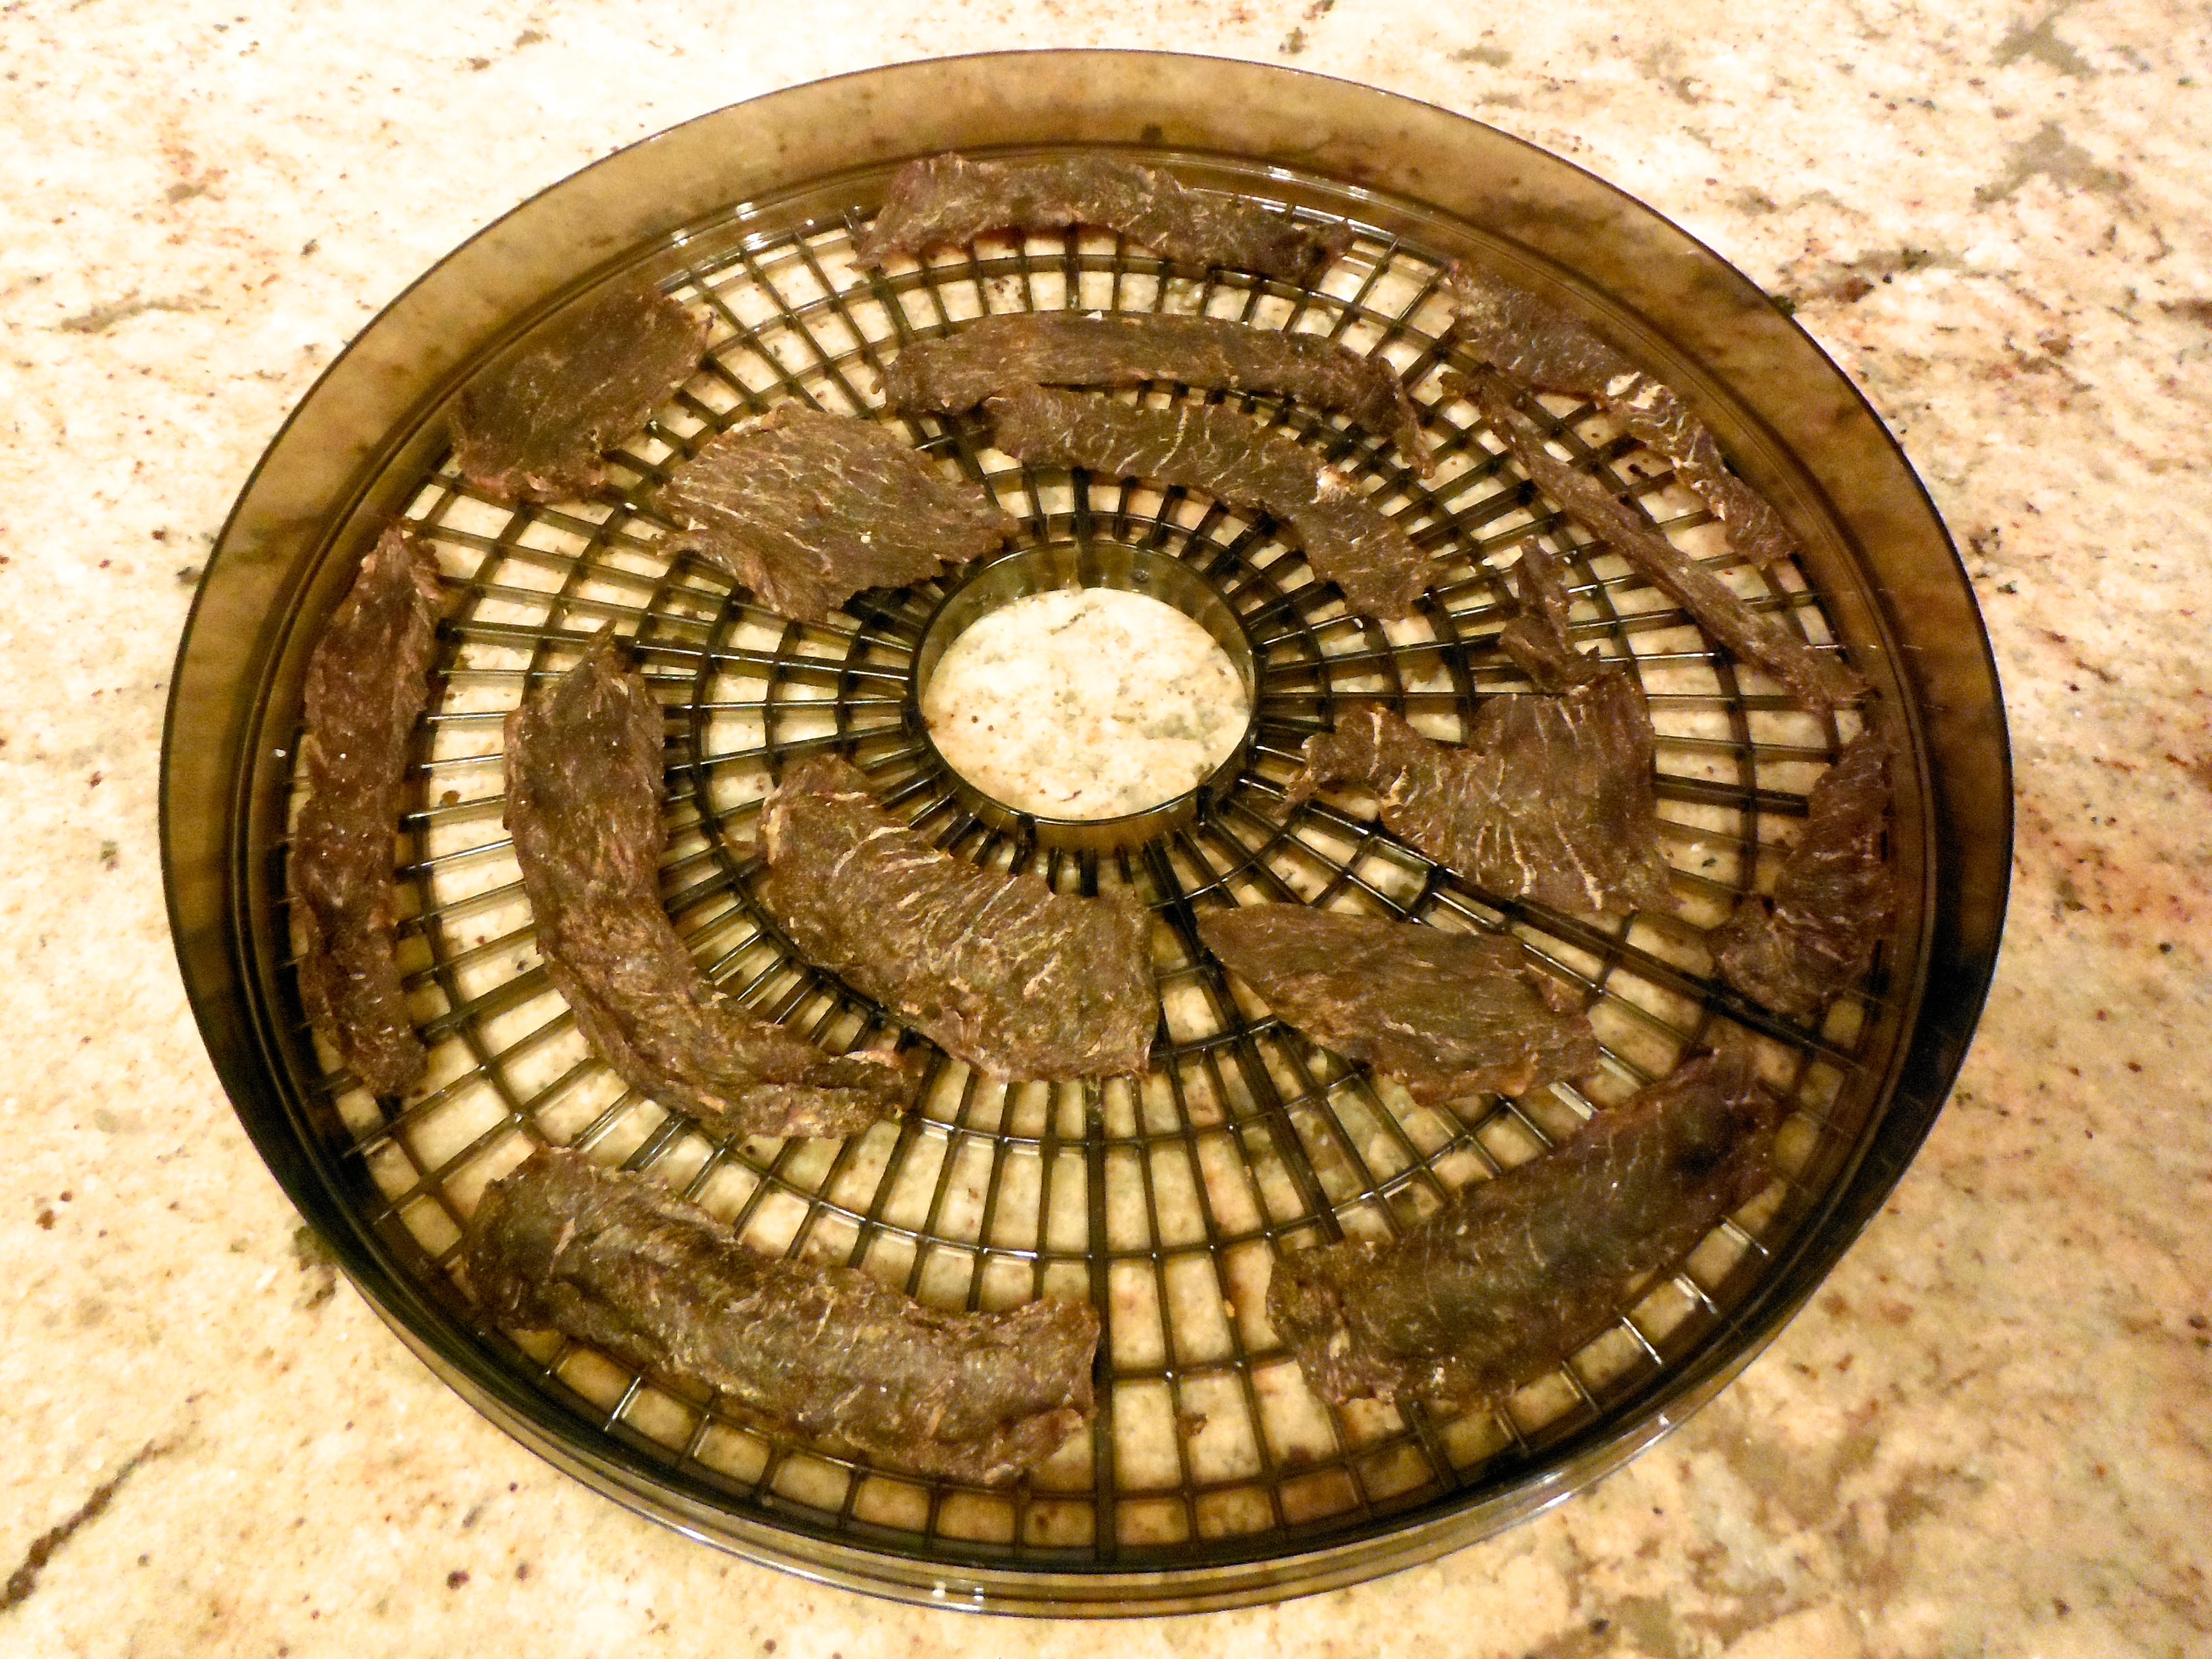
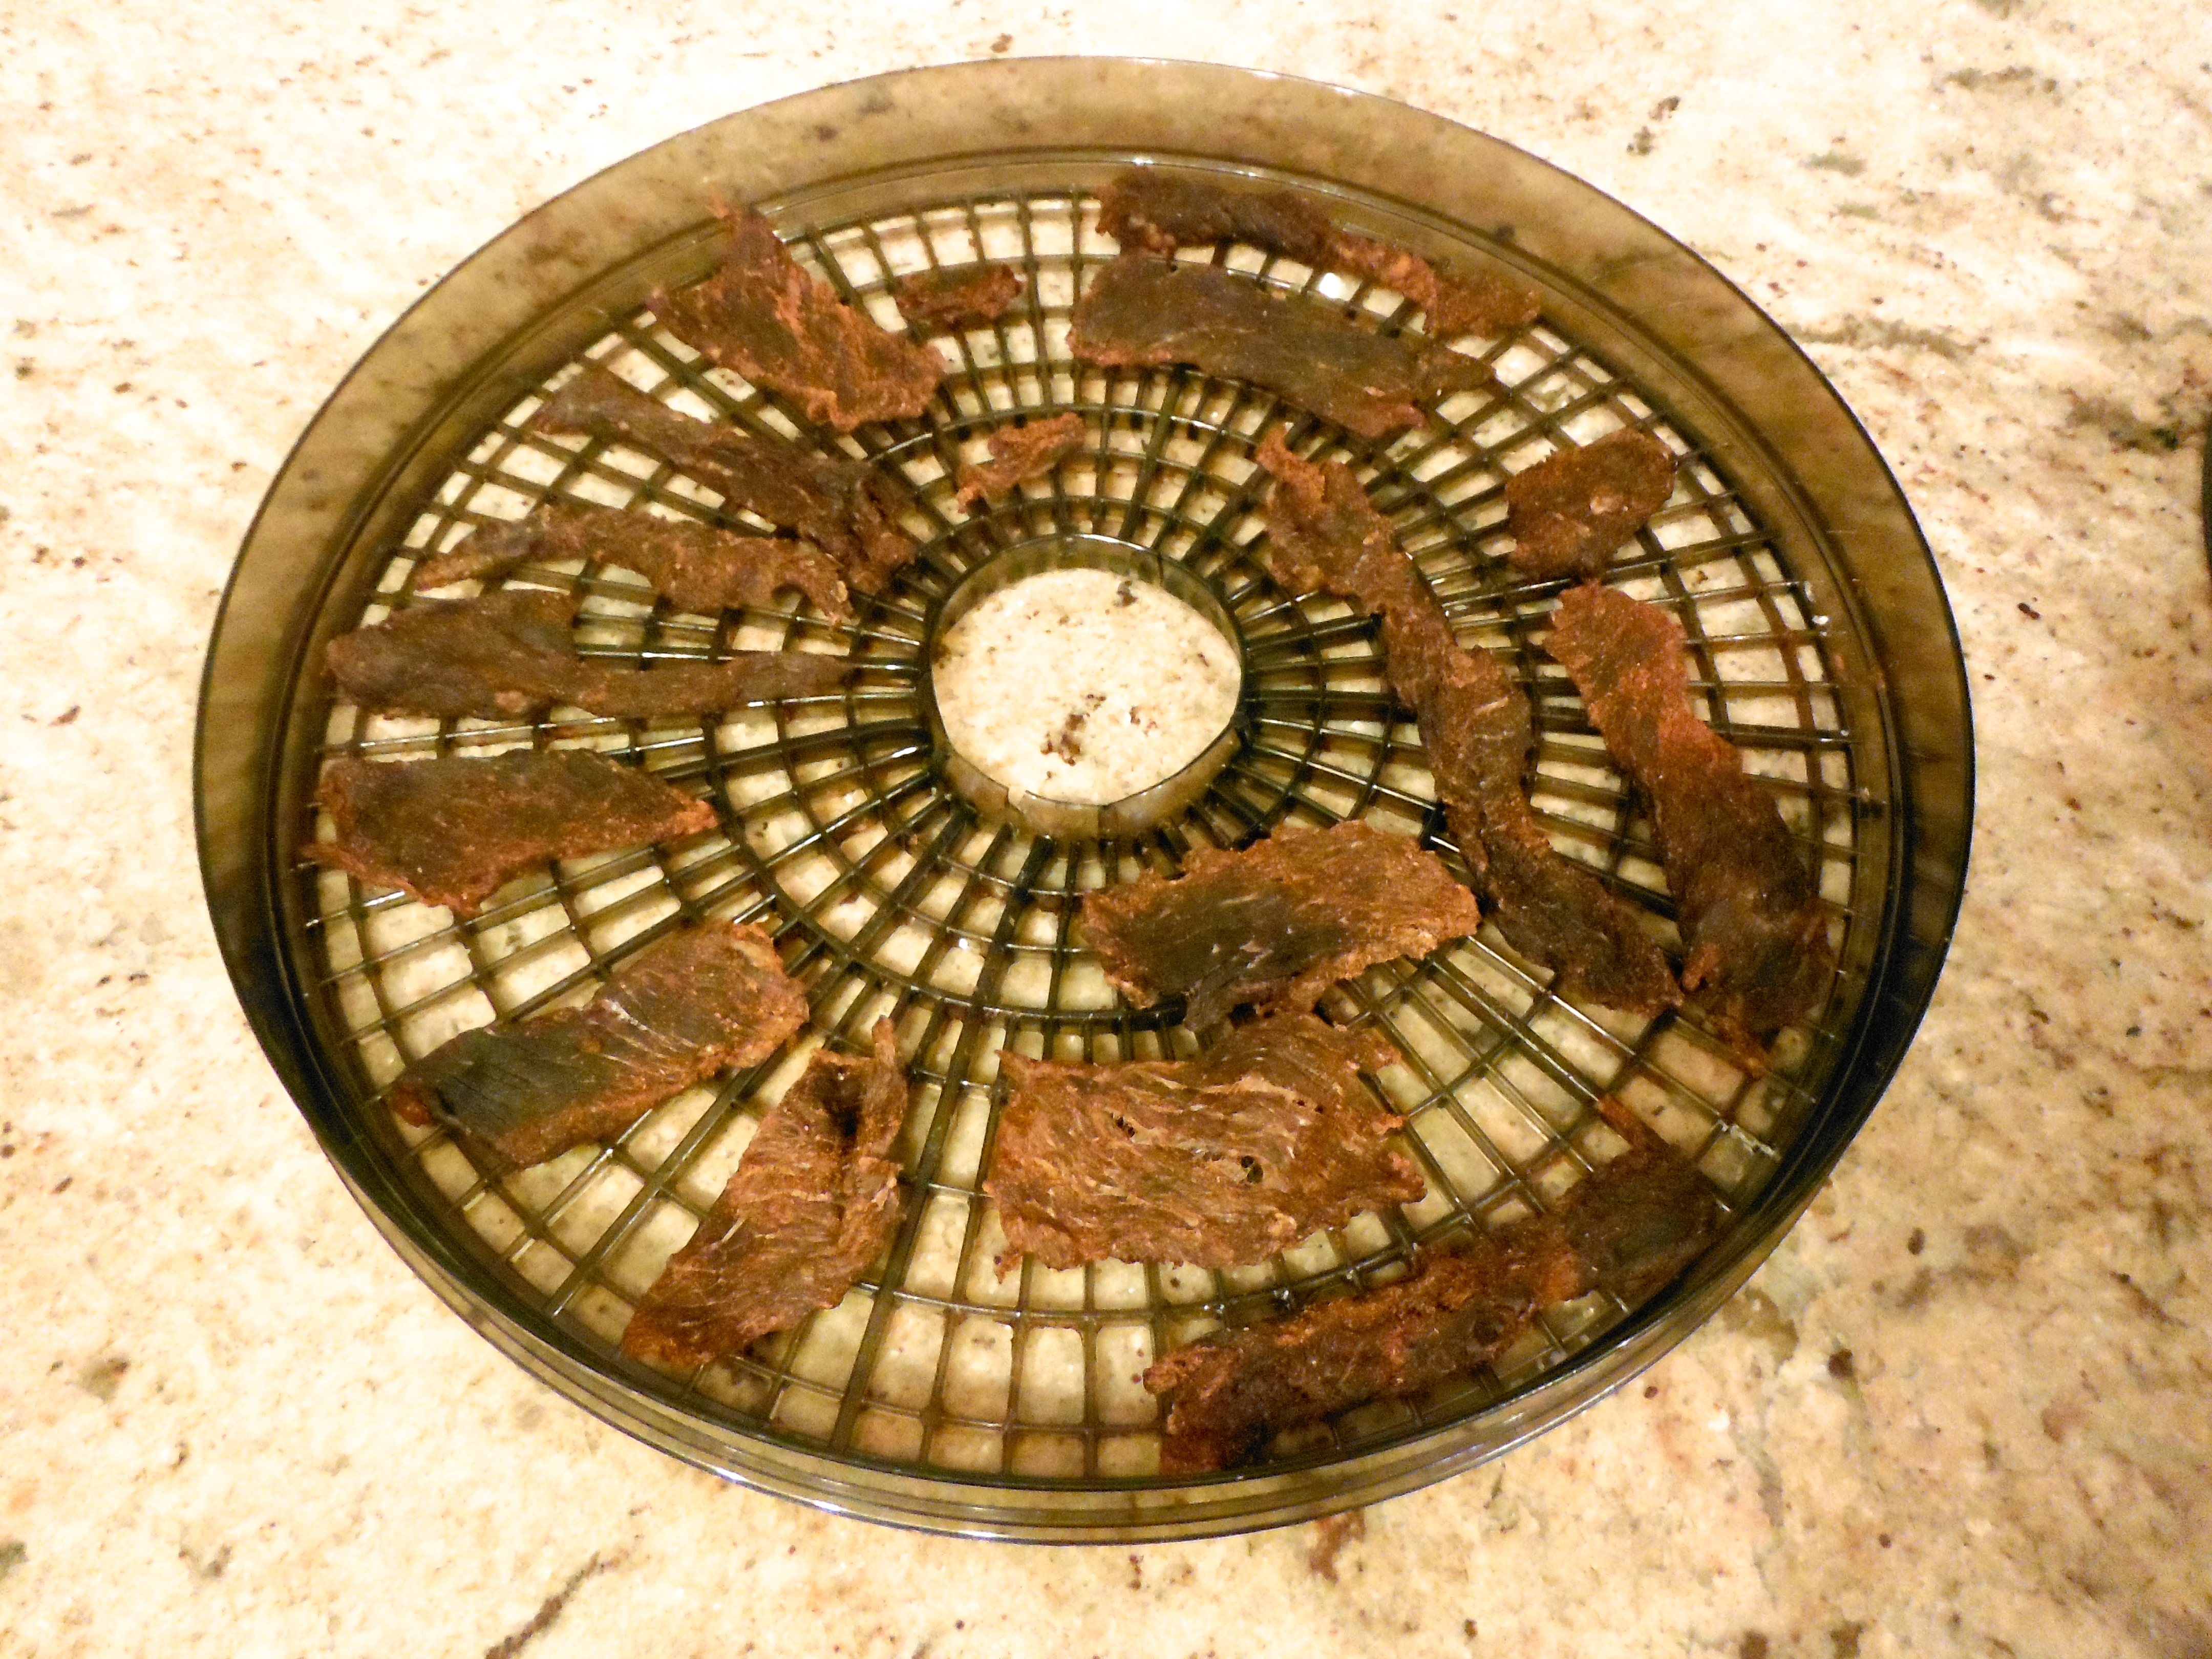
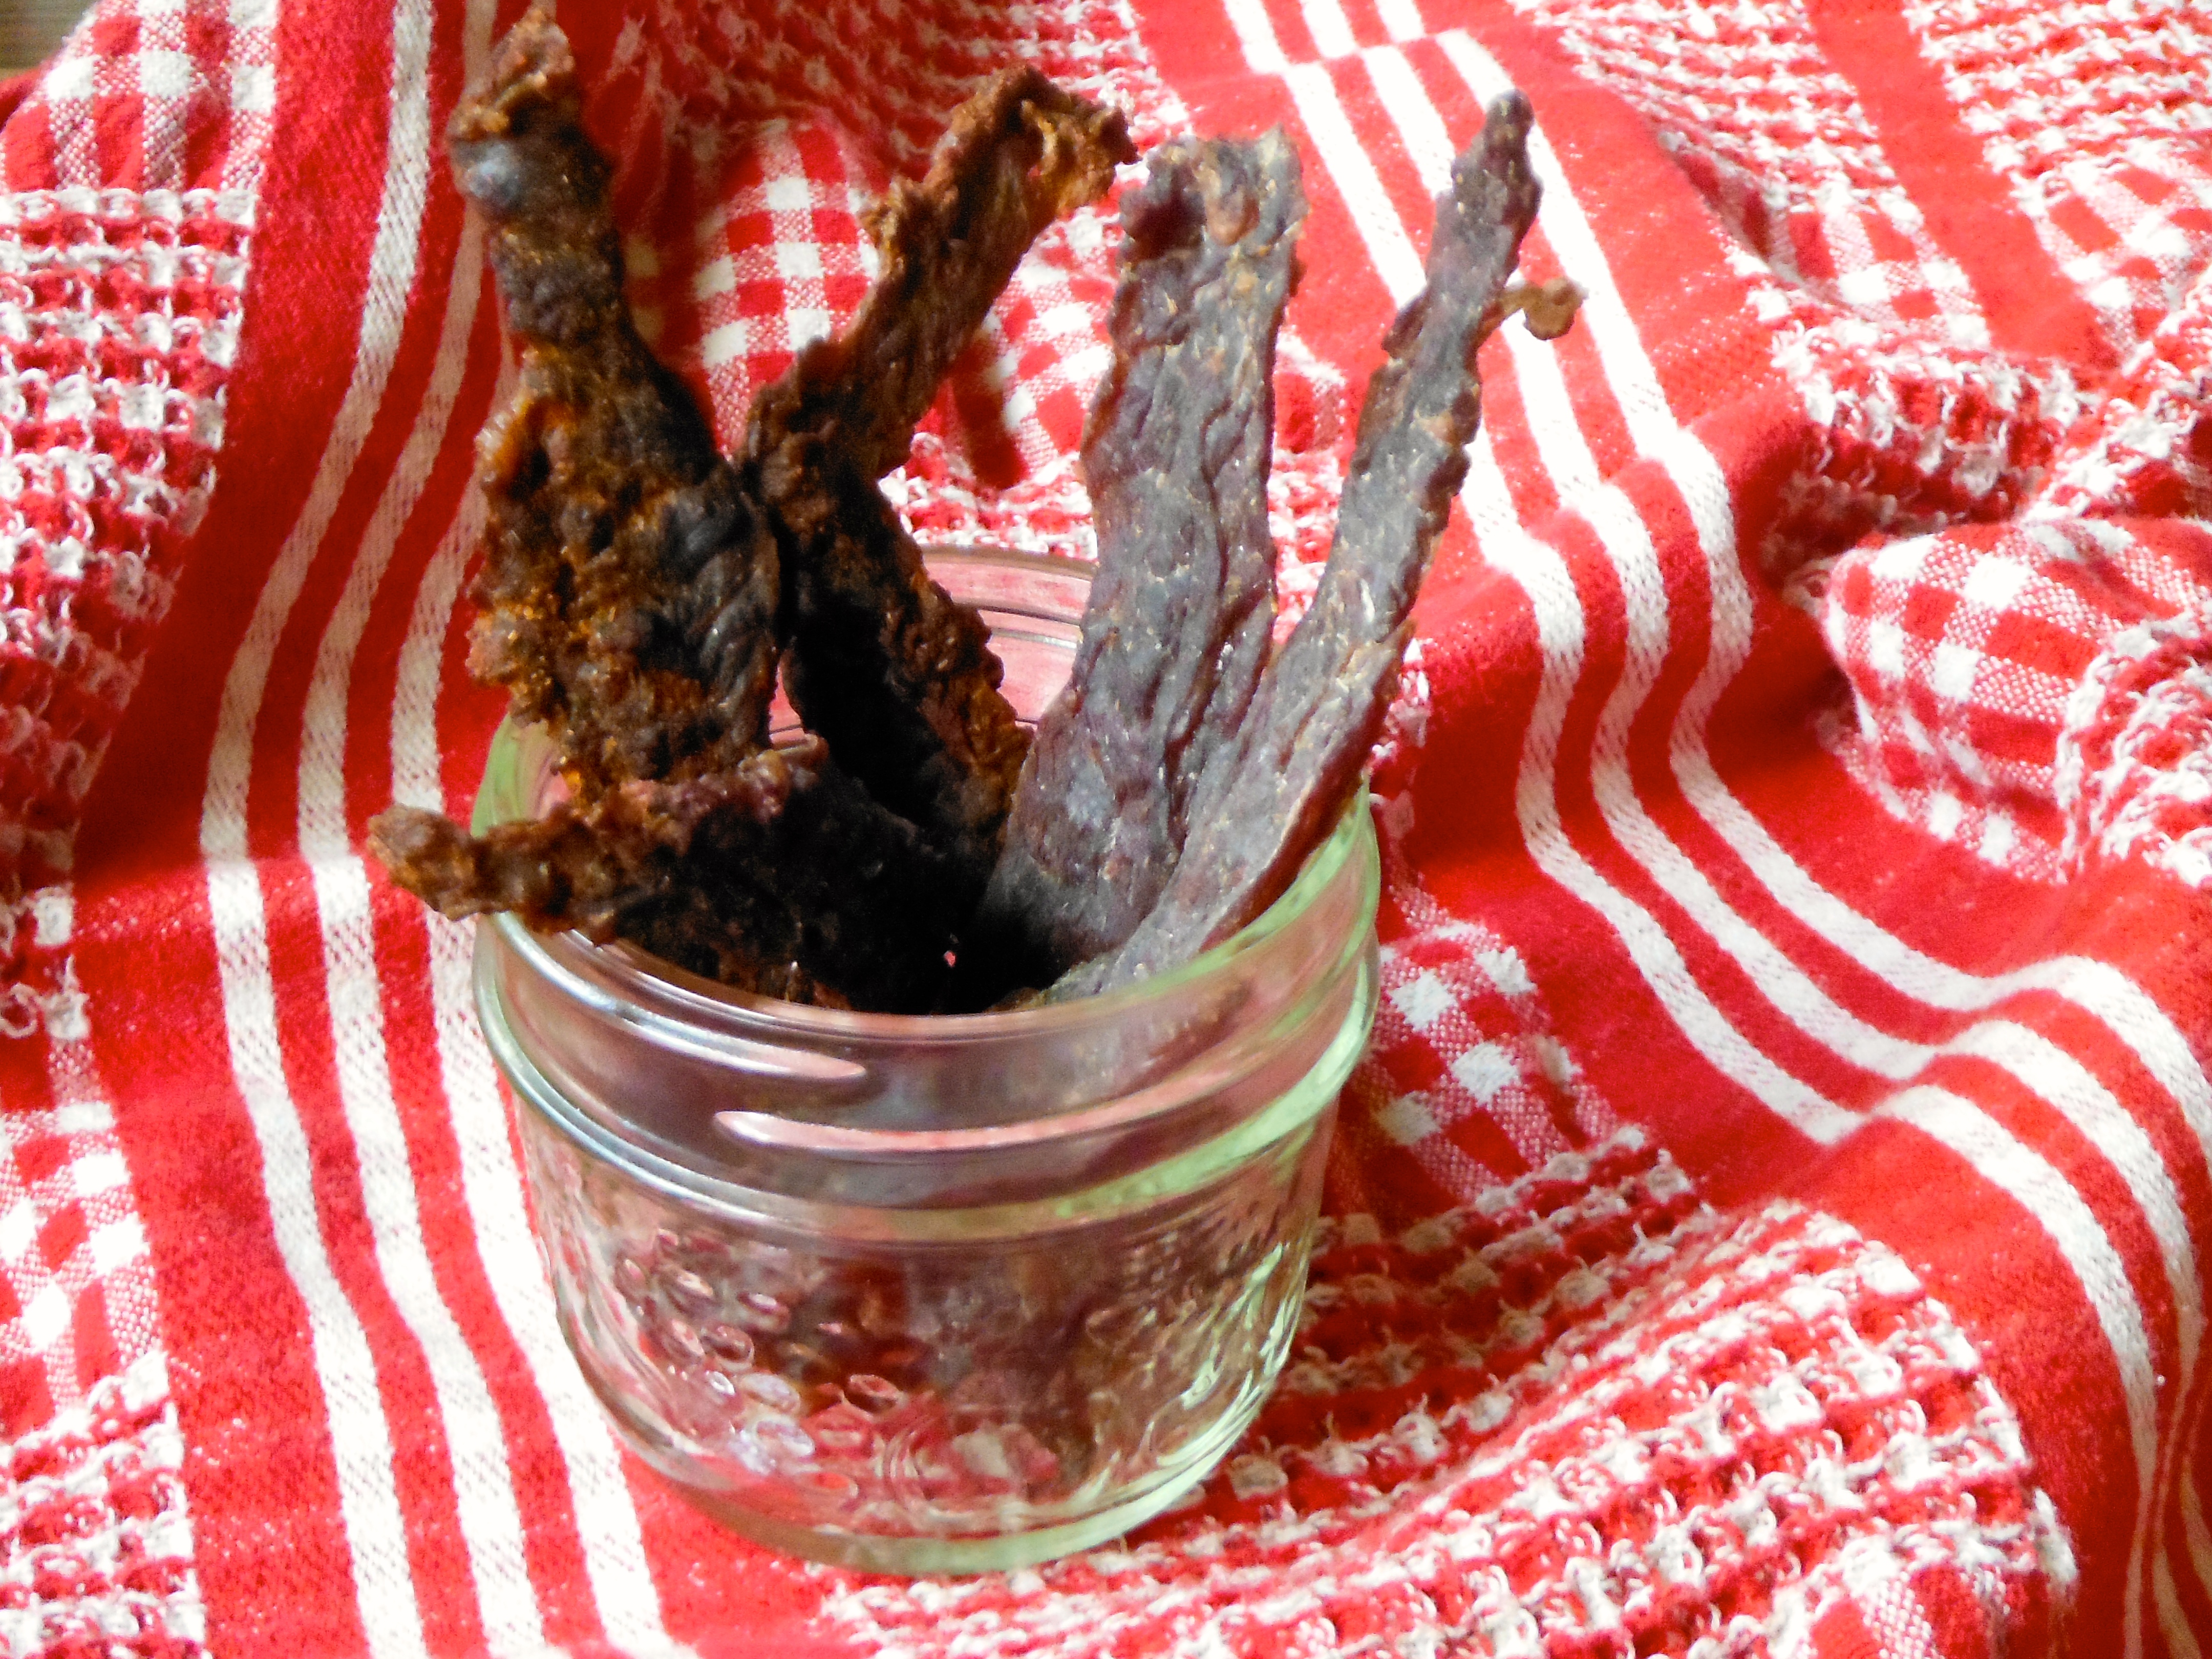
Dehydrate for 24 hours, or until ready. Most of mine were ready in about 24 hours, but I threw a few thick, weirdly shaped pieces back on for another 6 hours. (Note: if you do not have a dehydrator, you can follow the initial directions I followed, or simply bake in the oven at 200F on drying racks/baking sheets for a few hours.) The photos below is what it looks like when it’s done. The ginger mustard batch is on the left, and the spicy batch is on the right.
Store in a sealed container in the cupboard. Word on the street is this stuff lasts a while, like 6+ months. Mine has never lasted more than a few weeks!

 When I first started cooking, I would follow a recipe exactly as it was written. As I got more comfortable in the kitchen, I started loosening up a bit. One tablespoon of oil? Approximately a quick circle around the pan. One tsp of cumin? I’d eyeball it in the palm of my hand. The more I practised, the better I got. I started to inherently know when an additional spice should be added, or what ingredients were okay to omit if I didn’t have them. Before I knew it, I stopped following recipes altogether! I learned some basic flavour combinations such as chill powder, cumin and oregano; lemon, garlic and rosemary; dijon and thyme – and started applying them to various cuts of meat and veggie dishes. Now I rarely follow a recipe, which can actually make it challenging when I’m trying to post my recipes for you guys!