Tag Archives: nutrition

Beef Jerky

Beef Jerky - Amanda NaturallyAnyone who makes an effort to eat whole, real foods most (if not all) of the time, can totally sympathize with me when it comes to finding quick grab-and-go snacks. Sometimes I wish I was still in the dark about nutrition so I could grab a protein bar to throw in my purse for those just-in-case moments. Unfortunately, I still have not found a bar that I consider real food, so homemade snacks are my only option. The one exception are Larabars, which I do enjoy, but I find they’re very sweet and mostly dried fruit. Since they range from 3-5g of protein per bar, I don’t really classify them as high protein snacks. When you start to get into the actual high-protein snacks 3 things happen:

  1. They start using whey (dairy) which I am allergic to.
  2. They start adding all sorts of other garbage to make it taste remotely ok.
  3. If they are striving for a “clean” bar, they use stevia (which messes up my stomach) and all sorts of grains, which can be problematic for some.

Nuts and seeds don’t cut it either. While they have some protein in them, they are mostly fat. Which is a good thing! But can be easily overdone and a lot of people don’t find them that satisfying. I know I don’t. I can bang back handfuls of nuts in a short period of time – which usually makes me feel pretty darn sick. But if I limit myself to a small portion, it really does not seem to do the trick.

So what options are there? I can’t do dairy so yogurt and cottage cheese are out. Beans are a no go for me – but they’re not really a nutrient dense protein source anyway. Protein powders  – well there’s a time and a place for them, they’re heavily processed, very few have clean ingredients and those that are often have stevia (darn stomach). For the longest time, the only protein-dominant snack I could think of was eggs. Hard boiled eggs are still one of my go-to’s for a quick protein source that requires minimal refrigeration. But honestly, how many eggs can a girl eat? Most days I have 2-3 eggs for breakfast, and I don’t know what it is, but that usually seems to be my limit.

When I really started getting into the real, whole foods scene, I began seeing some incredible store-bought snacks that bloggers and instagrammers were raving about. Epic Bars, Exo Bars, Steves Paleo Goods, Sophia’s Survival Food – all of these would actually work within my food options! I was stoked, but soon learned that these products are only available in the US. You can have them shipped to Canada, but for a hefty fee, so I decided to do what I always do…make my own!! 

Homemade beef jerky is actually an incredibly easy process – it just takes a bit of time! My first inspiration was this great tutorial for homemade jerky over on The Paleo Mom. I made my first 2 batches of jerky following this method and was hooked.


http://instagram.com/p/qHdbEWC9gL/?modal=true


I loved having jerky in the cupboard for so many reasons! It was perfect for long days at the office, days where I don’t have any leftovers for lunch, road trips, vacations, on airplanes, days when you are out and about all day long and even times when you might be eating with other people and there are not many options for you due to food sensitivities, or what have you. I could just throw it in my purse and not worry about it!

The only problem was it took so darn long in the oven. There were very few days that I could actually dedicate to the 7+ hours required to be at home. So I made a purchase that I swore I would never need – a dehydrator! I bought it used so it was a reasonable investment that has paid for itself over and over again! Now I make jerky every time I get a meat delivery, and while we try to save it for times of need, it rarely lasts us a week because it’s so freakin delicious! 

Homemade Beef Jerky

The cut of beef is the most important part. You want a large piece of meat that has very little fat on it. Or if there is fat, that it is on the outside and easy to remove. Fat goes rancid pretty easily, so if there is fat on your jerky, it decreases the shelf life. This is the only time I recommend avoiding the marbled meat options! I did lots of research, but really struggled to know what to purchase because the names and cuts of the animal seem to vary dramatically between countries! I started experimenting and have now tried a few different cuts. Flank steak had a bit too much marbling. Brisket was good, but I was pretty devastated getting rid of the huge layer of fat that ran through the middle of the meat. The third time was the charm. I tried a blade roast from our favourite grass-fed meat delivery team – Brooker’s Meat – and it’s now my jerky cut of choice! I usually make 2 different flavours, to keep it interesting.

Ingredients
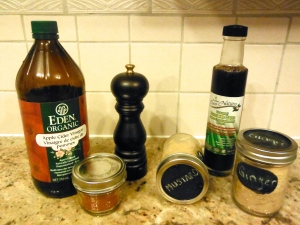
Beef Jerky - Amanda Naturally1 grass-fed Blade Roast (mine was 3.72 lbs and cost $27.86)

¼ cup apple cider vinegar
2 tsp hot paprika

¼ cup coconut seasoning sauce (called coconut aminos in the USA. Alternatively, use gluten-free tamari or soy sauce)
½ tsp mustard powder
1½ tsp ginger powder

Sea salt, liberal amounts.

NOTE: Paprika is a nightshade, so may need to be avoided by some people. The coconut seasoning, mustard and ginger batch is nightshade free. If following the autoiommune protocol strictly, eliminate the mustard powder because it is made from a seed.

Directions

Meat is easier to cut when it’s on it’s way to frozen. So if previously frozen, let thaw in the fridge and slice when it’s still slightly firm. Alternatively, freeze for 30-60 minutes before starting to make cutting easier.

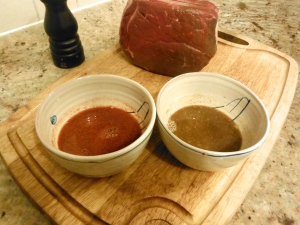
Combine the apple cider vinegar and hot paprika in one small bowl. Mix thoroughly. Combine the coconut seasoning (or tamari), mustard and ginger in another small bowl. Mix throughly.

Beef Jerky - Amanda Naturally

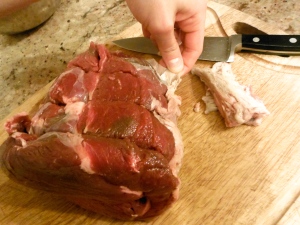
Prepare your cut of beef. Remove as much of the fat as possible. 

Beef Jerky - Amanda Naturally

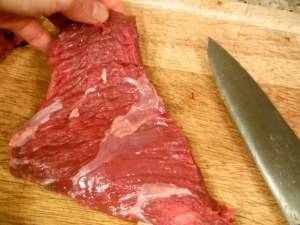
Then, cutting against the grain, slice the piece of meat into jerky sized pieces. Mine are about ¼ inch thick or less.
Beef Jerky - Amanda Naturally
The grain is running side to side in this photo, so I am cutting “against” it, or perpendicular to it.

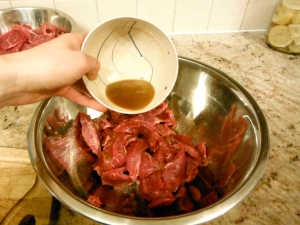
Divide the sliced meat into 2 bowls and pour the 2 seasoning mixes over them. Season liberally with sea salt, mix well and let marinate on the counter for 30 minutes.

Beef Jerky - Amanda Naturally 2014-10-21 14.34.20

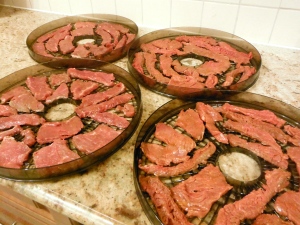
Lay your jerky pieces on to your dehydrator trays making sure they don’t touch. Season again with sea salt.

Beef Jerky - Amanda Naturally

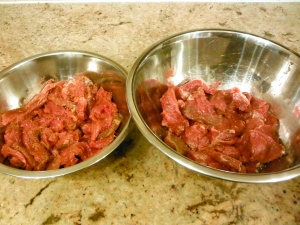
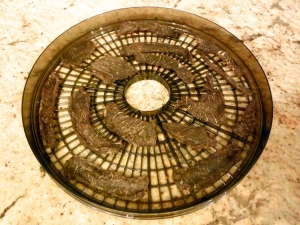
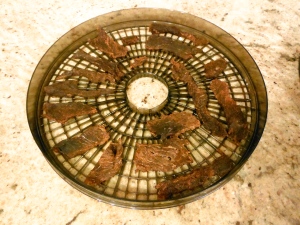
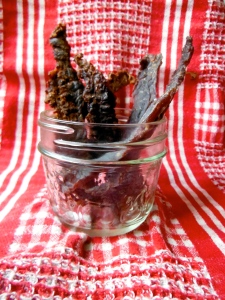
Dehydrate for 24 hours, or until ready. Most of mine were ready in about 24 hours, but I threw a few thick, weirdly shaped pieces back on for another 6 hours. (Note: if you do not have a dehydrator, you can follow the initial directions I followed, or simply bake in the oven at 200F on drying racks/baking sheets for a few hours.) The photos below is what it looks like when it’s done. The ginger mustard batch is on the left, and the spicy batch is on the right.

Beef Jerky - Amanda Naturally Beef Jerky - Amanda Naturally 

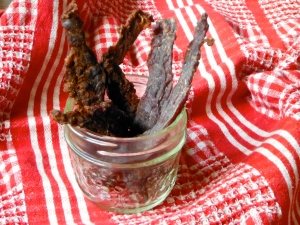
Store in a sealed container in the cupboard. Word on the street is this stuff lasts a while, like 6+ months. Mine has never lasted more than a few weeks!

Beef Jerky - Amanda Naturally

Leaky Gut

Picture a tree – a big, strong, beautiful tree. How did the tree get so magnificent? The most important requirement for it to grow strong and healthy, is the soil it is planted in. Along with the sun, the soil is the source of life for the tree. It is where water and nutrients are absorbed from. It hosts microorganisms which convert decaying matter into life-giving nutrients and pull nitrogen out of the air so the plant can utilize it. It is what provides the foundation for the tree to spread its roots and grow tall and strong. If the soil is sub-optimal, the health of the tree will be as well. If the soil is infected with pathogenic microorganisms, the tree will die. If the roots are damaged, it will not be able to absorb the nutrients from the soil, and the tree will die. 

Leaky Gut 101 - Amanda Naturally
© Cia Pix


The digestive tract is the soil in which the rest of our body is planted.

By healing the digestive tract, you set the stage for healing every other part of the body. The very first thing we do with every client who comes into our office is heal the gut. Without proper absorption and delivery of nutrients, there is simply no way to heal the rest of the body.  Heal the gut and everything else starts to fall into place. Oftentimes individuals see a complete recovery by focusing on gut health, but sometimes more work is required. In those cases, we still focus on the gut first, because regardless of what condition you are suffering from, your body requires nutrients to heal, recover and build new tissue. A damaged digestive lining = poor nutrient absorption = poor or nonexistent recovery.

On top of this basic understanding about the important role of the digestive tract in overall health, there has been a lot of fascinating research coming out lately about the power of healing the digestive tract to heal the body on all sorts of levels – from malnutrition and allergies to autoimmune disease. With the term “leaky gut” becoming increasingly common, I wanted to take the time to explain what exactly it means and why it is so dangerous.

Leaky Gut 101

Our gastrointestinal tract (sometimes referred to as digestive tract, GIT or simply “gut”) is a long tube that runs right through our body. It begins in our mouth, continues down our esophagus, into our stomach, through the small intestine, then large, into the rectum and finally out. While it may seem like it is inside our body, the inside of our GIT is technically still the outside of our body. Think of it like a long straw running through our entire torso. Or for another slightly bizarre analogy, think of the human body like a funny-shaped donut!

When we eat food, a complex chemical process is set in motion. Simply, it starts in our mouth, where we mechanically break down large pieces of food into a paste. Chemical digestion also begins here by the presence of amylase, an enzyme required to break down starch. In our stomach food is further broken down by stomach acid and pepsin, enzyme which breaks down protein. The mass of partially broken down food and stomach acid is called chyme. Once enough stomach acid is present in the stomach, it triggers the pyloric sphincter to open up and allow the chyme to move into the small intestine. The presence of the stomach acid effectively turns on all of the machinery (i.e. activates pancreatic enzymes) our body needs to break down the food into its smallest particles so our body can utilize it. Once broken down into the smallest parts, receptors pull these food particles into the cells in the gut lining, and then transfers them into the bloodstream via capillaries surrounding the intestinal lining. This is the most important part. You know that old adage “you are what you eat”? Well it is only partly true. The lining of our GIT is designed to be very tightly regulated. It only allows the smallest pieces of food to get across and into the body. When it recognizes a fully broken down food particle, it absorbs it directly into the GIT lining, where it then gets transferred into the blood stream and delivered to the rest of the body. If food isn’t broken down into its base components, absorption won’t happen. So what that saying should be is “you are what you absorb”.

This is how it is supposed to work.

As you can see, there are many steps to this process, so there are many places it can go wrong. Here are a few examples of how and where things can go wrong:

Mouth: If food is not chewed properly, there is not enough surface area for the stomach acid to do its job, which in turn will make the digestion and absorption in the small intestine very challenging. Food that should be utilized by the body, goes undigested, moves into the large intestine where it ferments, causing digestive distress (among other more serious concerns) before it is excreted.

Stomach: If insufficient stomach acid is produced by the body, food can’t be broken down entirely. Since stomach acid is needed to transition the chyme into the small intestine, food will stay in the stomach longer than it should, where it ferments. Bubbles are forced out through the mouth, splashing the little stomach acid that there is up the esophagus causing pain and irritation. When it eventually moves into the small intestine, the enzymes are not able to be properly turned on, so incomplete digestion and absorption occurs. Additionally, we rely on stomach acid to protect us from pathogenic microorganisms, most of which cannot survive the acidity of our stomach. If there is insufficient stomach acid, or if we intervene medically and eliminate stomach acid altogether, you significantly increase your risk of getting sick.

Small Intestine: If the body does not have the building blocks it needs to create digestive enzymes (which it obtains through optimal nutrition and digestion), they will not be present in sufficient amounts to break down the food into its smallest parts. As a result, absorption and utilization of nutrients by the body will be sub-par. One of the most dangerous effects of incompletely digested food in the small intestine, aside from malnutrition, is the structural damage that can occur to the gut lining. Undigested food feeds bad bacteria, which in turn overgrow and start releasing nasty toxins. These toxins, as well as certain types of foods and undigested food particles, start to deteriorate the gut lining. The cells in the lining start to separate, allowing direct transit from the inside of the gut to the bloodstream. This is technically called increased intestinal epithelial permeability but is referred to casually as leaky gut. Undigested food particles, pathogenic bacteria and environmental toxins suddenly are able to bypass the strictly regulated absorption process and go directly into the bloodstream, where they do not belong.

Why is leaky gut so dangerous to the rest of the body?

1. Decreased Immune System Function. When foreign particles enter the body, your immune system turns on and sends all of its forces to protect the body from these invaders. The result? A fatigued immune system. If the immune system is always turned on due to leaky gut, what will happen when a virus infects the body? It won’t be able to fight it! What about over a long period of time? Cancer cells are accidentally created in the body on a daily basis, and our immune system diligently destroys them to protect us. If our immune system is too burnt out from fighting foreign invaders, it won’t be able to do this job either. Finally, certain foods have actually been found to trigger an over-active immune system, which can lead to autoimmune conditions.

2. Inflammation. Some of the unfriendly bacteria and environmental toxins that get into the bloodstream will trigger an inflammatory response in the body. While our liver is supposed to take care of these toxins for us, it is often overburdened by chronic exposure to toxins in our food, air, water and cleaning/personal care products, so its function is sub-optimal. What does this mean to the body? Well it depends. Every body is unique, so where chronic, low-grade inflammation attacks varies from person to person. Common areas are:

  •  joints (stiffness, pain, arthritis)
  • muscles (soreness, poor recovery from workouts, cramping)
  • skin (acne, eczema, psoriasis)
  • brain (brain fog, emotional liability, ADHD, depression, anxiety, headaches, migraines)
  • cardiovascular system (elevated cholesterol, plaques, subsequent elevated blood pressure)
  • endocrine system (bad PMS and menopause symptoms; thyroid, adrenal and sex hormone imbalances)
  • inability to lose weight (can be caused primarily by inflammation, or secondary to hormonal imbalances)

As you can see, leaky gut sets the stage for disease, so maintaining proper gut health is crucial for optimizing your body’s function. So, what can you do to take care of your digestive tract? The good news is by making some simple dietary and lifestyle changes, you can begin to heal your leaky gut within days! In part 2 I discuss what specific things (food and otherwise) to avoid to protect your intestinal tract!

Leaky Gut 101 - Amanda Naturally
© Phil Date

Homemade Dusting Spray

Homemade Dusting Spray - Amanda NaturallyOne of the first cleaning tasks I was trusted with as a kid was dusting the dining room. The chairs were a bit of a nuisance with all the spokes I had to get around, but I absolutely loved dusting the piano. I know it sounds crazy, but there I was, rag and Endust in hand, taking care of that beautiful instrument. I think it was probably the immediate gratification of how shiny the wood got as soon as I ran the rag over it…

Annnnywayys, enough reminiscing. After I started getting into nutrition, and really being concerned with the quality of food I was putting in my body, not to mention avoiding putting toxins in my body, it was a natural progression to start critically looking at the products I used to clean my house. One quick search on Google directed me to what is now one of my favourite websites: Environmental Working Group. One of the many things they do is use peer-reviewed, scientific studies to assess products and tell you exactly what they think – and boy are they harsh!

I immediately threw out everything I had. I usually recommend slowly transitioning products over, but when it comes to cleaning products, just get rid of ’em. They’re not that expensive and holy bejeezus they’re full of toxins. I started buying “environmentally-friendly” products – you know, the ones labelled “green”, “natural” or “chemical-free” (none of these labels have any legislated protection by the way). The only problem was they still had a bazillion ingredients (some of which looked a bit sketchy to me) and they were expensive. I started to look for other solutions…little did I know, everything I needed was already in my house!

I began making my own cleaning products to decrease my toxin exposure about 3 years ago, and haven’t looked back. Why? Well not only are they incredibly effective, but they’re so inexpensive!! I try to buy my individual ingredients in bulk, but even in small sizes you absolutely beat the price any commercial product, green-washed or not! My top 2 ingredients for homemade cleaning products are:

1. Vinegar
2. Baking Soda

Followed very closely by:

3. Borax
4. Castille or Glycerin Soap
5. Essential Oils (top 2: Tea Tree and anything Citrus)

You can pretty much clean any room in the house with these ingredients, but it was a replacement for dusting that got me a-googling again. I know I can use a special cloth, but I honestly like to use plain old rags, and my kitchen/bathroom cleaner wasn’t cutting it, so a dusting spray was key. It stumbled across the idea of using olive oil in your dusting spray, over at One Good Thing By Jillee. Well that was just genius! I pretty much added a few tsp of olive oil to my standard cleaner and voila, a perfect dusting spray.

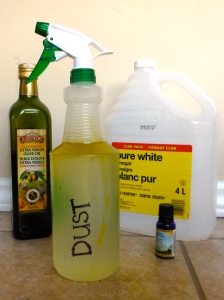
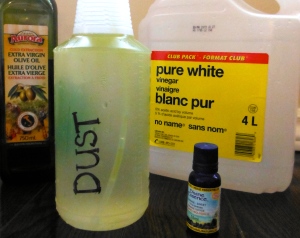
Homemade Dusting Spray (Natural & Toxin-Free)

1 part vinegar
4 parts water (purified or filtered to prevent build up of minerals)
citrus essential oil (optional, but makes everything smell nice. If including, use enough to mostly cover the scent of the vinegar)
a few tsp of of olive oil

Combine all ingredients in a spray bottle, shake well and dust away!

My spray bottle is about 1L in size, and I usually eye-ball the measurements. It typically goes something like this:

1/5 vinegar
30 drops of sweet orange essential oil
2 dollops olive oil (approx. 2 tbsp)
fill the rest with filtered water

Special Considerations:

1. Since no emulsifiers are used, the oil will sit on the top of the water, simply shake it every time you use it.

2. Essential oils are absolutely not necessary, but they are totally worth the investment! A small bottle of Sweet Orange essential oil is less than $10.00 and will last you a long time. 

Homemade Dusting Spray - Amanda Naturally

Have you started to make any of your own cleaning products? If yes, what was your incentive – health, environment or financial?

Copyright 2014 Amanda Naturally | Design by The Nectar Collective